
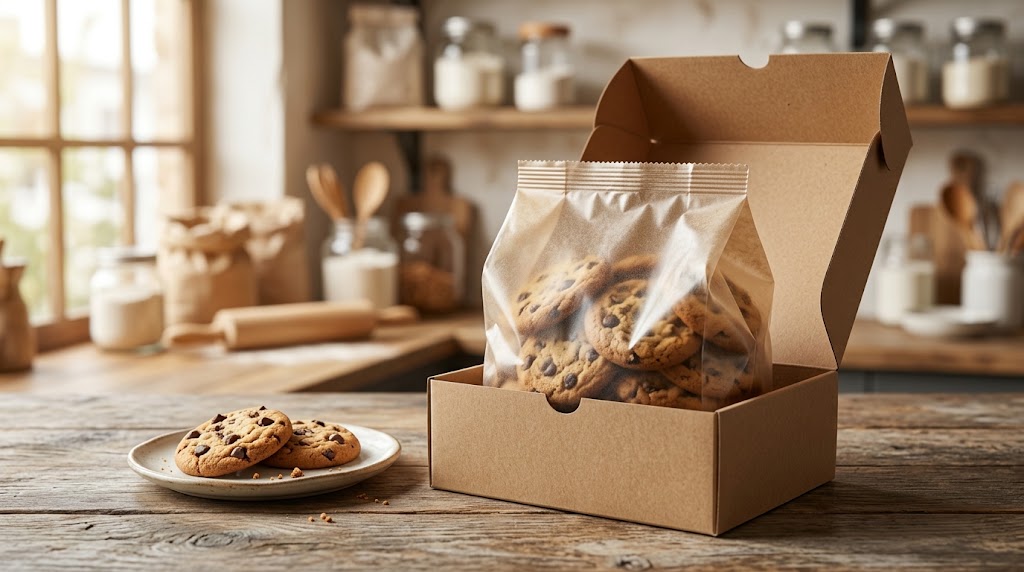
A neat retail box can make a cookie range look finished. But when the cookies sit in a flexible inner bag, the two packages do different jobs. The bag is usually the primary food-contact package and the first place to design for a dependable closure and a suitable barrier. The outer box can organize the product, provide a printable display surface, and add some physical support. Its presence does not prove that the bag is sealed or that the cookies will keep their intended texture.
The short answer: define the cookie and its intended unopened life first. Choose and test a food-contact bag around that product, including its actual top seal. Measure the bag after it is filled and sealed, then test it inside the closed retail box. Validate the combined pack for handling and storage. A beautiful box cannot compensate for a poor seal, while an excellent bag may still fail commercially if it buckles, rubs, or lets fragile cookies move inside the box.
This guide addresses flexible cookie packaging bags for cookies people eat. It explains the box only where it changes the inner bag's design, filling, protection, or trial. It is a method for specifying and checking a package, not a promise of a universal material, dimension, or shelf life.
Start With the Jobs, Not the Appearance
“What kind of packaging for cookies?” is too broad until the cookies and selling route are described. A crisp thin biscuit, a soft filled cookie, and a decorated cookie may all look good in the same box. Their moisture targets, grease behavior, breakage risk, portion size, and opening experience differ. The design brief should say what the customer must receive, not merely what the front panel should resemble.
The table below separates the functions a buyer can assign and verify. An ordinary paperboard retail box may help with presentation and physical handling, but do not credit it with a measured moisture or oxygen barrier unless that specific construction and finished pack have been evaluated for those claims.
| Part of the pack | Primary job in a common bag-in-box design | What to specify or inspect | What it does not establish by itself |
|---|---|---|---|
| Cookie-contact side of the inner bag | Provide a suitable surface for the intended food contact and storage | Exact contact layer, relevant documentation, cookie condition and contact time | A finished-cookie shelf life |
| Flexible film and any barrier layer | Control transfer of moisture, oxygen, aroma and light to the degree the product needs | Full construction, test method and conditions, windows or unprotected areas | A sound first heat seal or freedom from pinholes |
| Converted bag seams and bakery's first top seal | Close the package after filling | Sealant, seam geometry, sealing process, contamination and acceptance criteria | Resistance to crushing in a shipping route |
| Retail box | Display, group and support the bag in its chosen orientation | Closed internal dimensions, folds, edges, closures, openings and handling | Food-contact compliance or a dependable vapor barrier for the inner bag |
| Shipping pack and handling process | Protect the retail unit through distribution | Count, orientation, cushioning if needed, handling trial and arrival inspection | A guarantee that the cookie inside a sound bag remains intact |
These parts interact. A tight box can press a raised cookie against a pouch seam. A loose box can let the filled bag slide, abrade its corners, or concentrate crumbs at one end. A wide, attractive display window may expose the bag to more light and handling. The right question is not “which layer is best?” but “what failure does each layer prevent, and how will we observe that in a finished pack?”
The sequence also matters. Normally the bakery fills the inner bag, clears the planned seal area, makes and checks its first closure, then inserts the finished bag into the box. If the process is different, draw it and test it. A box cannot turn an unsealed inner bag into a sealed food package merely by holding it shut.
Design the Inner Bag Around the Cookie
Food contact is a construction question
Ask which layer actually touches the cookie. A kraft-looking or metallic-looking outer surface says little about the food-contact side. In a laminated pouch, the food-side sealant, adhesives, inks and other components must be considered in the context of the intended construction and use. The FDA's explanation of food-contact components illustrates why component identity and conditions of use matter; the applicable review for a project follows its sales market and actual materials.
A food business should communicate whether cookies have an oily surface, exposed chocolate, filling, dusting, sharp inclusions, or warm product at the proposed packing step. Those details can affect staining, migration questions, seal contamination, abrasion, and the appropriate sample trial. Do not rely on a generic “food grade” phrase divorced from the quoted bag construction. Ask for records tied to the proposed material and intended use, and have the responsible team review them.
The outer box may touch the outside of the bag but normally not the cookies in this design. If cookies can contact the box because the bag is open, torn, or intentionally omitted, that is a different packaging design and its food-contact review must be reconsidered. A decorative tissue sheet is not automatically a substitute for a qualified cookie-contact layer.
Moisture, oxygen and grease need different questions
Crispness often depends strongly on how the finished cookie exchanges moisture with its surroundings. A soft cookie may have a different target texture and may lose moisture. Fat-containing recipes can raise oxidation and grease-appearance questions. The right film is the one that performs with the actual cookie, top seal, window if present, storage conditions, and intended life. There is no single barrier label that decides this for every cookie.
A material supplier may provide water-vapor transmission rate (WVTR) data. ASTM F1249 describes a method for measuring water-vapor transmission through flexible barrier material. Ask for the units, temperature, humidity conditions, sample construction, and method. Oxygen transmission rate (OTR) may also be relevant for an oxidation-sensitive recipe; ASTM D3985 is one film method. A film result is not a measurement of the bakery's filled package with its top seal, folds and any window.
Grease resistance is another issue. An oily cookie can visibly mark a paper-facing material or collect at a heat-seal area even when a film has favorable WVTR data. Test the packed product over the planned conditions. Note whether the stain is merely an outside appearance issue, an actual material incompatibility, or evidence that a closure has failed. The answer changes the corrective action.
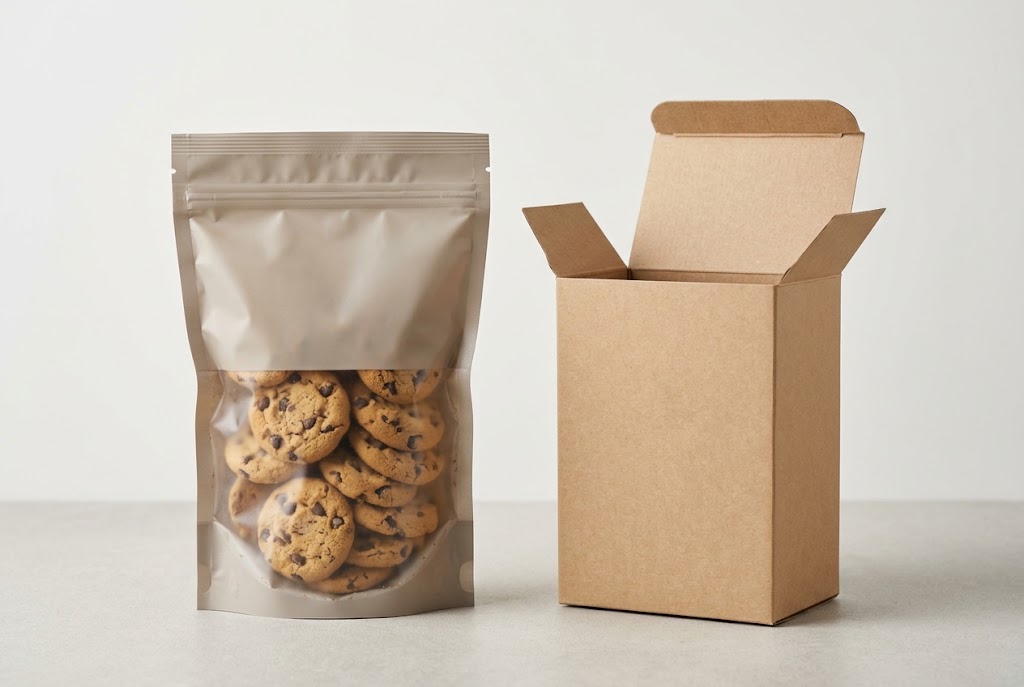
For a printed or laminated cookie bag, ask for the layer sequence rather than a nickname such as “foil bag.” A metallized film is not necessarily a sheet of aluminum foil. A clear window may use a different film path from the opaque panel. A paper-like outside can sit over a polymer contact layer. Each change can affect barrier, fold behavior, print appearance and how the pouch runs through the filling operation. A prospective supplier's custom cookie bag options can start a format discussion, but the signed construction and trial should settle the specification.
Size the Filled Bag Before Finalizing the Box
A flat drawing is only the first dimension record. Once cookies fill a flexible bag, its front and back panels bow, a gusset opens, the top seal forms a stiff strip, and the product can settle differently from pack to pack. The box must accommodate that filled profile, including the highest and widest normal samples, within the closed box's usable space.
Start with production cookies, not a drawing of an ideal piece. Measure count and net weight, maximum diameter or length, thickness, stack or loose-fill arrangement, and batch variation. Identify the edge or decoration most likely to catch at the opening. Trial more than one fill if pieces rotate or if a few large cookies determine the profile. For multi-cookie packs, record crumbs and whether the cookies remain in the intended orientation after ordinary handling.
Then request a bag drawing that makes the following dimensions unambiguous:
- Nominal outside width and height, gusset type and depth if applicable, and manufacturing tolerances.
- Opening width available to the operator or filling line, which can differ from the outside width.
- Position of zipper, tear notch, first top seal and any hang hole; include the strip that will be removed on opening.
- Usable volume and the product's intended fill line, checked with the actual cookies.
- Side and bottom seams, corner shape, and the panel area reserved for printed or coded information.
Do not calculate cookie capacity from a nominal width and height alone. Two cookies with the same total mass can form very different filled profiles. A pouch that lies flat for a catalogue photograph may become too thick for the box once filled. A bag that fits before sealing may become too tall once a sound top seal is added.
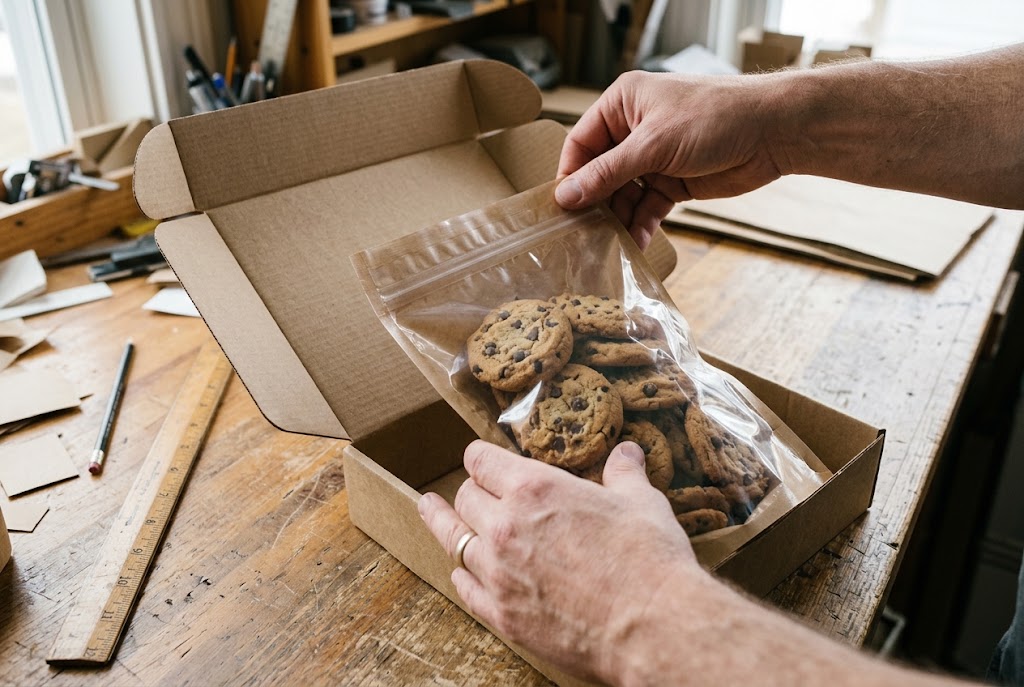
Measure the closed box's usable interior, not only its printed dieline or exterior size. Folded flaps, glue tabs, a viewing-window edge, a shelf insert, and the pressure of closing the lid can reduce the space available to the bag. Place a filled, sealed pouch inside a production-like box. Close it normally and reopen it. Look for whitening, wrinkles, stressed corners, crushed cookies, scuffed printing, and any bag seam caught under a flap. Repeat with products at the large and small ends of normal variation.
A useful fit record separates three quantities for each direction: the box's usable internal space, the maximum measured filled-pack envelope, and the remaining clearance. The difference is a screening calculation, not an automatic pass. Clearance that disappears at a fold or after shipment is not usable clearance. Too much space may also matter if the bag moves enough to abrade or break cookies. Set the acceptable range from observed samples and handling trials rather than quoting a universal number.
Choose the Bag Arrangement for the Portion
The outer box does not dictate whether every cookie needs an individual bag. Choose the primary pack from the customer's use pattern and the cookie's fragility, then test the arrangement within the box. A flat bag can be efficient for a single portion. A shared inner pouch can simplify filling for several cookies. A stand-up pouch may also serve as the retail-facing package outside a box; if it is placed inside one, the gusset and filled depth must be measured in that configuration.
| Arrangement inside a retail box | Potential benefit | Bag-specific trial |
|---|---|---|
| Individually sealed flexible bags | Each cookie has its own first closure and can be handled separately | Check cookie edge clearance, sealing around crumbs, rubbing between individual bags and added pack count |
| One shared multi-cookie inner bag | One primary closure and fewer separate bags | Check stacking, settling, breakage, opening experience, and whether reclosure is actually needed |
| Several portion bags grouped in one box | Portion control and separated flavors or pieces | Check how many filled packs fit without pressure on their seams or print |
| One shaped or gusseted pouch in a display box | A larger product portion with a defined front panel | Check opening width, filled depth, gusset deployment and contact with the box's folds |
A single cookie in a bag is not automatically more protected from bending. A thin bag can follow the cookie's movement inside an oversized box. Conversely, forcing several bags tightly into a box can transmit closing pressure through the cookie edges. Treat stiffness and cushioning as system questions. If the product needs extra support, trial a suitable support arrangement and check that it does not interfere with the food-contact or sealing plan.
For a flat pouch, ask which sides arrive sealed and which edge the bakery will close. For a stand-up pouch, ask how the gusset opens under the intended fill and whether that depth is compatible with the box. These are format starting points, not fixed cookie capacities. The choice should be made from a filled sample, line compatibility, retail opening behavior and the space inside the actual box.

Protect the First Seal From the Cookie and the Box
The first closure made after filling deserves its own approval. A zipper is useful for opening and reclosing some multi-cookie packs, but an unopened retail pack still needs the specified initial seal. An outer box tab is not that seal. Decide where the consumer tears the bag open and how much material remains above the zipper or opening feature.
Crumbs, oil and product in the planned seal area can create weak spots or channels. Establish a fill height that leaves enough clean space to make the intended top seal on the actual equipment. Check both normal and worst practical batches. Record settings, sealing surface condition, dwell time, pressure and temperature where relevant; do not copy settings from a different film. Seal and inspect bags before boxing so defects are visible.
ASTM F88/F88M measures seal strength on flexible barrier materials. It can support process validation and consistency checks when sampling and acceptance rules are set. It does not, by itself, tell you that every point on every finished cookie bag is leak-free. Visual inspection, appropriate integrity checks, finished-pack observation and the product's storage trial answer additional questions. Agree on those checks before production.
Box insertion creates another opportunity to damage an otherwise sound pouch. Watch for a top seal folded sharply to fit, a zipper caught under a carton flap, a seam scraped by a die-cut window, and a bag corner pinched when the box closes. Reopen test units after insertion and handling. If a seal looks distorted, determine whether the bag was overfilled, the box clearance was inadequate, or the insertion motion needs to change. Moving the defect out of sight inside the box is not a corrective action.
Test the Combined Pack Through Handling and Storage
Bag testing and box testing should meet at the finished retail unit. A barrier film may be suitable in a laboratory sample but a sharp folded corner can damage the converted pouch. A box may remain presentable while the cookies inside crumble. Define separate observations for the bag, product and outer display unit.
Begin with a small trial across the relevant product variation. Fill and seal the proposed bags under production-like conditions, insert them into boxes, then observe them immediately and after handling. Compare orientation and pack count. Check whether a loose bag slides, whether one cookie bears on a side seam, whether powder collects near the zipper, and whether the box leaves visible rub marks. Record the number and nature of failures rather than a vague “looks fine.”
For distribution, choose a trial that resembles the actual handling route. The ISTA Procedure 3A listing describes a procedure for packaged products in a parcel delivery system; it is an example to consider when that route is relevant, not a mandatory test for every retail unit. The food business should define which retail unit, case pack and shipping configuration it will evaluate. Inspect the cookies, bag, seal and box afterward, since a pass on one visible part can hide a problem in another.
Storage validation is different again. Keep finished production-like packs under the planned conditions and assess the actual cookie's sensory and physical acceptance over time. For a crisp product, record loss of crunch; for a soft product, record its intended texture and any undesired change. Include visible grease, aroma, breakage and seal condition where relevant. If the box has a window or openings, compare the actual light and handling exposure. A quoted WVTR or an attractive carton does not supply a universal best-before date.
Use a failure map to guide redesign:
| Observation after the trial | Likely places to investigate | Next comparison |
|---|---|---|
| Cookie loses intended texture while bag appears intact | Material transfer, initial product condition, top seal, window, storage humidity | Compare constructions and seals using finished-pack storage trials |
| Broken cookies but sound seals | Cookie orientation, bag movement, box fit, external handling | Compare filled arrangements and controlled handling trials |
| Scuffed or pinched pouch corners | Carton folds, insertion motion, filled depth, seam location | Recheck maximum filled profile in the closed box |
| Grease stain on pack exterior | Cookie contact, material structure, seal contamination, product temperature | Examine where the stain starts and trial the proposed material |
| Weak or variable top seal | Sealant and settings, dirty seal zone, equipment, bag height | Validate a clean sealing process and agreed acceptance checks |
| Box closes poorly around a good bag | Box internal tolerances, bag shape, gusset, fill height | Re-measure finished packs and usable interior space |
Do not change the box alone when the evidence points to the bag. Do not change to a thicker bag merely because cookies break inside a loose retail unit. The trial should isolate the cause before a new construction, orientation or dimension is approved.
What a Real Cookie-Pouch Case Can and Cannot Tell Us
Mylarbag's published 3.5 oz organic mini-cookie pouch case records a digitally printed stand-up pouch with a zipper, PET/VMPET/PE construction and a listed 12 × 18.5 + 3 cm size. The case description calls the inner PE anti-static. The gallery photograph shows the front and back of a real printed mini-cookie bag. Those are specific, useful facts for a bag discussion.
The case does not document an outer retail box for that project. It therefore cannot prove that this pouch fits a particular box, that a flap never touches the zipper, or that the finished bag-in-box pack passes a transport trial. It also does not publish a measured WVTR or OTR for the final filled pack, a production top-seal acceptance result, or a validated shelf-life period. The general marketing claims on a case page are not a substitute for those project measurements.
Here is how to use the case responsibly. Start with its known bag format as a reference, then send the converter a different bakery's actual cookie dimensions, count, target condition and filling method. Ask whether a similar stand-up bag is appropriate, what the quoted construction and tolerance would be, and what usable interior and first-seal area the proposed size provides. Request an empty sample and a drawing. Fill and seal it with that bakery's cookies. Only then select or adjust a box around the measured finished pack.
The 3 cm notation in the public case is a nominal product listing, not a measurement of the maximum filled depth in your box. A fold, gusset and soft cookies can produce a different profile from a rigid sample. The listed PET/VMPET/PE stack tells you which material family to investigate, not whether a new recipe needs the same barrier. The zipper raises an opening question, but a different brand may have a single-use portion that does not need it. A real case provides a concrete starting point, while the trial remains product-specific.

A Practical Approval Record for the Inner Bag
A packaging team can keep the bag-in-box project on one controlled record. That record should distinguish supplier material evidence, the bakery's filling and top-seal evidence, and the complete unit's handling and storage evidence. It prevents a visually approved mockup from becoming an unexamined production specification.
Before the printed order, agree on:
- Cookie definition: recipe family, count and weight, size range, texture target, oil or coating concerns, and condition at filling.
- Bag drawing: layer sequence, food-contact side, external and usable dimensions, tolerances, gusset, seams, opening, first top seal, zipper or tear feature, and print version.
- Box interface: closed usable interior, folds, window edges, insertion orientation, number of filled bags, and maximum measured filled profile.
- Evidence: applicable food-contact documents, method and conditions for relevant film data, seam and top-seal plan, filled-pack observations, and shelf-life protocol.
- Acceptance: who approves the sample, which failures cause a hold, what is recorded by lot, and which material or dimension changes require another trial.
A controlled sample should include the highest filled profile and the most difficult normal production cookie, not merely the neatest hand-packed unit. Keep the approved bag, box and filled-pack photographs together with the dated drawing and test notes. On a repeat order, inspect the delivered bag against the approved record before putting a full run into boxes.
If the material supplier proposes a new contact layer, thinner film, different zipper, changed gusset or revised seam geometry, ask what changes in the risk assessment and which trials must be repeated. If the box supplier changes a flap or internal depth, repeat the fit and handling check even though the bag specification has not changed. The package is a system; the approval record should show which component has changed.
FAQ: Cookie Bags Inside Boxes
Does a retail box keep cookies fresh without an inner bag?
A box can organize and shield cookies from some handling, but its appearance alone does not establish a moisture or oxygen barrier or a dependable food closure. If the design relies on the box itself as the primary package, specify and validate that construction and its food-contact surfaces. For the bag-in-box design discussed here, freshness depends on the actual cookie, qualified inner bag, sound seal and storage trial.
Should every cookie inside a box have an individual bag?
Not necessarily. Individual bags can separate portions and handling, while one shared inner bag can serve a group of cookies. The choice depends on portioning, opening use, food-contact and barrier needs, line capability, material use, breakage and the filled arrangement. Test both when the trade-off is unclear.
Can the outer box make a low-barrier bag suitable?
Do not assume so. A particular outer construction may contribute protection, but an ordinary display carton should not be assigned a quantified vapor or oxygen barrier without evidence for the complete design. Ask what the cookies need and test the finished pack over its intended storage conditions.
What size cookie bag fits a retail box?
There is no universal size. Measure the largest normal cookie arrangement and the filled, sealed bag profile, including gusset and top seal. Compare it with the usable interior of the closed box and its fold or flap intrusions. Confirm fit on physical samples after normal closing and handling.
How much space should remain between the bag and box?
Enough to insert and close the pack without stressing seams or crushing cookies, but not so much that the bag moves and abrades excessively. There is no reliable single clearance for all cookies and bag formats. Set a project-specific tolerance from maximum and minimum filled packs and handling trials.
Does the zipper replace a heat seal when the bag is boxed?
A reclosure is generally intended for use after the pack has been opened. The unopened retail pack needs its specified initial closure. Verify the seal position, tear route and zipper operation with the actual pouch and filling process. The carton tab does not seal the food bag.
Should a flat pouch or stand-up pouch go inside a box?
Either may work. A flat bag may suit a thin single portion or a close-fitting group. A stand-up pouch's gusset and front panel may be useful for a larger pack or for later use outside a box, but they add a filled depth to check. Choose from actual filling, sealing, box-fit and consumer-use trials rather than the format name.
Will thicker film stop cookies breaking in transit?
Not by itself. Breakage can come from a fragile recipe, cookie-to-cookie impact, too much movement, poor orientation, compression or handling outside the retail unit. Diagnose the observed failure. A different arrangement or external support may help more than a thicker film, while the bag still needs its own food-contact and seal checks.
Can I use the 3.5 oz cookie-case bag in my box?
You can ask for a similar sample. The published case describes one printed stand-up bag and its listed nominal size, but no outer box or transferable fit result. Supply your cookies and the box's usable interior, then test a filled and sealed sample. Do not copy its size as a guarantee of capacity or shelf life for another cookie.
What should be checked before a bag-in-box order is approved?
Approve the exact contact construction, drawing, artwork, opening and first-seal details. Run a production-like fill and top-seal trial with representative cookies. Close the filled pack in the intended box, inspect it after handling, and validate storage against the cookie's acceptance criteria. Keep the records and signed sample for incoming and repeat-order checks.
Let the Bag and Box Prove Their Own Work
A retail cookie box can be a good display and handling layer. The flexible bag inside it is still a distinct product with a contact surface, material structure, dimensions, seams and a first closure. Specify the bag around the cookie, measure it after filling and sealing, and then test the combined unit. Keep the case example and film test data in their proper roles: evidence to guide a trial, not proof of a different cookie's shelf life or box fit.
For a project ready to sample, send the cookie count and dimensions, intended texture, filling method and the closed box's usable space with a request for two testable inner-bag options. The custom cookie bag formats page can start that specific bag conversation; the finished-pack evidence should decide which option is approved.