

To package cake slices in bags, first decide whether the slice can tolerate contact with flexible film. Measure the finished portion, choose a food-contact bag with room to load it without scraping the top, and keep crumbs or frosting away from the sealing area. Close the bag using a method validated for its material and your packing process. Test the filled pack in its real display and handling conditions before ordering a production run.
A bag works well as an individual retail pack for some firm cake slices, loaf portions, and cake pieces. It is a poor substitute for rigid support around a tall, heavily frosted layer-cake wedge. The difference is visible during filling: if the baker has to squeeze the slice through the mouth or pull the film across the decoration, a prettier printed pouch will not fix the underlying fit.
This guide is for bakeries and food brands planning individual or small-group flexible packs, primarily for the US market. It covers the cut piece, the bag, the closure, and a practical sample trial. It does not set a universal shelf life or storage temperature. Those depend on the recipe, handling process, intended sale channel, and the food business's own safety assessment. If the intended product cannot be packed without damage, choose a more supportive format for that product rather than forcing it into a pouch.
Start with the slice, not a stock bag size
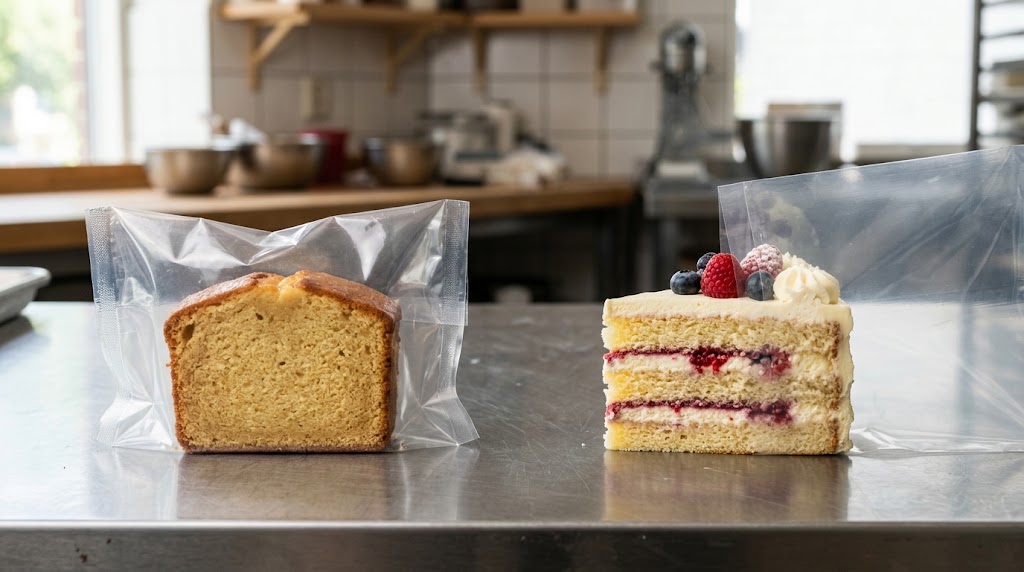
“Cake slice” can describe very different products. A compact slice of pound cake has a flat base and a surface that usually tolerates some gentle film contact. A tall wedge with whipped cream, fruit, and a piped top may lose its appearance as soon as the bag touches it. A brownie-like cake piece may shed crumbs but keep its shape. A half cake has a larger exposed face and an awkward outline. They should not share one bag specification merely because their net weights are similar.
Take one finished portion from each real product variant, at the temperature at which it will be packed. Include the decoration and any protective support that is actually part of the proposed pack. Ask four questions before choosing a bag:
- Does the portion hold its shape when lifted? If it bends or sheds a layer, the bag may be suitable only around a separate support, or not at all.
- What can touch the film? The base may tolerate contact while glaze, whipped topping, fruit, or a delicate crumb face may not.
- Will the product need refrigeration or another controlled condition? A barrier film does not make a perishable filling safe at ambient temperature.
- How will the customer handle it? A slice meant to stand on a shelf, lie flat in a chilled case, or ride in a takeaway bag faces a different movement pattern.
| Finished portion | Bag-first trial worth considering? | Main fit question | Stop or change format when… |
|---|---|---|---|
| Firm, undecorated loaf or pound-cake slice | Yes, with a physical sample | Can it enter without crushed corners or excessive headspace? | The cut face rubs or the portion slides and breaks. |
| Short cake bar or sturdy square piece | Often worth testing | Does the closure stay clear of crumbs and glaze? | Oil, filling, or crumbs repeatedly enter the seal land. |
| Light sponge slice with soft filling | Only with a more careful trial | Can the portion stay upright and retain its layers? | The film presses on the filling or the slice tilts. |
| Tall wedge with piped or whipped topping | Usually needs structural separation from the film | Is there reliable clearance around the top and sides? | Decoration contacts the bag during loading or handling. |
| Half cake | Case by case | Does its broad cut face need a separate support or surface protection? | Its weight distorts the bag or the exposed face smears. |
These are trial priorities, not claims that any named recipe is automatically safe or suitable. A dense slice can still have a perishable filling; a relatively plain piece may still be too crumbly for the planned line. Record what the actual sample does.
A useful “no” saves time
The most valuable sample result may be a decision not to use a bag for a particular slice. If a decorated wedge needs a tall cavity, a bag with larger dimensions can still collapse around it when lifted. If a delicate cut face must remain untouched, a clear window does not solve contact with the rest of the film. Document the failure in ordinary language: “top smears at the mouth,” “slice leans after standing,” or “crumbs enter the seal area.” That makes the next choice more precise than “try a thicker bag.”
A food-safe insert or base can sometimes give a slice a surface to rest on inside the flexible pack. It must be evaluated as part of the complete pack, including food contact, fit, and how the customer removes the slice. It does not turn the flexible bag into a crush-resistant container. This article remains about the bag and its filling process; it does not recommend a source for cake boxes or boards.
Measure the finished portion and the usable bag space
Do not select a pouch from cake weight alone. Two 100 g portions can have entirely different shapes because of layering, frosting, air content, and cutting style. Measure the longest span, widest span, and tallest point of the finished slice. For a wedge, include the wide outside edge and the pointed tip in the orientation you plan to load. For a half cake, measure the broad cut face and the footprint of any support as well as the cake itself.
Then check the bag as a usable three-dimensional space. The flat width printed on a supplier's specification is not necessarily the internal clearance available after side seals, folds, a gusset, or a zipper are accounted for. The bag mouth may be narrower to load than the body appears in a flat photograph. A window may be placed where the bakery wants to show the cake, but the closure and top seal still need space above the highest point of the product.
Use a simple sample worksheet instead of a generic “slice-to-bag” conversion:
| Record during the fit trial | What to measure or observe | Why it matters |
|---|---|---|
| Finished slice envelope | Maximum length, width, height, including topping | Determines loading orientation and film clearance. |
| Contact-sensitive surfaces | Frosting, glaze, cut face, garnish, exposed filling | Determines where the bag may safely touch. |
| Bag opening | Actual open mouth and loading angle | A slice that fits inside may still scrape during insertion. |
| Usable body | Interior width, depth or gusset behavior when filled | A flat bag dimension does not describe filled shape. |
| Closure zone | Distance above the product needed for clean handling and sealing | Prevents the cake from reaching the seal or zipper. |
| Removal | How the customer opens the pack and lifts the slice | A good fill can still become a poor eating experience. |
Make a paper or blank-film mock-up only to screen obviously wrong sizes. The decision comes from filling several physical bags with the intended product. Observe the first fill, the fifth fill, and a fill made at normal working speed. A design that works when a manager carefully lowers one sample into the bag may fail on a busy bakery line.
If the slice must lie flat, inspect the bottom surface after the filled bag is picked up. If it must stand, place the pack on the actual shelf or chilled-case surface and see whether the gusset opens consistently. Do not treat an empty pouch standing on a table as proof that a filled cake slice will stand.

Where to leave clearance
Clearance belongs at the vulnerable surfaces, not just at the top of a spreadsheet. A short square cake piece with a chocolate coating may need side clearance so the coating is not scraped at the mouth. A tall layered slice needs vertical clearance where the zipper or sealing jaws pass. A half cake may need a stable base to stop the cut edge from dragging across film while the bag is held open.
There is no reliable universal extra-centimeter rule for every cake. The useful requirement is observable: the product enters without contact damage, the closure remains accessible, and the filled pack keeps its intended shape through the planned handling cycle. Record the sample bag's finished dimensions and the actual product dimensions together. If a supplier offers a new size, repeat the trial rather than assuming proportional scaling.
Choose a bag format for the way the portion will be sold
The words “flat pouch” and “stand-up pouch” describe constructions, not food-safety approvals or guaranteed cake compatibility. Select the format after deciding whether the slice is displayed upright, laid flat, or grouped with other pieces. The Mylarbag cake packaging page lists flexible options including stand-up, three-side-seal, flat-bottom, and side-gusset formats. Those published options are a starting point for a sample request, not a claim that each format has passed a finished cake-slice trial.
A flat or three-side-seal pouch can be a practical trial for a low-profile, sturdy portion when the retail presentation is flat. The loading mouth and the straight seal path deserve attention: a portion that leaves oil or crumbs along the top edge can make a nominally simple format frustrating to fill. If a bag is too tight around a wedge, changing the nominal width alone may not help because its point and wide end create different pressure points.
A stand-up pouch may suit a compact slice or a group of small pieces when upright display is important, but only if the filled base settles consistently. A gusset does not support an unstable tall wedge by itself. A window pouch helps shoppers see the actual portion, provided that the window position is useful after the cake is in the bag. Ask for an assembled, filled sample; judging the window from a flat dieline can be misleading. A zipper may help after opening where the product and pack support reclosure, but the initial commercial closure and any tamper-evident requirement must be specified separately. Never assume a zipper alone performs the work of a validated top heat seal.
| Sales situation | Format to test first | What to verify physically |
|---|---|---|
| One firm slice sold flat | Flat or three-side-seal bag | Entry angle, corner damage, cut-face contact, clean top seal. |
| Short cake pieces displayed upright | Stand-up bag | Base opening, product settling, window alignment, accessible closure. |
| Several uniform, sturdy pieces | Gusseted or stand-up bag | Movement between pieces and whether they mark each other. |
| Tall decorated slice | Do not start from a bag-only assumption | Clearance and separate structural support, or a different package format. |
The table is a way to select trials. It does not substitute for food-contact documentation, a line trial, or storage review.
Check the actual food-contact surface and storage conditions
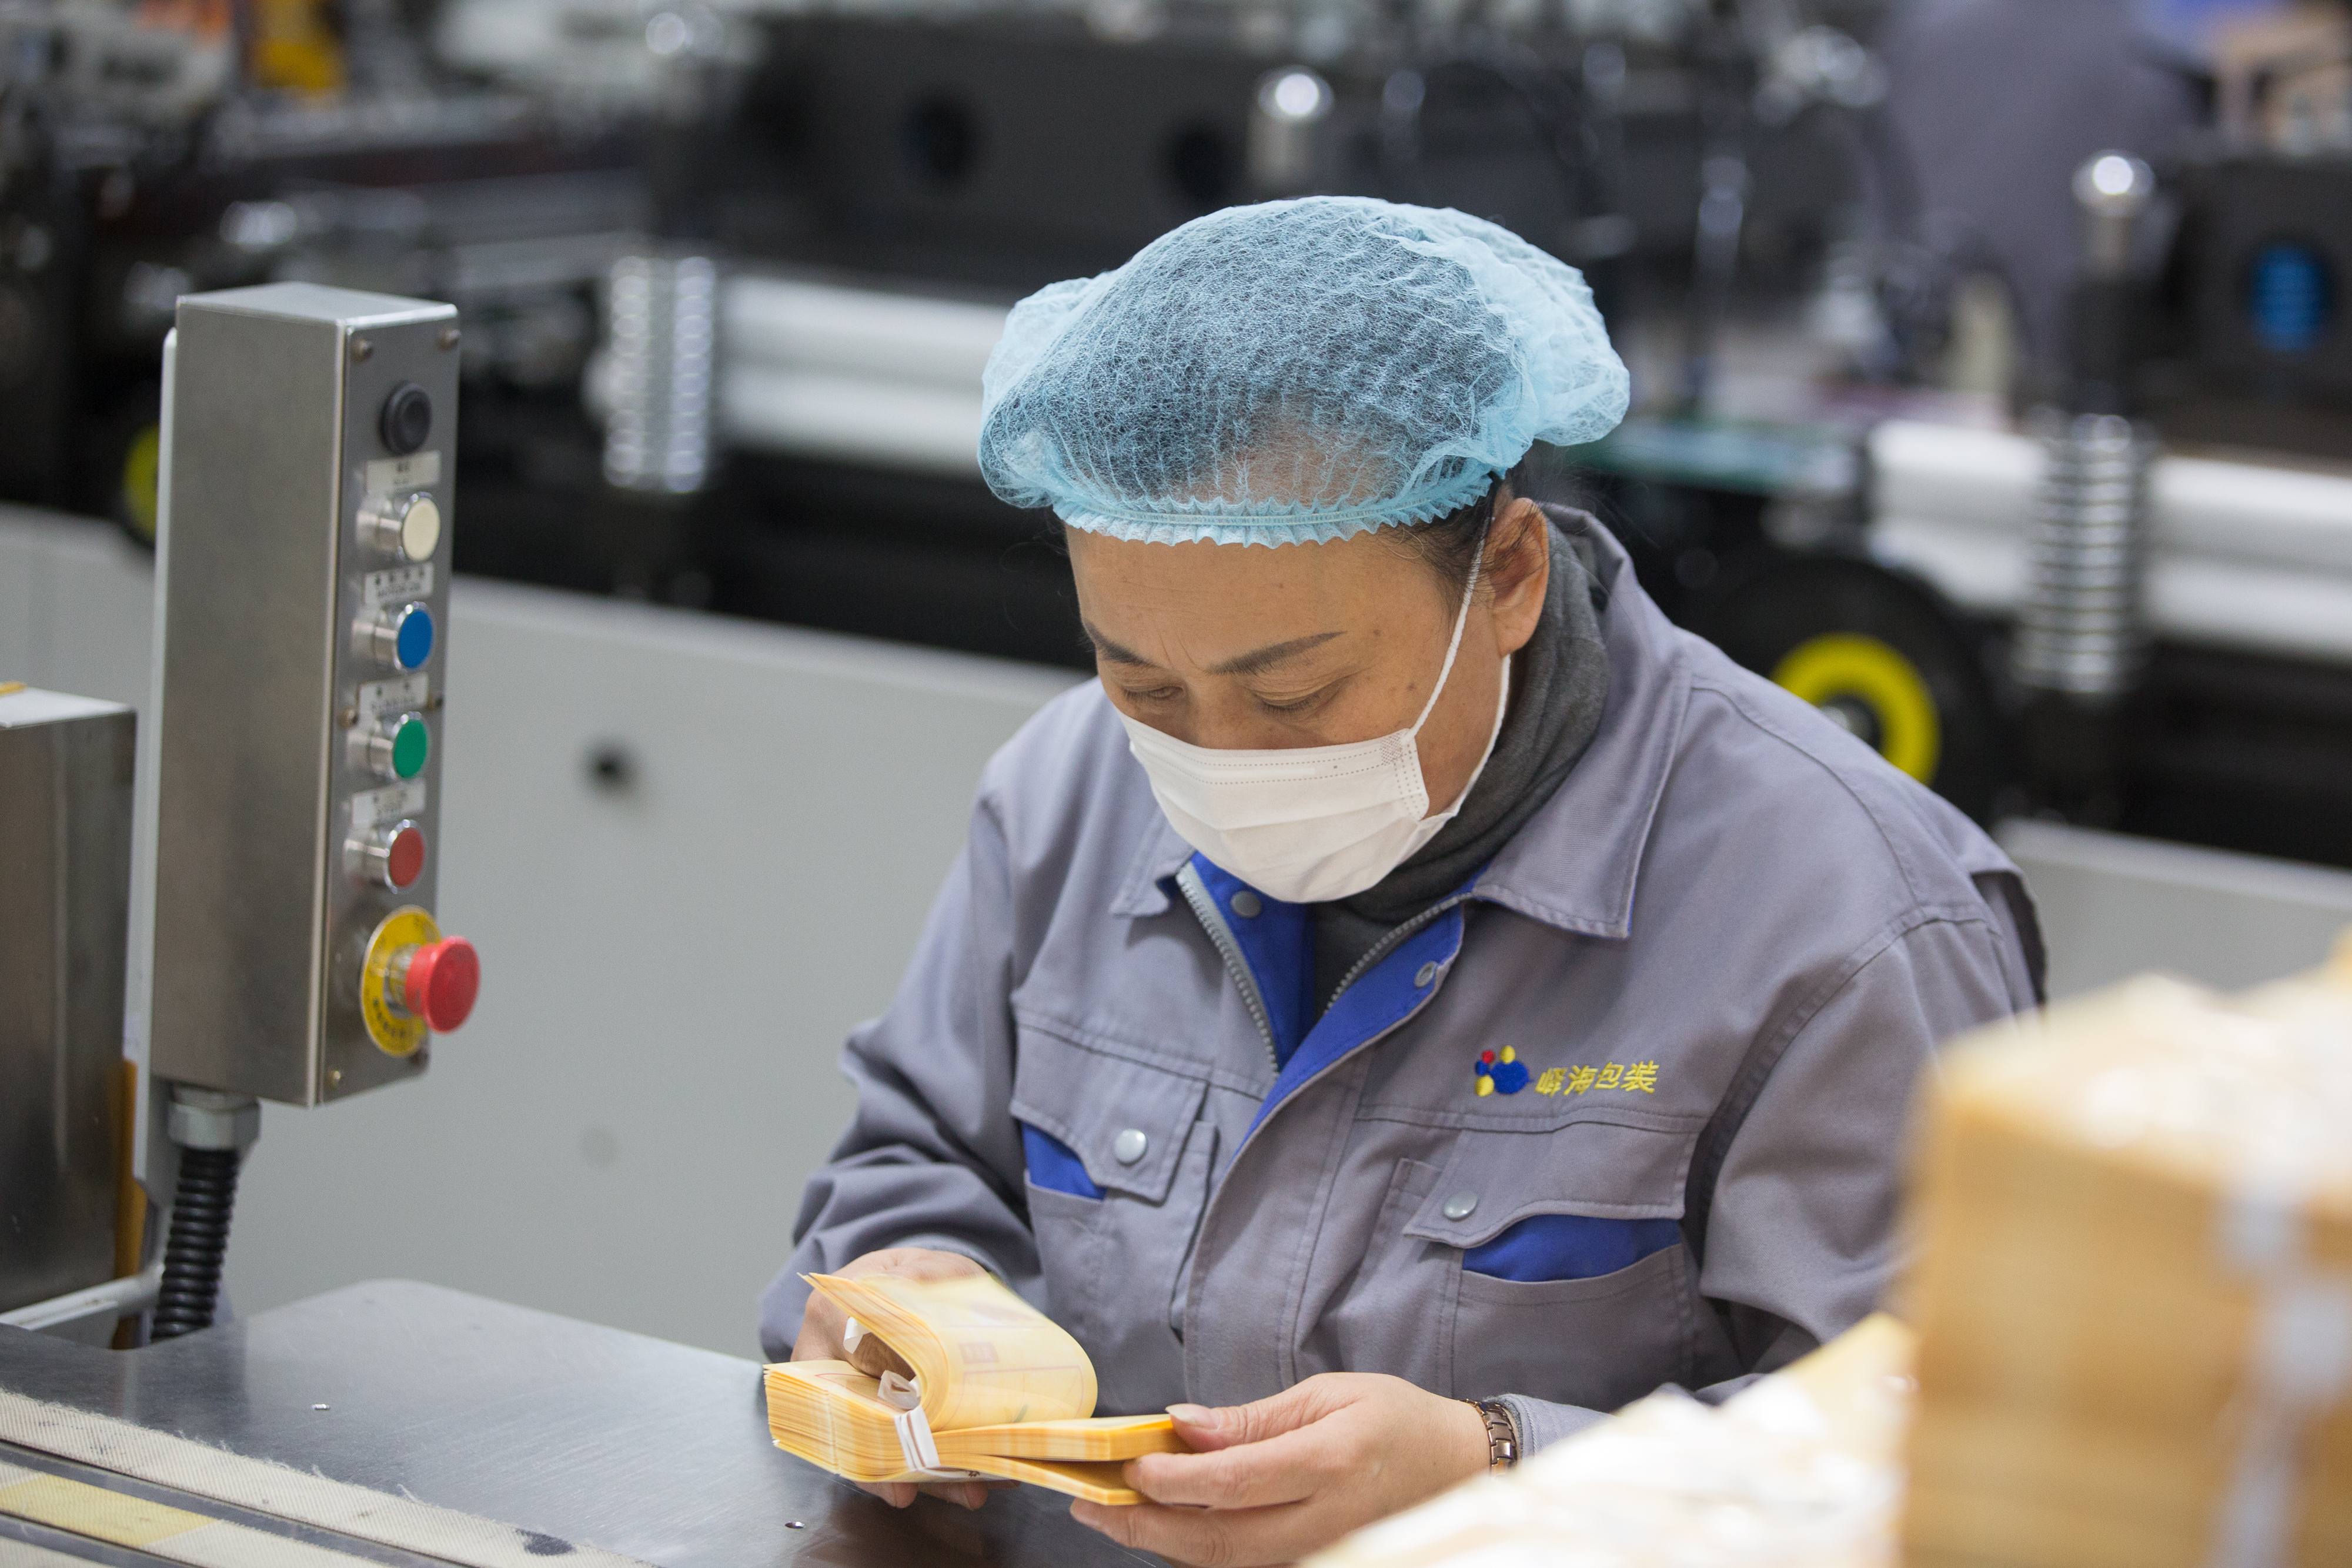
A slice may contact the inner film over much of its cut face. This is different from using a decorative outer bag around an already wrapped product. Tell the supplier whether the bag itself will touch cake, frosting, fat-rich glaze, or a separate primary wrap. Ask which layer is the food-contact surface and request documentation for the intended food type, contact duration, filling condition, and storage condition in the destination market.
For US projects, the FDA explains that the regulatory status of a food-contact article depends on its components and their intended conditions of use. Its tables distinguish bakery products with or without free fat or oil on the surface and distinguish room-temperature, refrigerated, and frozen use. These categories help frame a supplier question; they do not make every film with a “food-grade” description suitable for every cake. Review the FDA food-type and use-condition tables and its food-contact material guidance with the exact proposed structure. For other markets, check the corresponding rules and supplier documents rather than copying a US statement onto the artwork.
Do not infer shelf life from a metallized layer, a paper-look exterior, or the presence of a window. Those may be useful choices in a specific specification, but the finished cake's recipe, moisture, microbial risks, packaging process, and storage conditions all affect its sale life. If the business needs a shelf-life claim, it needs an appropriate product-specific study and a defined handling process. A visual sample is not that study.
A soft, warm slice can fog a clear package or mark the inner film. Wait until the product is ready for the intended pack under the bakery's controlled process; do not use “cool it longer on the counter” as a universal instruction. A cake with a filling or topping that requires refrigeration must remain within the producer's safe time-and-temperature controls. FoodSafety.gov's general guidance says perishable foods should be refrigerated promptly and not left out for more than two hours, or one hour when exposed to temperatures above 90°F (32°C). That general limit is not a declaration that a particular cake is shelf-stable until that point, nor does it replace a business's food-safety program.
Food-contact questions to put in the supplier brief
Name the cake and its contact surfaces instead of asking only for “food-grade plastic.” For example: “A slice with a butter-rich exposed crumb, packed after cooling, stored chilled, with the inner film touching the cut face.” Add whether the cake is oily, topped with chocolate, wet with syrup, or separated from the bag by another wrap. State whether the packaging will be heat sealed, zipped, frozen, or displayed under retail lighting.
Ask for the exact proposed laminate or film structure, the food-contact layer, the applicable declaration or supporting documentation for the market, and any restrictions on use. If an insert, label adhesive, or separate wrap can contact the food, review those components too. Keep the final approved specification with the artwork and the pack-out record so a future repeat order does not silently change the contact surface.
Set up a filling routine that keeps the slice and closure intact
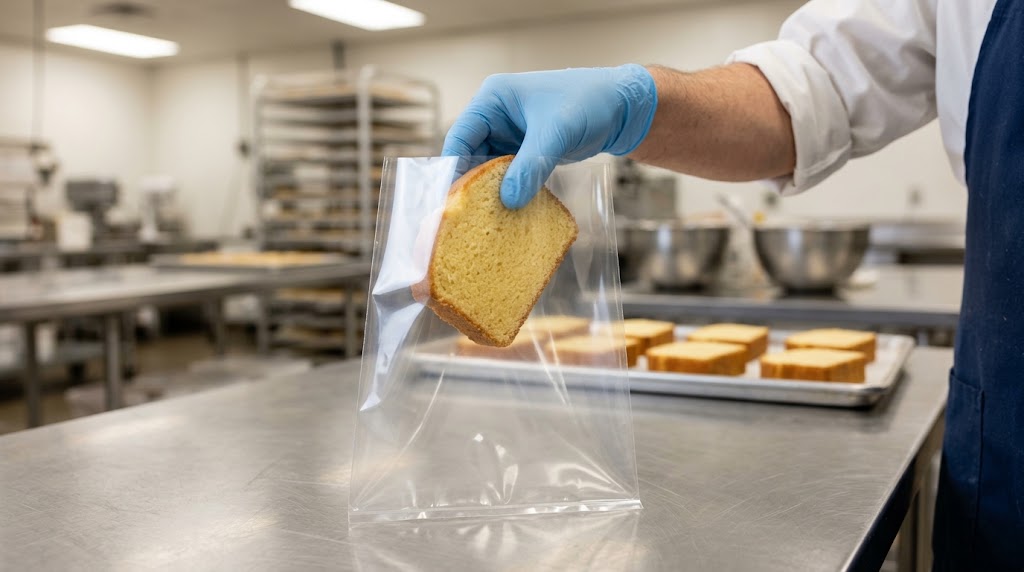
A workable bag is one that ordinary staff can fill repeatedly without touching sensitive surfaces or contaminating the closure. Put the proposed bags, product portions, and any supports at the real workstation. Decide which side of the slice faces the front panel and which direction the cut face points before timing a line trial. Otherwise the team may rotate individual pieces until they fit, leaving smeared windows and inconsistent shelf presentation.
A practical sequence is:
- Inspect the portion. Use a finished slice that meets the bakery's own quality and temperature criteria. Remove pieces that are already broken or shedding excessively; a bag will not restore their appearance.
- Open the bag without dragging the mouth over the food-contact area. If the opening collapses, test a wider mouth or a loading aid appropriate to the line.
- Guide the slice by its support or by a stable, permitted surface. Do not squeeze the decorated top to make it fit. For a half cake, control the broad cut face as it enters.
- Settle the slice in the intended orientation. Check the front view, base, and the point or corners of the portion. The package should not need shaking to correct its appearance.
- Inspect the closure zone before sealing. Brush-off, rework, or reject according to the business's procedure when crumbs, frosting, oil, or syrup reach the intended seal land.
- Close and inspect the pack. Use the closure specification confirmed for that material and product, then assess the filled pack after it has been handled as it will be in the shop.
This is a packing workflow, not a universal sanitation or food-safety plan. Use the bakery's established hygienic handling, allergen segregation, and employee procedures. The point is to include the bag in that process instead of treating it as a cosmetic finishing step.
Keep crumbs out of the top edge
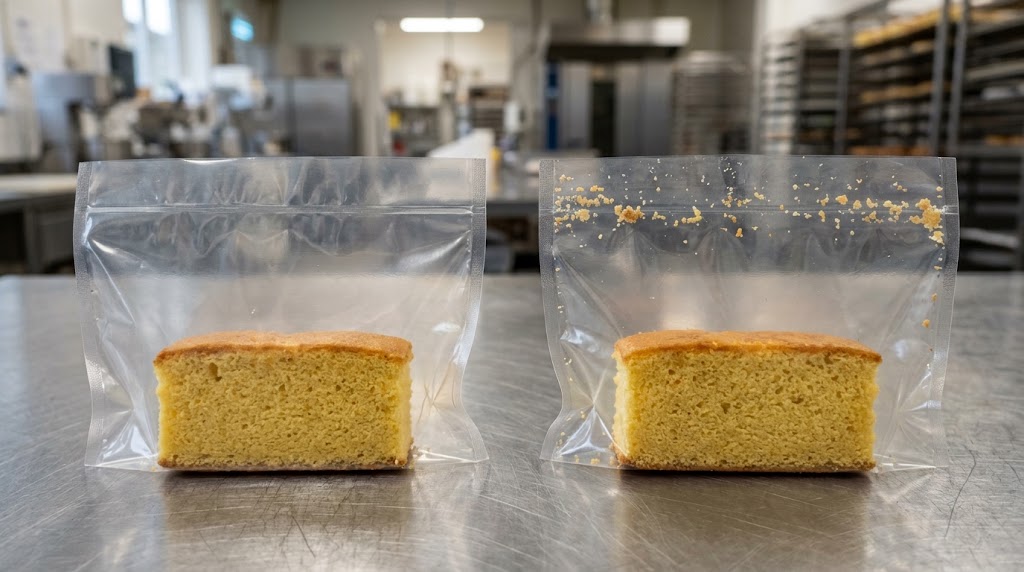
A seal can look straight while the food contaminates part of it. Cake crumbs may lodge where the jaws press; glaze or butter may spread as the top is flattened. Watch where contamination originates. If staff brush a crumb line off every bag, the issue may be portion height, loading angle, bag opening, or the distance between product and seal land rather than employee carelessness.
Move the product, not the machine setting, when the main problem is a smear caused by contact. A deeper bag or a different loading orientation may create a cleaner top. A more stable slice may permit a narrower bag. Document the specific adjustment and repeat the fill trial. Do not compensate for an unclean seal area by assuming more heat will make it acceptable.
Specify and inspect the closure
Some bakeries use a heat-sealed top; others use a closure intended for immediate handoff or a zipper beneath a separate seal. The correct method depends on the film's sealant layer, the equipment, the product, and the intended distribution. Ask the bag supplier for a compatible sealing recommendation and establish the settings on your own equipment with representative filled packs. The settings for a different laminate or a different line are not a reliable recipe.
Inspect more than whether the jaws left a visible stripe. Look for an uninterrupted, even seal across the full mouth, wrinkles crossing the seam, trapped crumbs, oil spots, distorted film, and a closure that a customer can open as intended. Use the business's appropriate integrity or destructive checks where specified. Record defects by cause rather than calling every failure “bad bags.” A clean but weak seam, a good seam with a torn corner, and a seam contaminated by cake are different problems.
A zipper should be assessed after the bag has been filled and handled. Does cake enter the track? Can customers grip the pack without compressing the portion? Is there a separate first-open indication if one is required for the sales channel? A reclose feature is a consumer convenience in some uses; it does not determine shelf life or substitute for the initial closure.
Make the artwork fit the physical package
A window can show the best face of the slice only if the product settles in the same place every time. Fill a blank sample first, mark the visible portion and fold lines, and place essential artwork outside distortion zones. Check that a mandatory label or date mark remains readable after the bag is filled and sealed. If the same printed bag serves several cake flavors, make sure variable labeling still distinguishes them correctly.
For packaged foods sold in the US, allergen labeling is a substantive review, not a graphic afterthought. The FDA's allergen guidance explains requirements for major allergen sources and distinguishes some point-of-purchase wrapping from prepackaged labeled food. Have the brand's qualified team check the exact sales context, ingredients, and label; a packaging supplier can reserve adequate space but cannot infer the recipe from a pouch proof. Do not copy another brand's ingredient panel into the design.
Package individual slices, pieces, and half cakes differently
For individual cake slices, a consistent cut is as useful as a consistent bag. If one slice is much taller than the next, the bag must accommodate the tallest part without making the smaller portion look lost. Test both ends of the bakery's real production range. A triangular layer-cake wedge should be checked at the broad side, point, top decoration, and exposed cut face. If any of those surfaces needs a cavity rather than film contact, the bag-only plan may be unsuitable.
For cake pieces or bars, several items can fit in one pouch but may rub against each other. Put the planned count into a bag and examine the coating, corners, and crumbs after ordinary handling. A bag that displays one square beautifully may have a messy window when three are packed together. If portions differ by flavor or allergen, keep the bakery's segregation and label controls intact; do not use a mixed pack merely because it fills the pouch efficiently.
For half a cake, the cut surface is larger and the mass is distributed unevenly. Start with the shape and the customer's method of removing it. If the half cake needs a stable support, include that support in every sample and food-contact review. A flexible bag around the unsupported curved edge can pull against the cut face or press a glaze during carrying. Where the half cake is too heavy, tall, or fragile to retain its intended appearance, use a format that provides the required structure. It is better to state this boundary than to publish an unrealistic universal “half cake bag size.”
| Portion | Main risk to watch | Sample-trial observation |
|---|---|---|
| Single firm slice | Side or cut-face rub | Photograph the front and cut face after filling and pickup. |
| Multi-piece pack | Piece-to-piece contact | Check coating and crumb transfer after handling. |
| Half cake | Uneven load and broad exposed face | Check orientation, support, and removal from the bag. |
| Decorated wedge | Top and side contact | Stop a bag-only trial if appearance is compromised. |
Review the filled pack in its actual sales cycle
A bag that passes a bench inspection may fail in the chilled case, at handoff, or in a customer's tote. Decide what a successful pack looks like before ordering printed inventory. For one bakery, it may be a visible slice with an intact cut face and a clean seal after a local pickup. For another, it may be a group of plain cake pieces that remains presentable in a retail display. Neither result should be inferred from an empty pouch photograph.
Build a modest trial around the real process:
- Fill samples from the earliest and latest acceptable product portions, including the range of height and topping variation.
- Use the actual operator, loading method, and sealing machine rather than a careful one-off hand fill.
- Photograph the pack immediately, after display under the intended conditions, after ordinary pickup, and after the planned delivery or handling sequence.
- Check the product as well as the pouch: cut-face appearance, top contact, trapped crumbs, portion movement, condensation, label legibility, seam condition, and ease of opening.
- Record the bag specification, product batch, temperature conditions, and any rework. An unsupported “looks fine” note is difficult to use when the next order changes film or dimensions.
If the bakery ships filled slices, the bag is only one layer in the transport system. It cannot reliably absorb stacking loads or prevent a delicate topping from touching its walls. Evaluate the complete arrangement for the route and product, and keep the food's required temperature under the producer's control. Cake Blog 3 will address the inner-bag role for whole cakes and Bundt cakes; it will not convert a soft pouch into a shipping carton.
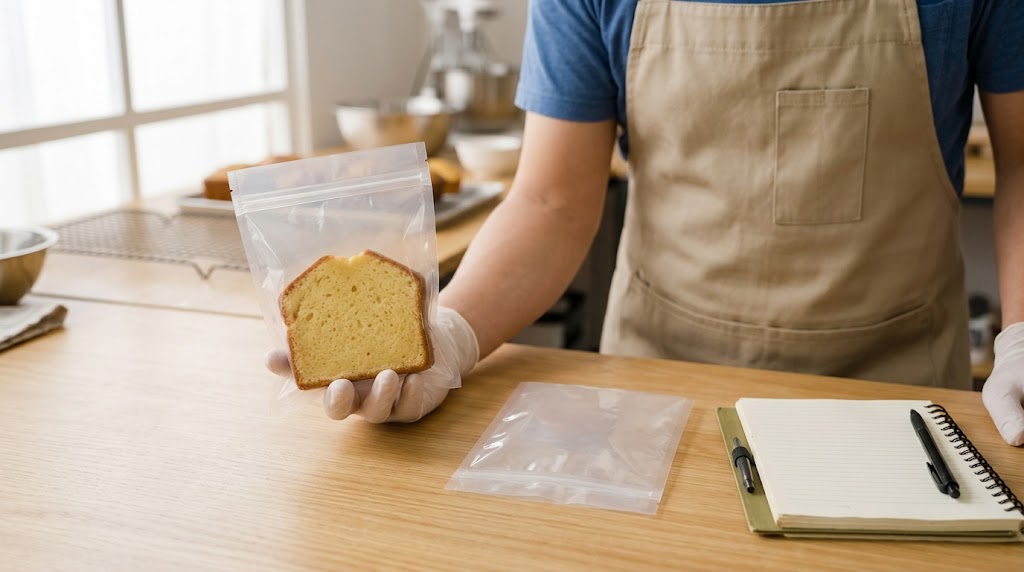
A small trial record worth keeping
| Trial field | Record the observation, not a promise |
|---|---|
| Product | Exact recipe/variant and finished portion dimensions. |
| Pack | Bag style, finished dimensions, structure supplied for review, and closure. |
| Process | Product condition at filling, line or hand-fill method, seal setup and inspection. |
| Sales cycle | Display and handling sequence actually tested. |
| Result | Photos, defects, customer-opening check, and decision to approve or revise. |
The record helps a supplier respond to a concrete problem. “The slice touched the top seal during loading” points toward opening and headspace. “The portion slid to one side after pickup” points toward format and support. Neither problem is solved by promising a stronger oxygen barrier without evidence that oxygen was involved.
A related Mylarbag pouch project, with a clear evidence limit
Mylarbag has a published white kraft stand-up pouch with a full-length window for Cake & Bakery. The public record lists an Israel project, a MATOPP / white kraft / VMPET / PE construction, gravure printing, and a 17 × 24 + 4 cm size. Its photos illustrate a windowed stand-up pouch format that a bakery buyer may want to examine when planning shelf display.
That record does not state a verified cake-slice fill, a tested seal on a buttery cut face, a measured shelf life, or a shipping result. It is a related flexible-packaging reference, not a completed validation for the cake in this article. The project-specific dimensions are not a recommended size for your portion. Bring an actual slice or accurate finished dimensions to the sample review.
Recommended packaging configuration: request a sample, then decide
For a low-profile, stable individual slice sold flat, ask whether a custom flat or three-side-seal food-contact pouch can be sampled with your actual product and sealing equipment. For a compact group of sturdy pieces displayed upright, ask to compare a stand-up pouch with the intended fill count. If product visibility matters, evaluate the position and construction of a window on a filled sample. Where a half cake or a decorated wedge needs structural separation from the film, say so in the brief rather than choosing a bag purely for its print area.
The Mylarbag cake packaging bags page is the relevant starting point for available flexible formats. These are trial configurations, not off-the-shelf performance claims. Ask for the proposed film structure and food-contact documentation for the target market and use, physical samples, artwork dimensions, and closure compatibility. Confirm any pricing, order quantity, timing, or validation requirement in the actual quotation; do not assume the related project sets them.
When you contact Mylarbag, include the cake type and photograph, whether it is frosted, the finished portion's maximum dimensions, intended count per bag, direct-contact surfaces, storage and sale channel, preferred display orientation, and filling/sealing method. If the product needs a support or separate wrap, say what that component is. Those details let the packaging team propose a bag worth testing instead of guessing from “one cake slice.”
Frequently asked questions
Can I put a frosted cake slice directly into a bag?
Only if a physical trial shows the film can be loaded, closed, displayed, and opened without touching or damaging the frosting under the intended handling conditions. Tall or soft toppings often need structural clearance that a flexible bag alone cannot provide. A larger bag does not automatically create that clearance after it is lifted.
What size bag do I need for one slice of cake?
Measure the finished slice's maximum length, width, and height, including decoration and any support. Then test the actual bag mouth, usable filled space, window position, and clean closure area with the real product. Weight or a flat bag width by itself cannot establish fit. Keep the chosen sample's specifications with the approved pack record.
Should a cake-slice pouch have a zipper?
A zipper can be useful when reclosure makes sense for the portion and sales channel. Test whether it stays clear of crumbs and whether customers can use it without squeezing the cake. Specify the initial commercial closure separately; a zipper is not proof of a validated top seal or shelf life.
Can several cake pieces go into one bag?
Yes, if a filled trial shows they remain presentable and the pack can be closed cleanly. Check piece-to-piece rubbing, coating transfer, crumbs, display orientation, and the customer-opening experience. Use the planned count and product range in the trial, and maintain the bakery's ingredient and allergen controls.
Is a kraft-look or metallized pouch automatically food-safe for cake?
No. The visible exterior does not identify the inner food-contact surface or establish suitability for the particular cake, contact time, and storage condition. Request the exact proposed structure and supporting documentation for the target market. A published related pouch project is a format reference, not a blanket approval for every cake.
Will sealing a cake slice in a pouch make it shelf-stable?
No such conclusion follows from the seal alone. The recipe, filling, packaging conditions, and storage program determine what validation is needed. Follow the producer's food-safety plan and verify any shelf-life or ambient-storage claim on the actual product and process. A bag's visual appearance cannot establish that outcome.
A good cake-slice pack begins with a slice that can be handled in a flexible format. Test the real portion, the real bag, and the real filling routine together. If that trial preserves the cake's appearance and allows a clean, documented closure, the printed bag can be designed around a working specification rather than an attractive guess.