
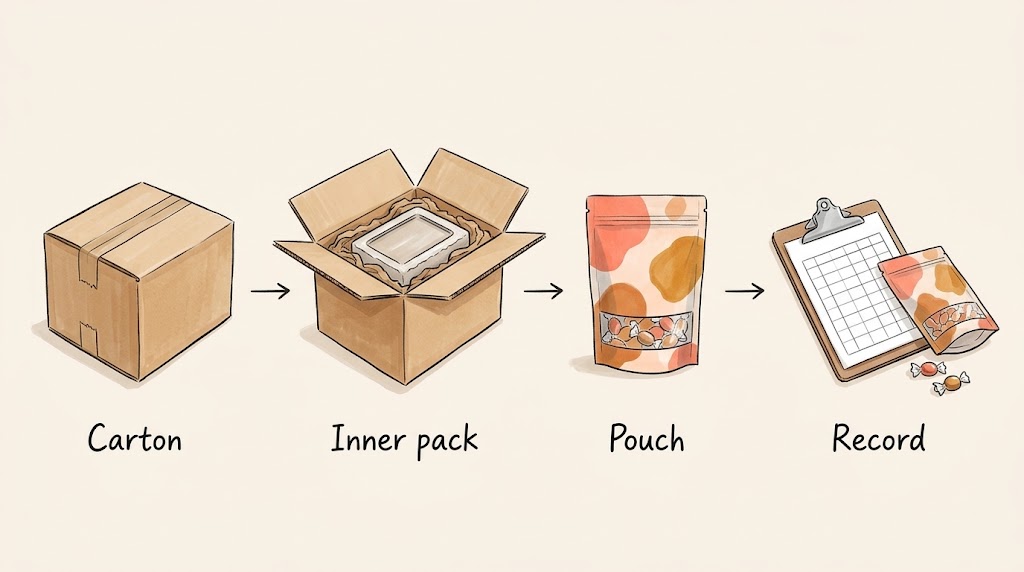
To package candy for shipping, close it in a suitable food-contact pack, support that pack so the candy cannot be crushed or move excessively, and place it in a correctly sized shipping carton. Add temperature control only when the product and route require it. Check the complete shipment through representative trials: an intact box alone does not tell you whether the candy arrived in saleable condition.
This guide covers parcel orders containing hard candies, gummies, wrapped sweets, and fudge. It starts with finished candy and follows the order through packing, dispatch, and inspection on arrival. The examples are planning exercises, not tested specifications for your product. Carrier guidance referenced here was checked in September 2026; confirm the requirements for your actual service and destination before dispatch.
Identify what could go wrong with this order
Before buying a larger box or adding more padding, name the damage you need to prevent. A broken lollipop, a flattened fudge square, and a pouch with a torn corner point to different problems. Treating all three as a need for more bubble wrap can leave the original problem unresolved.
Begin with the candy in its finished retail pack. Note the fill weight, piece shape, wrapper type, and any rigid parts such as sticks or trays. Handle a representative pack gently to see where its contents settle. A pouch that stands well on a shelf may present a different shape when laid sideways in a carton.
Next, describe the order rather than just the individual product. A single pouch, a six-pack bundle, and a gift assortment need separate packing layouts. Heavy sweets can bear against lighter items in a mixed order. Decorative tins and jars introduce additional contact points even when each item is already packed for retail.
Use the following table to identify an initial concern. It does not classify a recipe as safe for ambient shipping or establish acceptable storage temperatures.
Record the product's established storage instructions separately from these physical concerns. If those instructions are not yet established, settle them with the producer or an appropriate food specialist before selecting the shipping service. A neat package is not evidence that a recipe is shelf stable.
Give the retail pack and the shipping materials different jobs
The pack touching the candy must suit the food and intended conditions of use. Ask for documentation covering the actual packaging material, including relevant contact conditions. The FDA review framework considers the substances in a food-contact material and the conditions under which they may be used. Ask about the specified grade rather than relying on a generic material name. FDA food-contact material guidance.
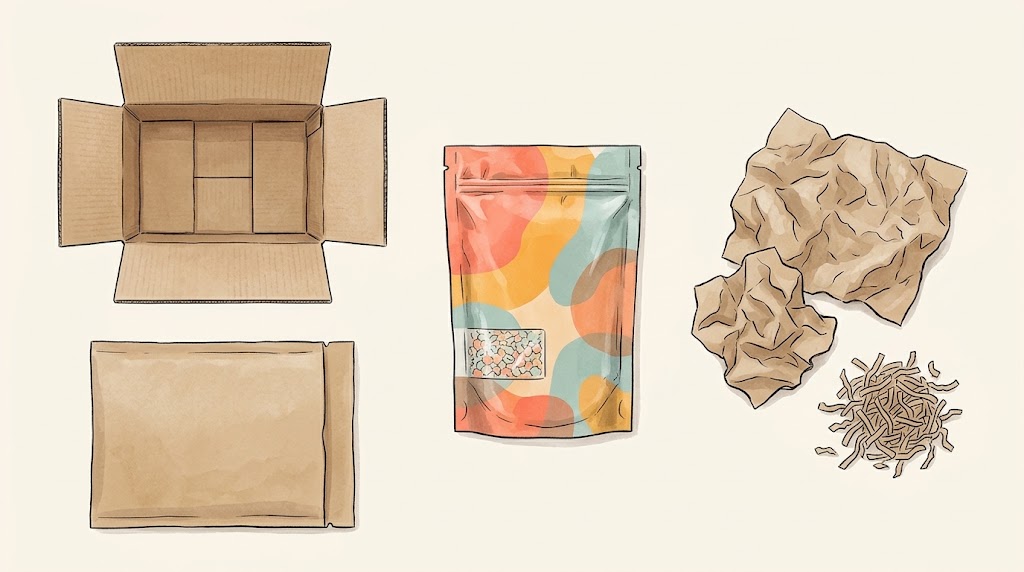
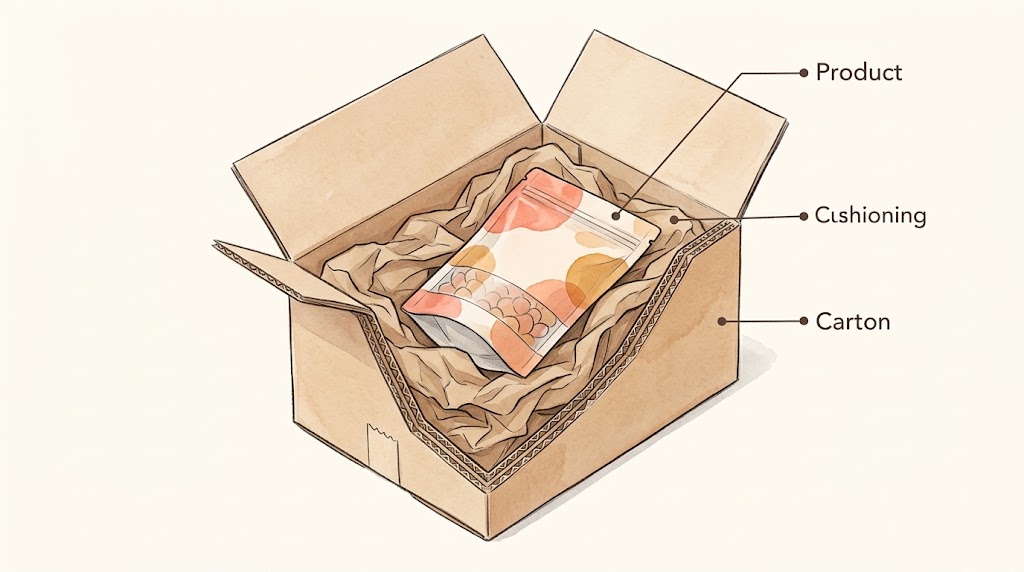
Outside that food pack, a tray or small inner box can support the portion. Cushioning then separates the supported goods from the shipping carton and controls movement. The carton holds the assembled order. Some shipments need fewer components, but the functions still have to be accounted for.
Keep ordinary shipping paper, loose filler, and adhesive away from exposed candy. If a divider will touch unwrapped food, it becomes part of the food-contact specification. Describing it as an insert does not remove that requirement.
For the retail layer, compare custom candy bags and pouch formats against the finished portion and its filling process. Ask how the filled pack will sit in the proposed carton. A wider pouch may present candy well in a store but need a different divider arrangement for parcel orders.
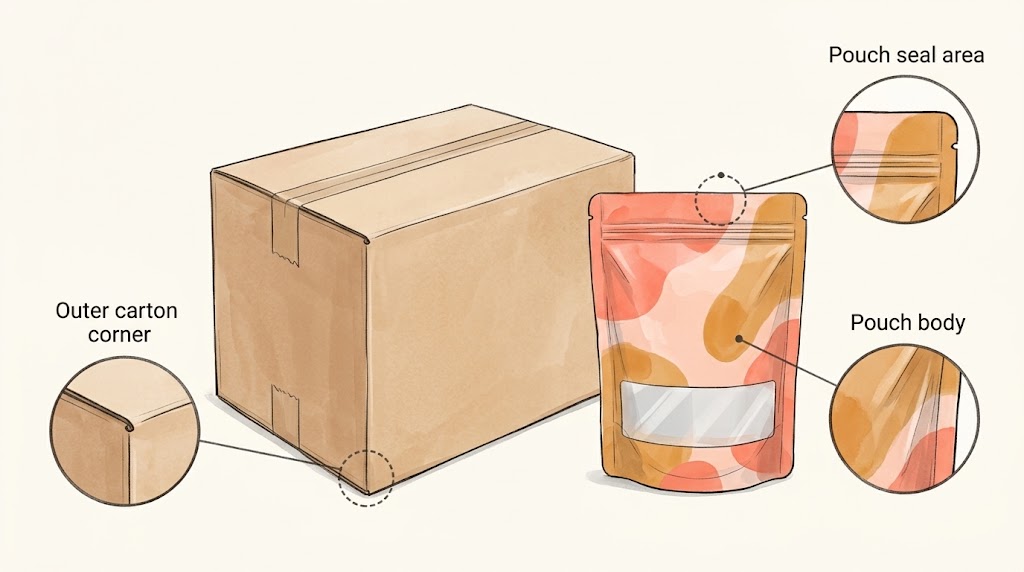
Check the top closure before boxing. Product caught in the sealing area, a folded corner, or a partially closed zipper should be resolved at the packing station. Do not expect the shipping carton to compensate for a damaged retail pack. Equally, a sound seal does not make the pouch rigid enough to protect every candy shape under compression.
Measure the assembled contents before choosing the carton
Empty pouch dimensions are a poor starting point for carton sizing. Fill the intended number of pouches, close them normally, and arrange them with any trays or inner boxes. Measure the space occupied by that complete arrangement without squeezing the product to obtain a smaller number.
Include raised closures, folded wrapper ends, and the thickest part of each filled pouch. If a multipack has a paper sleeve, measure it with the sleeve installed. For an assortment, use the actual combination that will be shipped; equal net weights do not necessarily occupy equal space.
The following hypothetical example shows the calculation. Assume the assembled contents occupy 260 × 180 × 100 mm. For this example only, allow 50 mm on each opposing face for a proposed protective system. That allowance is an input to check with the packaging supplier and through trials, not a universal candy-shipping recommendation.
For each axis, required internal space equals the contents dimension plus the allowances on its two sides. Different sides may need different allowances. Replace the example values with the actual cushioning, insert, or insulated-container dimensions for your design.
The resulting internal volume in this example is 20.16 liters. It is not the parcel volume used to obtain a shipping quote. Measure the closed carton's external dimensions and its gross weight, then use the carrier's current quotation system. Do not estimate the outside size by adding a guessed board thickness: carton construction and closures affect the finished measurement.
Try the smallest and largest order configurations you expect to send. A carton suitable for six packs may leave too much movement with two. Keep a separate packing instruction for each approved order range instead of asking staff to improvise the missing space.
How to pack candy for shipping at the dispatch table
Set out the complete order, the selected carton, and its specified internal components before loading. Check the retail packs against the order, including flavors and pack count. Keep sealing rejects out of the dispatch area so that a rushed packer cannot mistake them for finished stock.
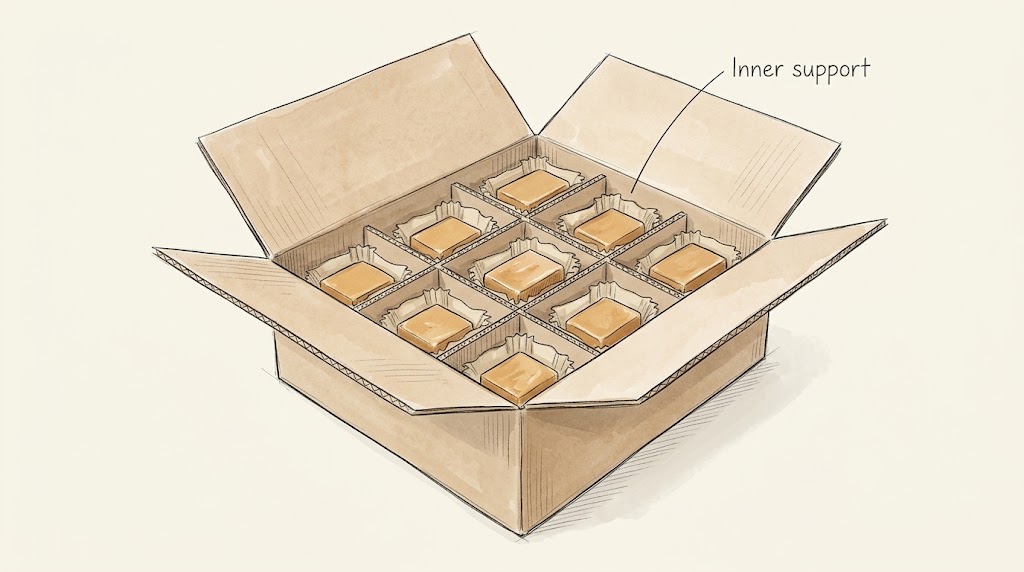
Start with the bottom support or cushioning. Place the first group of packs in the documented orientation, then add dividers or separators where needed. Avoid positioning a hard corner, stick end, or inner-box edge against an unsupported pouch face. Place additional groups without using the lower candy packs as structural supports for heavier goods.
Fill the intended spaces around the contents while preserving the shape of the product. More filler is not automatically better. If closing the flaps requires pressure on the candy, review the arrangement, quantity, or carton size. Do not solve a tight fit by pushing the entire load down with the lid.
Before sealing the carton, inspect all sides of the arrangement. Check that the bottom protection has not shifted during loading and that small packs cannot slip into a gap. Take a reference photograph of the approved layout with its top layer removed and another with the complete contents visible. These photographs are useful working instructions for repeat orders.
Use shipping tape and closures suitable for the chosen carrier and carton. UPS recommends a rigid box, appropriate cushioning, securely sealed seams, and removal of obsolete shipping labels. Its guidance also calls for a duplicate address label inside the parcel. UPS packaging guidance.
For cartons using an H-tape closure, tape follows the main flap seam and the two edge seams on the relevant face. Follow the applicable packing instructions for both top and bottom. Keep the external label flat and readable, away from a corner where it will fold. Include the order identifier inside without exposing customer details in public packing photographs.
Finally, weigh and measure the closed parcel. Record which packing version was used. This connects any later complaint to an actual arrangement rather than an informal description such as “the usual small box.”
Control movement without transferring pressure into the candy
Look at movement at two levels: candy within its retail pack, and retail packs within the shipping carton. Holding the pouches firmly in place cannot prevent a fragile piece from moving inside an oversized pouch. Conversely, a well-fitted retail pack can still strike neighboring items if the carton has unrestrained space.
A divider may separate packs effectively without cushioning the carton walls. Loose filler may occupy space but shift away from a dense item. Review what each component does in your arrangement instead of assuming that every material sold as protective packaging performs the same function.
A gentle handling check can reveal obvious sliding or rattling before dispatch. It is an initial screen, not a substitute for transport testing. Do not squeeze a soft pack until it becomes silent or use a vigorous shake that damages the sample before you can learn anything useful.
Examine high spots carefully. A folded pouch corner pressed against another pack can become a repeated contact point. An upright zipper can catch under an insert. A lollipop head supported on one side with its stick trapped on the other may experience bending when the surrounding packs shift.
For mixed orders, write down which item goes in each compartment. Separate dense packs from delicate ones with a support appropriate to the load. A photograph of the layout is more reliable than an instruction to put the fragile items “somewhere near the top,” especially because the parcel may change orientation during transport.
Decide whether the route needs temperature control
A moisture barrier and a temperature-control system address different conditions. A foil-containing or metallized pouch does not establish a safe shipping temperature or hold candy at its dispatch temperature throughout the journey. Evaluate thermal protection separately from the choice of retail film.
Build the route review around time outside controlled storage. Include the wait for collection, transport, any transfer or delay, and the period before the recipient brings the order inside. The advertised transit time alone does not describe that entire period. Review holiday schedules and the customer's receiving arrangements before dispatching a temperature-sensitive order.
If the product requires controlled temperatures, specify its limits first. Then select and evaluate an insulated shipping system for the intended journey. The coolant type, amount, placement, and starting condition belong to that system; there is no defensible rule that one gel pack suits every box of sweets.
FedEx's perishables guide discusses insulation, coolants, moisture containment, and the effects of delays. It also treats dry ice as a regulated shipping material with separate requirements. Use those instructions for the relevant service, rather than substituting dry ice into an untested gel-pack arrangement. FedEx guidance for shipping perishables.
Where cold packs are used, include their weight and occupied space in the layout. Evaluate moisture around the coolant and its effect on paper components and retail labels. Keep the food enclosed in its appropriate primary pack. Document the arrangement during the trial so that temperature results correspond to a known configuration.
How to package fudge for shipping
Fudge deserves its own packing decision because preserving a clean cut surface and recognizable portion can matter as much as keeping the outer bag intact. Start with the specific recipe, portion size, established storage instructions, and intended delivery conditions. Do not borrow the storage period of another maker's fudge or assume that its sugar content settles the question.
Wrap and support the finished portion
Check the contact material on the fudge you actually sell. The wrapper should open without pulling away an unacceptable amount of product, and it should contain the portion without smearing during ordinary handling. Evaluate this after the relevant holding period as well as immediately after wrapping.
Separate cut pieces when contact would damage their surfaces. Suitable individual wraps, cups, or dividers may help, depending on the portion. A shallow tray or closely fitted inner box can provide support that a flexible bag alone cannot. Confirm suitability for direct food contact wherever the support touches the fudge.
For a slab, support its base and check what happens at the edges when the wrapped slab is lifted. For individual squares, assess whether a neighboring piece or divider leaves a mark. Avoid stacking unsupported layers simply because they fit inside the pouch; the lower portions may carry the weight of the upper ones.
Fit the supported fudge into the outer pack
Measure the wrapped portion together with its support. Keep folds and tray corners away from the sealing area. If a pouch is part of the retail presentation, evaluate fudge packaging bags around that assembled size. Leave enough working space to insert and remove the product without scraping its surface.
Then put the complete retail unit into the shipping layout. The carton should restrain the supported unit without squeezing the fudge through its wrapper. Check an actual recipient opening sequence: removing the inner box, opening the food pack, lifting a portion, and separating its wrap. A parcel can look satisfactory until that last step reveals a sticking problem.
Apply the recipe's storage requirements to the journey
If the recipe requires refrigeration, use an evaluated refrigerated shipping arrangement and clear receiving instructions. If it is suitable for ambient storage, still examine the expected route for quality changes. These are separate decisions; adding insulation does not establish shelf stability.
For homemade fudge sold commercially, confirm the rules for the business, product, and selling area. FDA's food-business overview explains that federal, state, and local requirements may apply. It does not approve a particular fudge recipe or grant permission to ship under a local home-food exemption. FDA food-business guidance.
Keep freeze-dried candy on a separate packing instruction
Freeze-dried pieces should not automatically share the packing arrangement used for dense hard candy. Their size, shape, and fragility need their own evaluation. Limit this shipping decision to the finished sealed pack: check its fit, how it is supported, and how much product movement remains inside it.
Do not compress the pouch to make it fit an existing carton. Compare supported arrangements with the actual fill quantity, and record the condition of the pieces after the journey. A padded mailer may limit abrasion but provides no general assurance against crushing; choose it only when the complete product and pack have been evaluated for that use.
The detailed decisions about filling, moisture exposure, and initial sealing belong in the separate freeze-dried candy packaging guide. Here, retain a distinct order code and packing photograph so staff do not substitute the ordinary candy layout when dispatch becomes busy.
Run trials that tell you what to change
Define acceptable arrival condition before sending trial parcels. State what counts as damage for this product: a broken stick, an opened retail seal, visible smearing, or loss of the intended shape. For cosmetic issues, use a clear written description or reference photograph so two reviewers are judging the same thing.
Keep a comparison pack from the same production batch under the product's established storage conditions. Record its condition alongside the shipped samples. If both change similarly, transit may not be the only explanation. If only the shipped units change, review the transport conditions and layout before attributing the cause to one material.
An initial trial should represent the order, route, and receiving process you plan to use. One short trip in mild weather cannot establish performance for longer routes or another season. Select additional trials around the uncertainties you have identified, rather than collecting more examples of the easiest delivery.
Inspect from the outside inward. Photograph the carton before moving its contents, then the top protection, each layer, and the retail packs. Note where damage occurs in relation to the walls and neighboring items. This makes a crushed corner more useful evidence than a photograph of loose candy after everything has been unpacked.
For formal testing, ask a packaging laboratory which procedure fits the distribution route and package. ISTA distinguishes screening procedures from simulations of transport hazards; its 3A procedure addresses individual parcel shipments within its defined scope. A trial delivery or a hand shake test is not an ISTA certification. ISTA test-procedure descriptions.
Read the damage pattern before changing materials
A torn pouch next to an intact rigid insert deserves a different investigation from a crushed carton with several flattened packs. Mark the damage location on the packing photograph. Check whether it lines up with a divider edge, a hard candy point, or a gap in support.
If the carton remains intact but several candies are misshapen, investigate temperature history, internal movement, and pressure within the arrangement. Do not infer the cause from one photograph. For an opened retail seal, inspect comparable unshipped packs and the sealing records as well as the shipping layout.
Change a clearly identified factor and record the revision. Replacing the carton, film, filler, and service simultaneously may improve the next shipment, but it will not show which change mattered. Keep the previous configuration available for comparison where practical, and make sure the dispatch team receives the revised instruction.
Related project: a windowed pouch for candied nuts
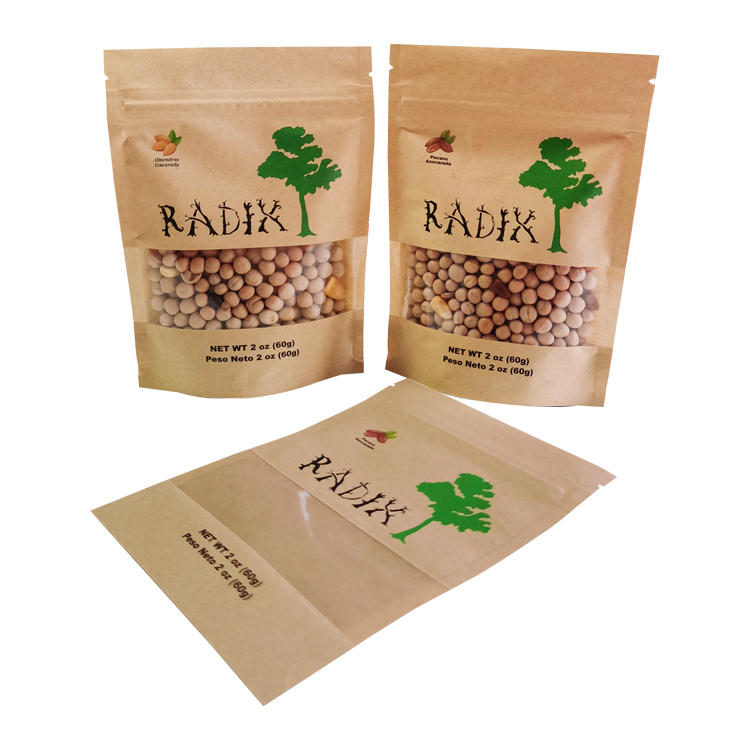
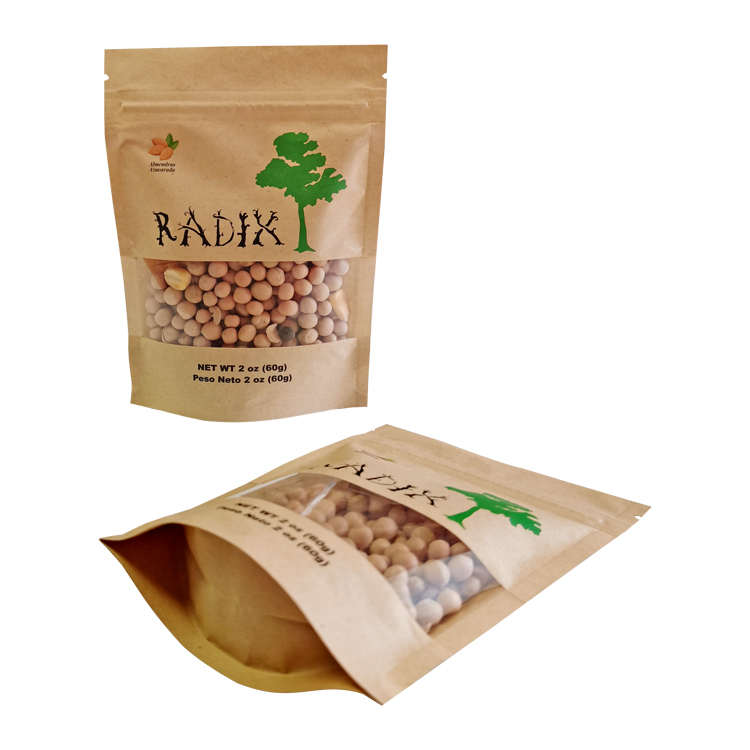
Consider the retail unit in this published candied-nut packaging record: a windowed stand-up pouch made with kraft paper/PET/CPP and digital printing. The project lists Puerto Rico and dimensions of 11.2 × 15 + 2.5 cm. These are published configuration details, not shipping-test results.
This is a useful example of a defined retail unit that still needs a separate parcel arrangement. Before ordering its shipping carton, a buyer would measure the filled pouch, choose an order quantity, and evaluate how the packs contact one another. The listed flat dimensions alone cannot provide the loaded thickness or determine the required cushioning.
The project title uses both “2oz” and “60g.” Those figures are not an exact unit conversion; confirm the intended net quantity for your own product and artwork. Neither the capacity description nor the pouch structure proves that another candy will fit, remain crisp, or survive a particular route.
Recommended packaging configuration
For an ambient parcel order whose product has established storage requirements, a reasonable configuration to evaluate is a correctly filled and sealed retail pouch, support where the candy needs it, a documented arrangement of protective materials, and a corrugated shipping carton selected for the assembled load. Add a separate thermal specification when the product and route call for it.
Mylarbag's custom pouch options for candy orders include stand-up, flat, and flat-bottom formats that can be discussed around the retail portion. Request samples suited to your filling and sealing process, then use filled samples in the carton trial. Confirm the supply of trays, cartons, insulation, and coolants separately; a pouch quotation should not be treated as a quotation for the complete shipping system.
Frequently asked questions
Can I ship candy in a padded envelope?
Possibly, for a product and pack that tolerate the expected handling and have been evaluated together. Padding alone does not provide a rigid space around fragile candy. Review crushing, bending, puncture, and temperature exposure before choosing an envelope to reduce parcel size.
Do all candy shipments need ice packs?
No. Base temperature control on the specific product and journey. A coolant adds weight, occupies space, and changes the conditions around the retail pack. When cooling is necessary, evaluate the complete arrangement rather than inserting an arbitrary ice pack into an ordinary carton.
Will a Mylar bag stop candy from melting during shipping?
The name does not establish temperature control. Specify the retail material for its intended job, then assess route temperatures separately. A pouch may form part of the shipment, but its appearance or barrier description does not demonstrate that it can maintain the product's required temperature.
How should I package fudge for shipping?
Use a suitable contact wrap, support the finished portions, and restrain the complete retail unit inside the carton without compressing it. Apply the recipe's established storage requirements to transport. Check both shape and wrapper release after delivery, rather than judging the order only by its closed package.
How much empty space should I leave in the shipping box?
Allow space for the protective components selected for your layout, then restrain unwanted movement. There is no single gap that suits every candy. Measure the assembled goods and calculate each internal dimension from those goods plus the required components on the opposing sides.
Does one successful test shipment prove the packaging works?
It provides evidence for that product, arrangement, and journey. It does not cover untested order sizes, routes, delays, or seasons. Record the result, identify what remains uncertain, and use representative trials or suitable laboratory evaluation to address those remaining conditions.
Prepare the pouch brief alongside the shipping layout
Send the candy type, target portion, filled-pack measurements, order quantities, and intended markets when discussing packaging. Include a packing photograph and describe any damage already observed. If temperature control is required, state the established product limits and the shipping conditions being evaluated.
Contact Mylarbag to discuss the retail pouch with those details and request the material information needed for your project. Approve the pouch together with its actual contents, then confirm the complete parcel arrangement through the checks relevant to the way you will deliver it.