

To package chocolate for sale, define the product and the retail unit: one bar, an individually wrapped piece, a pouch of bites, or a boxed assortment. Choose a suitable food-contact inner layer, size it with actual chocolate, and test the filled pack on your equipment. Then approve the label, presentation, and distribution route. A polished wrapper cannot rescue a poor fit, a contaminated seal, or unsuitable storage.
This guide is for U.S.-bound packaged chocolate and small confectionery brands planning a retail launch. It covers the decisions a chocolate maker can make with a packaging supplier before placing an order. Specific formulas, fillings, distribution conditions, and sales jurisdictions still need their own food-safety and label review. It does not set one universal shelf life, pouch size, or sealing temperature.
Start with the chocolate you are actually selling
“Chocolate packaging” can mean several different things on one purchase order. A 12 g square sold as an individual unit, a 3 oz craft bar, and a one-pound assortment may share a brand but need different cavities, sealing arrangements, labels, and transit protection. Write down the finished product before choosing a bag from a photograph.
Describe the food in the condition it reaches the packing station. A molded bar has edges and a defined face. Loose pieces have a bulk volume and can settle. A delicate filled chocolate may need separation so the pieces do not rub or transfer filling. A chocolate-coated nut introduces the nut, an allergen, and different product-quality considerations. If a recipe contains a moist or perishable center, the food business must assess that filling; a pouch alone does not establish that it can be sold at room temperature.
Next, decide what the customer buys. One bar in one wrapper is a retail unit. Twelve individually wrapped squares in a display carton may be another retail unit with a different outer label. A gift box may be presentation packaging around food already enclosed in a suitable food-contact layer. This distinction determines where the required information goes and what a retailer can scan, stack, or handle without damaging the chocolate.
| Product offered for sale | Sensible starting pack | What to check with a filled sample |
|---|---|---|
| One solid bar or tablet | Sealed wrapper or correctly sized flat pouch; optional paper sleeve or carton | Bar dimensions, edge pressure, opening route, and label area |
| One small square or tasting portion | Small flat sachet sized for the piece and the sealing equipment | Position in the sachet, seal clearance, legible type, and tear behavior |
| Loose bites, bark, or chocolate pieces | Flat or stand-up pouch with a heat-sealed first closure; zipper only if repeated use makes sense | Bulk volume, settling, top-fill space, product contact with the zipper and seal |
| Filled pieces or an assortment | Individually protected pieces or suitable tray plus an enclosing wrap, pouch, or box | Movement between pieces, tray fit, filling-specific handling, and label ownership |
| Gift set or multi-bar carton | Each food item’s suitable primary pack, then a presentation box or sleeve | Item movement, the outer sales unit, label placement, and shipping protection |
Those are starting routes, not a catalog of guaranteed food-contact materials. A paper sleeve can provide a print surface but should not automatically be treated as the inner food-contact layer. A box offers shape and display space; it does not necessarily make a seal around the food.

Homemade chocolate still needs a repeatable retail pack
Handmade describes how a product was made, not an exception to the packing questions. A maker who sells at a market should still decide how each unit is protected from handling, how ingredients and allergens will be shown, how lots will be identified internally, and what happens when unsold units return to storage. A plain stock bag with a later applied label may be a reasonable early-stage option if its actual contact use and closure are suitable. Custom printing becomes worthwhile when the format, artwork, and order volume are stable enough to approve a production run.
If you sell through a shop, ask what the shop needs from the sales unit: an individual barcode, an approved label, a hangable pack, a shelf-facing panel, or case quantities. Do this before artwork approval. Moving a mandatory text panel after the dieline has been released can force a new proof and sometimes a new bag size.
Decide what each packaging layer must do
It helps to sketch the package from chocolate outward. The primary layer is the material that touches or encloses the chocolate. A secondary layer could be a sleeve, folding carton, rigid gift box, or tray around that primary pack. A shipper protects the sales units through warehousing and delivery. One layer can perform more than one job, but a seller should know exactly which one is responsible for contact, closure, presentation, and physical protection.
For a bar, the primary layer may be a sealed flexible wrapper. A paper sleeve around it can carry artwork and some label content, subject to the final label arrangement. For loose pieces, a heat-sealed pouch may be both the contact package and the printed retail face. For a boxed assortment, the food-contact materials and positioning tray require their own specification; the attractive outside box cannot be assumed to solve every inside problem.
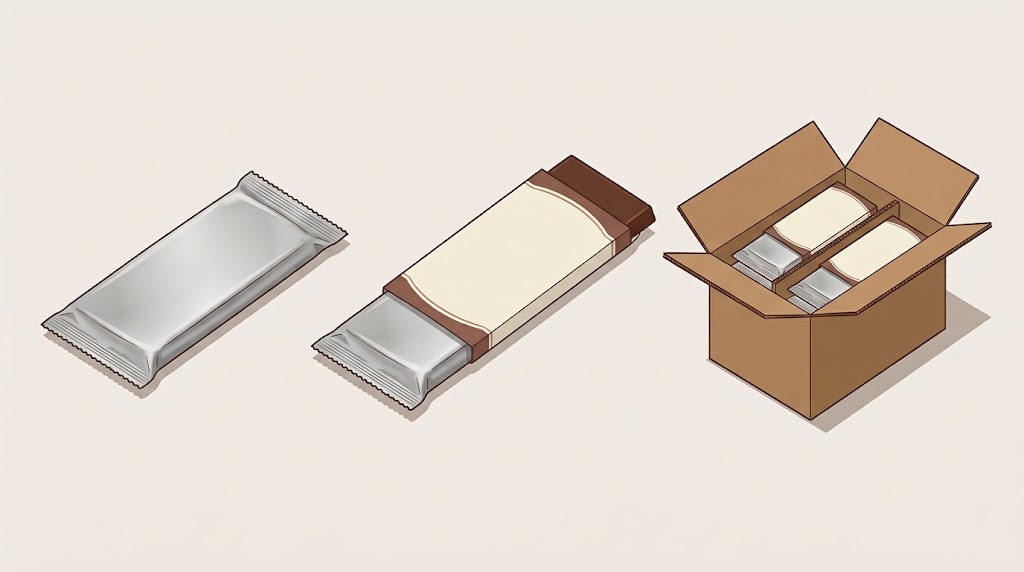
The layer map also prevents a common purchasing mistake: asking one thin pouch to keep a fragile bar from cracking inside a loosely packed shipping carton. A pouch can be specified for contact, closure, and a selected barrier performance. Carton fit, dividers, cushioning, and transit conditions address other risks. Likewise, barrier film manages transfer of gases, moisture, light, or odor to the extent supported by its actual construction and tests. It is not insulation and will not keep chocolate from melting in a hot vehicle. Callebaut’s chocolate storage guidance discusses the effects of temperature shocks, condensation, and nearby odors. Chocolate shipping requires a separate route-specific plan.
Choose a format around filling and selling, not appearance alone
A flat pouch or three-side-seal sachet is a useful starting point for single portions or a few flat pieces. It gives you a clear front and back panel without forcing a small product into a large gusset. A stand-up pouch makes more sense for a multi-serving quantity of pieces when it must stand on a retail shelf. If the customer will open it repeatedly, a zipper may be convenient, but the first package closure still needs its own approved seal above or apart from that feature.
Bars wrapped on a flow-wrap line require a film and web configuration matched to that equipment. A small maker who packs by hand should not order an automated-line wrapper based solely on a supplier’s attractive bar mockup. Ask whether the supplier is delivering premade bags, rollstock, or finished wrapped product, and who will perform the final sealing step. That answer changes the sample you should request and the measurements you should send.
| Decision | A practical question for the pack team | Reason to test it |
|---|---|---|
| Premade flat pouch or sachet | Will the piece enter without scraping its face or catching the rim? | Loading damage and contaminated seals |
| Stand-up pouch | Will the filled quantity actually form a stable base? | Shelf presentation and fill level |
| Zipper | Will the consumer use several portions after opening? | Closure position, usable volume, and seal location |
| Rollstock or flow wrap | What machine, web width, sealing pattern, and running direction are used? | Registration and line compatibility |
| Sleeve or box | Is the chocolate already enclosed in an approved inner layer? | Contact responsibility and item protection |

The “best” chocolate package is therefore conditional. For a single bar, a close-fitting primary wrap with an optional sleeve can be efficient. For loose bites, a pouch is often a better filling and display format. For fragile assortments, individually protected pieces and a tray may be necessary before an outer pouch or box makes sense. Choose the complete system that your product and route can pass in trials; no single material name makes it best for every recipe.
Specify food contact and barrier requirements from the recipe
Ask the supplier for a layer-by-layer construction and the intended food-contact layer. Also provide the food type and conditions of use: direct contact or already wrapped, expected contact time, fill and storage temperature, and whether the surface has free fat or oil. The FDA’s food-type and conditions-of-use tables distinguish dry solids with free surface fat or oil from dry solids without it, as well as room-temperature, refrigerated, and other use conditions. A generic “food grade” description cannot substitute for checking the proposed material under the actual use.
The barrier request should follow the product rather than a fashionable film acronym. Solid chocolate may need attention to odor pickup, humidity, light exposure, and the intended distribution interval. Add nuts, wafer pieces, or other inclusions and the product-quality questions change. A filled confection needs an assessment of the filling as well as the outer chocolate. Ask what evidence is available for the finished candidate structure, not just one raw layer, and how the seal changes the complete pack.
Do not confuse metallized film with a sheet of aluminum foil simply because both look silver. Nor does paper on the outside prove a package is paper-only or recyclable. A publicly listed Mylarbag artisan-chocolate flat pouch uses BOPP/PMP822/CPP, gravure printing, and spot UV at 12.7 × 15.3 cm. Those are the published configuration details for that project, not proof that every chocolate product needs that construction or that the complete pack qualifies for a particular recycling collection program. The project page is useful for seeing a real printed flat pouch while your own structure is evaluated.

Temperature and barrier are separate specifications
This distinction deserves its own line in the buying brief. A film can help manage specified moisture or odor exposure while the warehouse, retail display, and shipping route still expose the chocolate to temperature swings. Conversely, placing an item in a cool environment does not fix an unsuitable seal or a paper sleeve touching food without the required contact review. Guittard’s bloom troubleshooting separates possible causes of fat and sugar bloom, including temper, fat migration, humidity, and temperature shocks. A change in appearance should be investigated, not automatically blamed on the bag.
If the product will be shipped to consumers in warm weather, treat insulation, coolants, transit duration, delivery day, and acceptance checks as a separate project. This article establishes the retail unit; the later shipping guide in this series will handle the transit system in detail. A packaging quote should not promise “no melting” solely because the pouch has a barrier layer.
Size the bag with real chocolate, including a one-pound pack
One pound is approximately 454 g of product, but weight does not give you a pouch width, height, or gusset. A pound of small drops, irregular bark, individually wrapped minis, and thick bars occupies different usable space. Even the same pieces can settle differently after filling or transport. The question is not “What standard bag holds one pound?” but “What is the smallest practical bag that holds my actual one-pound sales unit while leaving clean room for closure and label?”
Make a sample set using the actual finished product. Record the piece dimensions or the filled volume at the target net weight. Try at least two candidate internal sizes. Fill each by the intended hand or machine method, then close it by the intended first-seal process. Evaluate the pouch immediately and after normal handling. Measure the usable inside area, because the quoted outer dimensions include side seals, bottom geometry, zipper position, and a top region that should remain free of chocolate.
For an irregular product, take a photograph next to a ruler or record the occupied height after the pieces settle. For a bar, check the corners and orientation as it passes through the mouth. A sample that looks generously sized while empty can become difficult to seal once a stack of bars sits under the jaws. A bag that barely accepts the specified weight can bulge into the print panel or leave no clear spot for a date or lot code.
| Sample check | Record for each candidate | Reject or change when |
|---|---|---|
| Actual fill | Product type, net weight, piece count, and observed occupied space | Target unit will not fit consistently |
| Mouth and insertion | Opening width and clearance around the widest piece | Bar edges scrape or the product catches the rim |
| Clean top area | Fill line, zipper, tear path, and proposed seal band | Chocolate or crumbs reach the first-seal area |
| Filled shape | Front-panel tension, base formation, and room for settling | Bag buckles, tips, or distorts the artwork |
| Finished handling | After closing, case packing, and a representative move | Seal, folds, or corners show damage |
The published Mylarbag 3 oz (85 g) chocolate example has a listed 13 × 21 cm pouch and MATT OPP/white kraft/VMPET/PE structure with digital printing. Its page title calls it a stand-up zipper pouch, while a specification field calls it a three-side-seal flat pouch. That inconsistency needs checking against the sample before the format is repeated as a specification. Neither the 3 oz weight nor those external dimensions establish a universal 3 oz size, and they are certainly not a shortcut for a one-pound pack. See the published project.
Protect the top seal and rehearse the packing operation
The bag maker may deliver a pouch sealed on three sides. The chocolate business still has to fill and close the remaining opening correctly. Decide whether the top seal is made with a hand sealer, a semiautomatic station, or a production line. Request samples in the actual proposed material and thickness, then establish settings on that equipment with real product. A temperature, time, or pressure copied from another film is not a release specification.
Keep fragments, cocoa dust, nut crumbs, decorative coatings, and any product oil away from the sealing area. Place the first seal where the designed sealant surfaces meet; keep it distinct from an optional zipper or consumer tear path. Inspect the seal across its full width, including corners and junctions. Ask your team to agree on what counts as a fold, channel, contamination spot, unsealed end, or unacceptable appearance before the first run. The validation method should match the pack and the quality risk; visual review alone may not be enough for the approved specification.
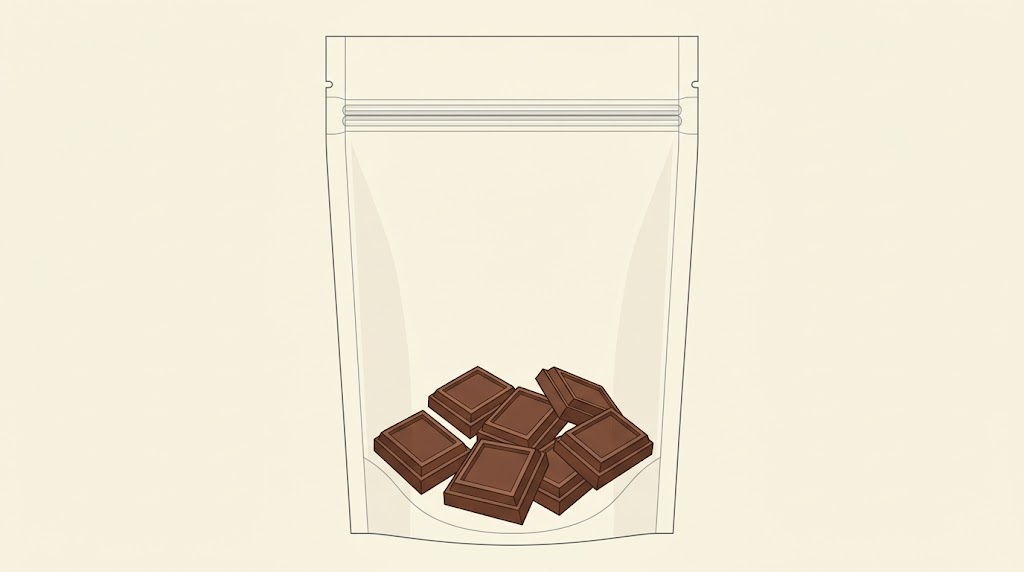
If a pouch is intended to be filled by an outside copacker, send that partner an empty sample, dieline, material and sealing specification, intended fill weight, and trial criteria. Have the copacker confirm opening, feeding, product orientation, seal quality, and coding on the actual line. An attractive bag proof and a successful filled-line sample are two different approvals.
Make the label fit before approving the artwork
For a U.S. retail food, confirm the statement of identity, net quantity of contents, ingredient list, allergen declaration, responsible business information, and nutrition labeling where applicable with the person who owns the food label. The FDA’s Food Labeling Guide explains the main label panels and placement, while its 2025 allergen guidance addresses declaration of major food allergens. Milk, peanuts, tree nuts, wheat, soy, or sesame may matter depending on the actual formulation and manufacturing conditions; the packaging supplier should not guess the allergen panel from the word “chocolate.”
Small makers sometimes assume a small-business nutrition exemption means the whole label is exempt. FDA guidance says any applicable nutrition exemption does not remove other mandatory information such as identity, net quantity, ingredients, and business name/address. Whether an exemption applies must be checked against the current conditions and product claims; it is not a default privilege of handmade chocolate. Read the FDA’s small-business guidance.
In the layout, reserve space for whatever the approved label requires before allocating every panel to an illustration. Keep a legible area for variable information such as a product code or date if your operation uses it. Map each version of the artwork to its own recipe, net weight, and allergen review. A seasonal flavor substitution should trigger an artwork check, not an assumption that the original back panel still describes the product.
For gift sets, decide which pack the consumer receives as the retail sales unit and where all required information will be presented. Do not hide required details under a glued sleeve, a fold, or a label that has to be torn away to read them. A responsible U.S. label reviewer should approve the complete presentation; other destination markets require their own review.
Move from proof to approved filled sample
A screen proof checks layout and content, but it does not tell you whether a piece catches on a seal edge or whether a printed batch code remains readable after packing. Use a sequence that connects the chocolate, the physical package, and the production record:
- Specification review: confirm the actual food-contact layer, format, internal dimensions, print panel, closure, and intended product and market. Keep the version number visible to everyone approving it.
- Empty physical sample: look at the material, opening, gusset or flat construction, print zones, and proposed label placement. Confirm that the supplier’s sample matches the written specification.
- Filled and sealed trial: pack actual product at the target count or net weight on the planned equipment. Record filled dimensions, product handling, clean seal area, and the finished unit’s appearance.
- Sales-unit and carton trial: pack the retail units as they would travel to the shop or customer, including any tray, divider, or shipper. Check how they move and whether the units remain presentable.
- Release records: retain the approved artwork version, sample or photographs, material and sealing information, quality criteria, and an internal way to connect finished units to production lots. Evaluate the actual product’s shelf-life and storage plan through the food business’s own program.

There is no reason to pay for elaborate printing before proving the filled unit. If two seasonal bars use the same outer dimensions but one has protruding inclusions, trial both. If a holiday mix is going into a larger pouch, measure its occupied volume rather than multiplying the small pack’s dimensions. The quickest way to avoid a painful repeat order is to save exactly which physical sample and which artwork version were approved together.
Related projects: what the published specifications actually show
Two published Mylarbag projects illustrate the range of retail units without pretending to be a universal specification. The 12 g matte three-side-seal sachet is listed at 8 × 8.5 cm with MATOPP/VMPET/PE and gravure printing for a Madagascar project. It demonstrates a small single-serve format. The published listing does not provide a test report proving a guaranteed shelf life or protection against melting.
The 3 oz U.S. artisan-chocolate pouch is listed at 13 × 21 cm, with a paper-look laminated structure and digital printing. It demonstrates a different retail scale and appearance. Because the page’s title and format field disagree, a buyer should request the current physical sample and approved drawing before using its bag type as a template. These project pages support the stated configurations and visible packaging; they do not establish a customer’s sales results or the right material for your recipe.
Recommended packaging configuration to request
For a single small solid piece, ask about a flat sachet or similarly close-fitting primary format and send the exact piece dimensions, orientation, and intended closing method. For one craft bar, start with a correctly sized inner wrap or pouch and add a sleeve or carton only for a clear labeling, presentation, or protection reason. For loose multi-serving pieces, compare flat and stand-up pouches with real filled samples; specify a zipper only when the use pattern calls for it and confirm the first-seal location separately. For a one-pound assortment, treat that weight as a fill target for a sample trial, not as a standard bag size.
These are configuration starting points. Mylarbag’s custom chocolate packaging page shows the company’s flexible-pouch formats and links to published chocolate projects. It is the appropriate place to compare a custom flat pouch, a stand-up bag, print finish, and candidate material structure. If your system also needs a rigid box, positioning tray, or active temperature-controlled shipment, source and verify those components with the relevant supplier. A flexible-bag quote cannot by itself cover them.
Before requesting a pouch quote, send a short but complete brief:
| Include in your inquiry | Example of the useful detail |
|---|---|
| Chocolate form and recipe | Bar, bites, inclusions, or filled confection; identify relevant contact concerns |
| Sales unit | Individual piece, bar, count pack, or assortment |
| Fill target and physical sample | Piece dimensions, count or net weight, photos, and a few actual samples if possible |
| Packing method | Hand fill, existing sealer, horizontal wrapper, or copacker line |
| Format preference | Flat pouch, stand-up pouch, rollstock discussion, zipper, tear notch |
| Destination and route | U.S. retail, direct-to-consumer, export, and expected handling |
| Artwork status | Number of SKUs, draft dieline or label, and required variable-code area |
| Requested evidence | Food-contact basis for the intended use, material specification, sample and trial criteria |
The supplier can then quote a candidate pouch specification and sample route for your project. Bring the actual food, packer, label reviewer, and distribution partner into the approval; nobody should infer full fitness from a product photo alone. Contact Mylarbag with your chocolate pouch brief if a flexible-packaging sample or custom pouch quotation is the next useful step.
Frequently asked questions
What is the best packaging for chocolate sold in stores?
It depends on whether the product is a bar, loose pieces, or a fragile filled assortment, and on the way it will be filled and sold. Start with a suitable primary food-contact pack and a closure that passes trials. Add a sleeve, tray, or box when it solves a real display, labeling, or handling requirement. No material name alone makes a package best for every chocolate.
How do I package homemade chocolates for sale?
Define a repeatable retail unit, choose a contact-suitable inner pack, trial it with the actual chocolates, and prepare a label reviewed for your product and sales jurisdiction. Keep a record of the recipe, artwork version, and production lot. A stock pouch with a properly reviewed label can be a starting route; custom printing should follow approval of the product and filled pack.
What size bag holds 1 lb of chocolate?
There is no reliable universal size. One pound is about 454 g, but piece size, shape, void space, arrangement, gusset, and sealing clearance determine the needed internal dimensions. Fill candidate bags with the actual one-pound unit, seal them on your equipment, and check the finished appearance and handling before ordering.
How is chocolate packaged for retail sale?
Typically the maker protects or encloses the chocolate with a suitable primary layer, creates a defined retail unit, closes and labels that unit, and packs units into secondary or shipping packaging as needed. The sequence and equipment differ for an individual bar, a sachet, loose bites, and a boxed assortment. Each format needs an actual filled-pack trial.
Can a paper box touch chocolate directly?
Do not assume so from appearance. Ask for the specific board, coatings, inks, adhesives, and intended contact-use evidence; otherwise put the chocolate in a suitable primary layer before the box. The responsible food business should review the complete finished contact arrangement for the product and market.
Does a high-barrier pouch stop chocolate from melting?
No. A barrier film may be specified for moisture, gas, light, or odor management under defined conditions, but it does not provide active cooling or a guaranteed safe temperature. Storage temperature, loading, route, insulation, and delivery conditions need their own plan. A pouch can still be useful as the primary retail pack within that larger system.
Source notes
- U.S. FDA: Food types and conditions of use for food-contact substances; Food Labeling Guide; Food allergen labeling guidance; Small business nutrition labeling exemption guidance.
- Chocolate handling: Callebaut storage guidance; Guittard bloom troubleshooting.
- Published Mylarbag project records: 12 g sachet, 3 oz artisan pouch, printed flat pouch.