
Dry dog food packaging should be designed around the actual kibble, the route to market, and the way customers will use the pack. A bag that looks right in a mock-up may be a poor choice if it does not fit the fill, the shelf, the packing line, or the information the product must carry. Start with the food and the selling conditions; choose the pouch only after those facts are clear.
This guide is for shelf-stable dry dog food. Fresh, frozen, and raw pet food are different projects: they can involve refrigerated distribution, product-specific food-safety controls, and different packaging validation. A flexible dry-food pouch is not a shortcut around those requirements.
Short answer: How to package dry dog food in 6 steps
- Confirm the product formulation, target market, and the team responsible for label compliance.
- Use the actual dog food kibble to determine pouch format, capacity, and usable print panels.
- Complete sample and carton-fit validation using the real product, not empty bags.
- Weigh, dose, fill, manage headspace, and heat seal on the actual production line.
- Inspect the seal integrity, appearance, batch coding, and shipping readiness.
- Record the approved packaging version and maintain verifiable documentation before starting a full run.
Begin with a packaging brief, not a bag style
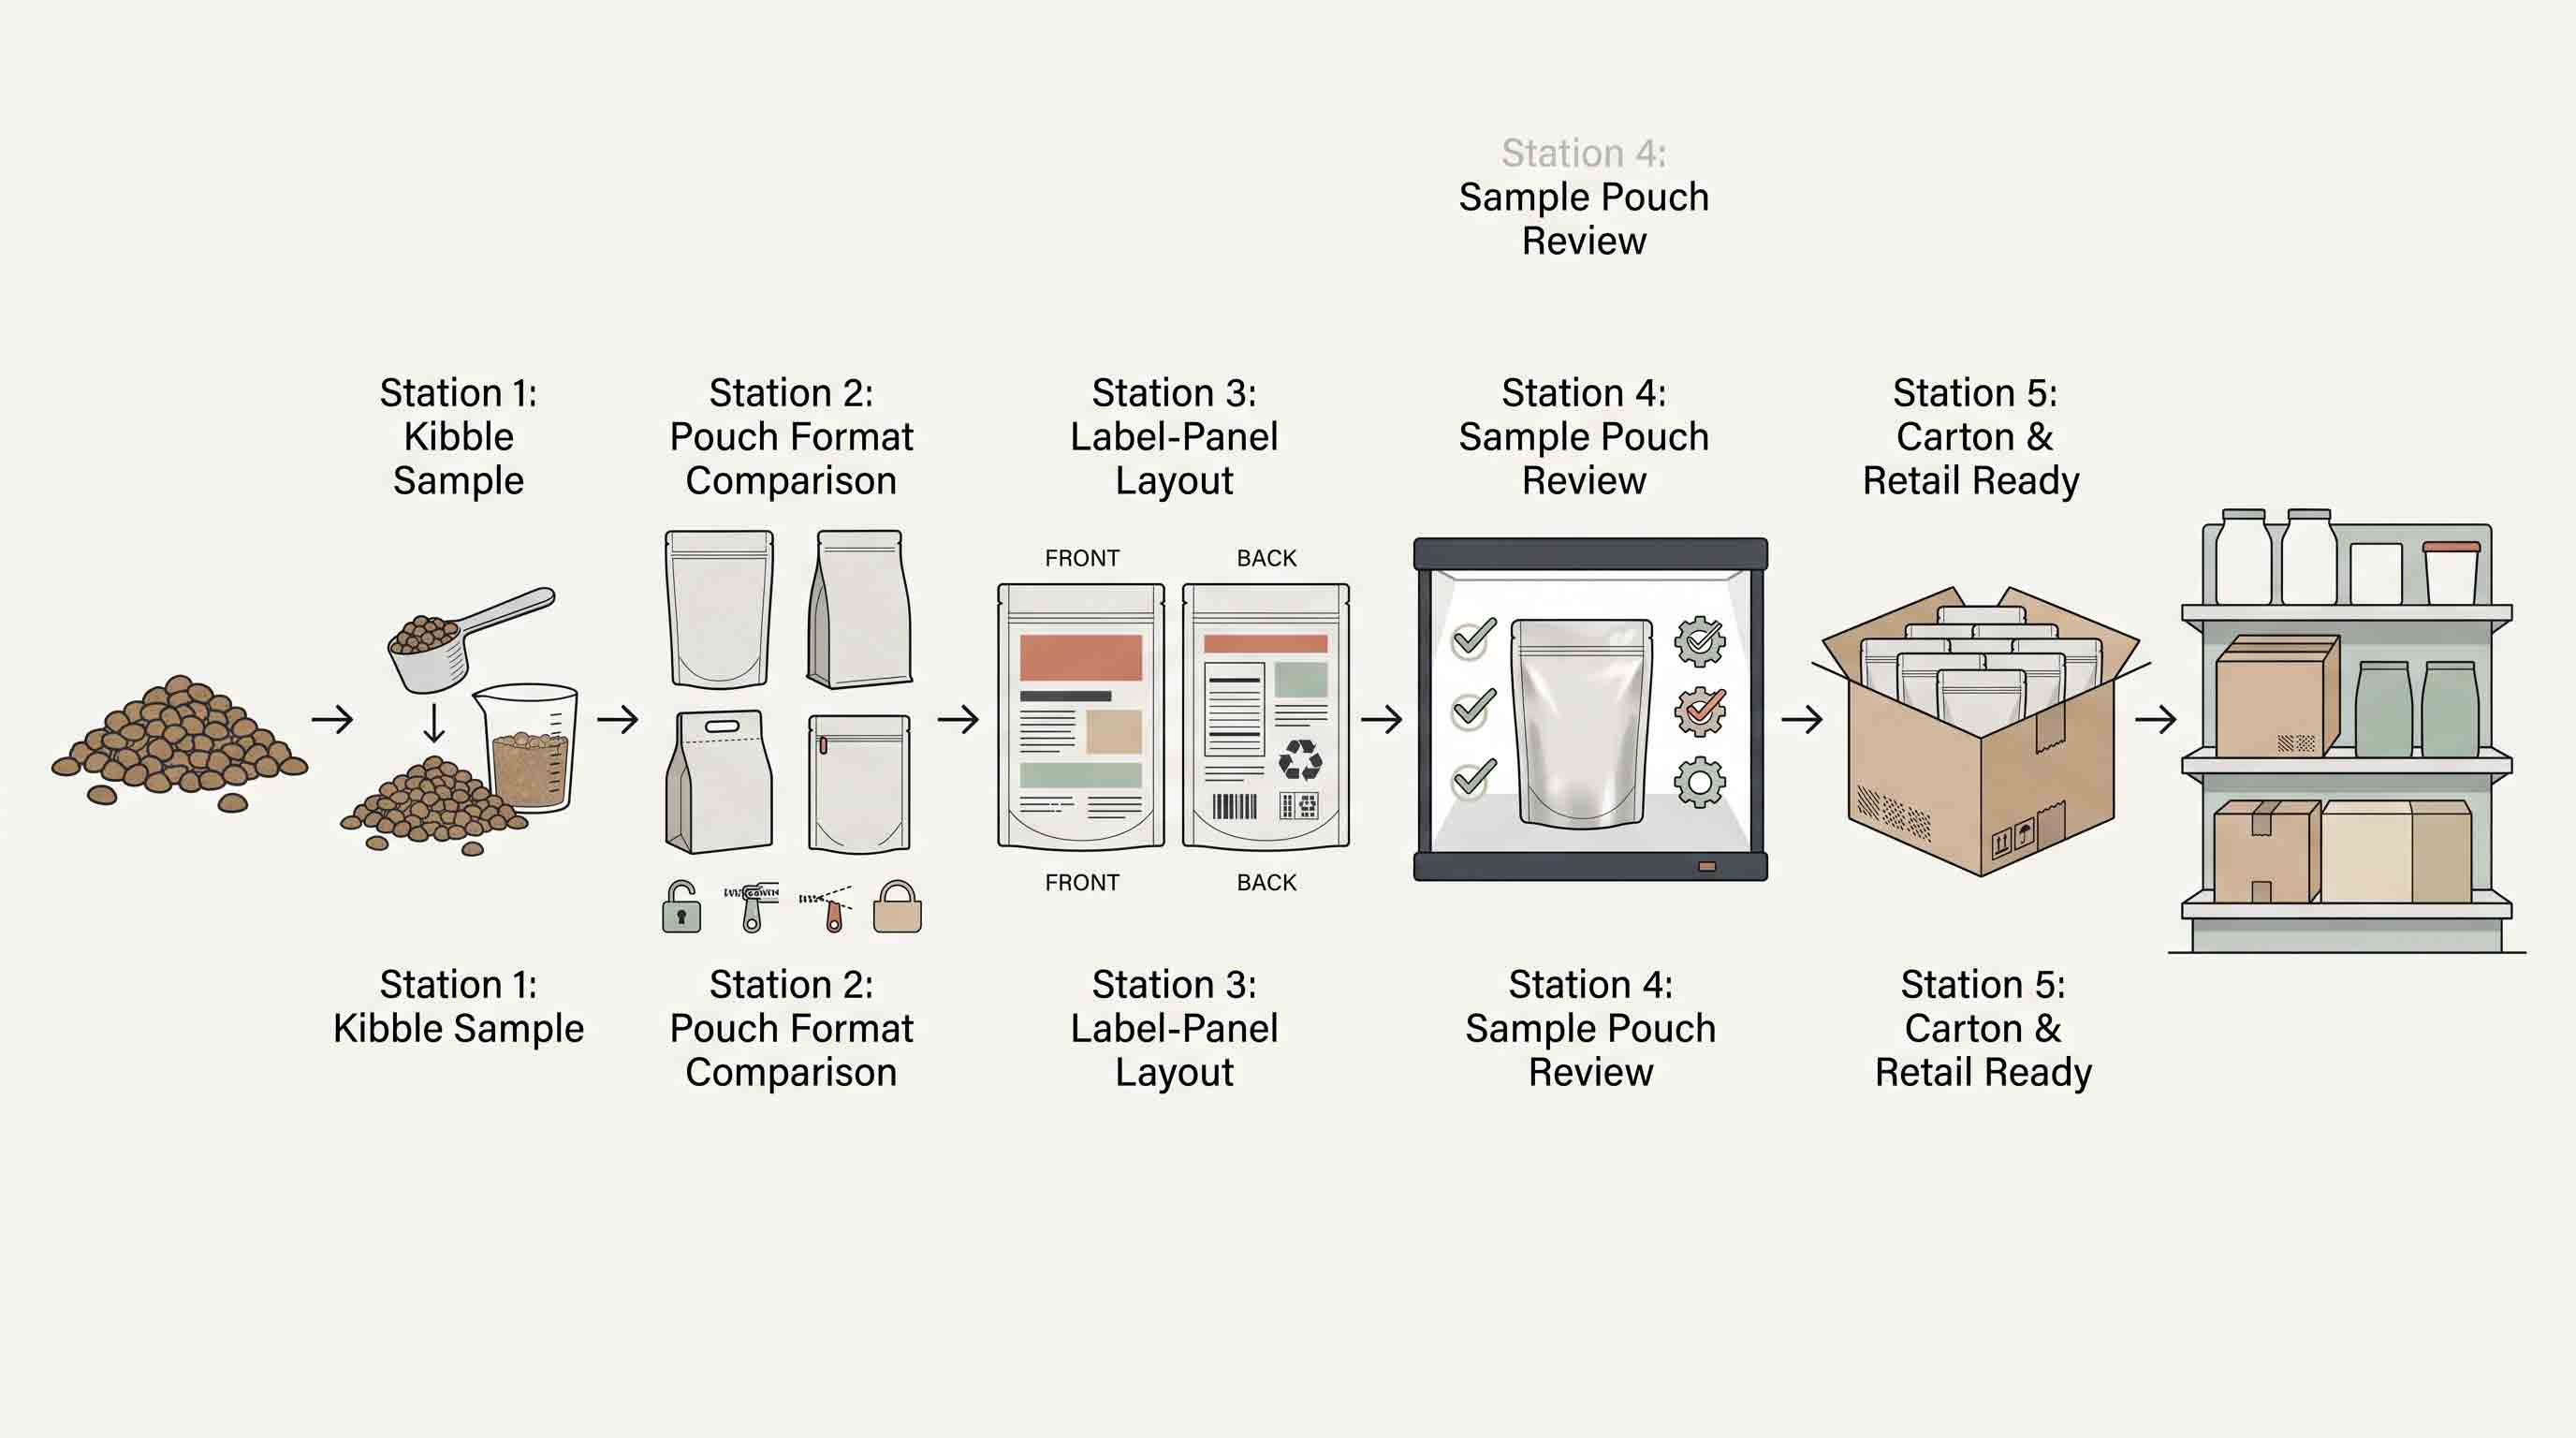
Before a brand requests a quote, it should be able to answer a small set of practical questions. This is more useful than asking for a “premium dog food bag,” because premium can mean very different things to a buyer, a retailer, and a contract packer.
U.S. scope: packaging is one part of the animal-food system
For a U.S. launch, a pouch project must sit inside a wider animal-food process. FDA states that animal food must be safe, produced under sanitary conditions, and truthfully labeled. Its preventive-controls rule also requires covered facilities to use a food-safety plan built around hazard analysis and risk-based preventive controls. Packaging selection supports that system; it does not replace formulation review, production controls, label approval, or product-specific validation.
The brand should identify the food category, target market, and the person responsible for regulatory approval before artwork is released. If the project involves a co-packer, confirm who owns final fill, seal, coding, and release checks. The packaging supplier can provide information about the quoted pouch and sample process, but it should not be asked to certify an entire food product or make the brand’s regulatory decisions.
A one-page approval record
Before production, retain one project record that identifies the product version, target market, approved artwork, selected pouch format, sample observations, and named decision owners. Note which items have been confirmed and which must be rechecked if the formula, fill, market, closure, or claim changes. This gives a brand a practical handover document without turning a packaging article into legal advice.
Sources: FDA: Pet Food; FDA: Preventive Controls for Animal Food.
Choose format by the job the pack must do
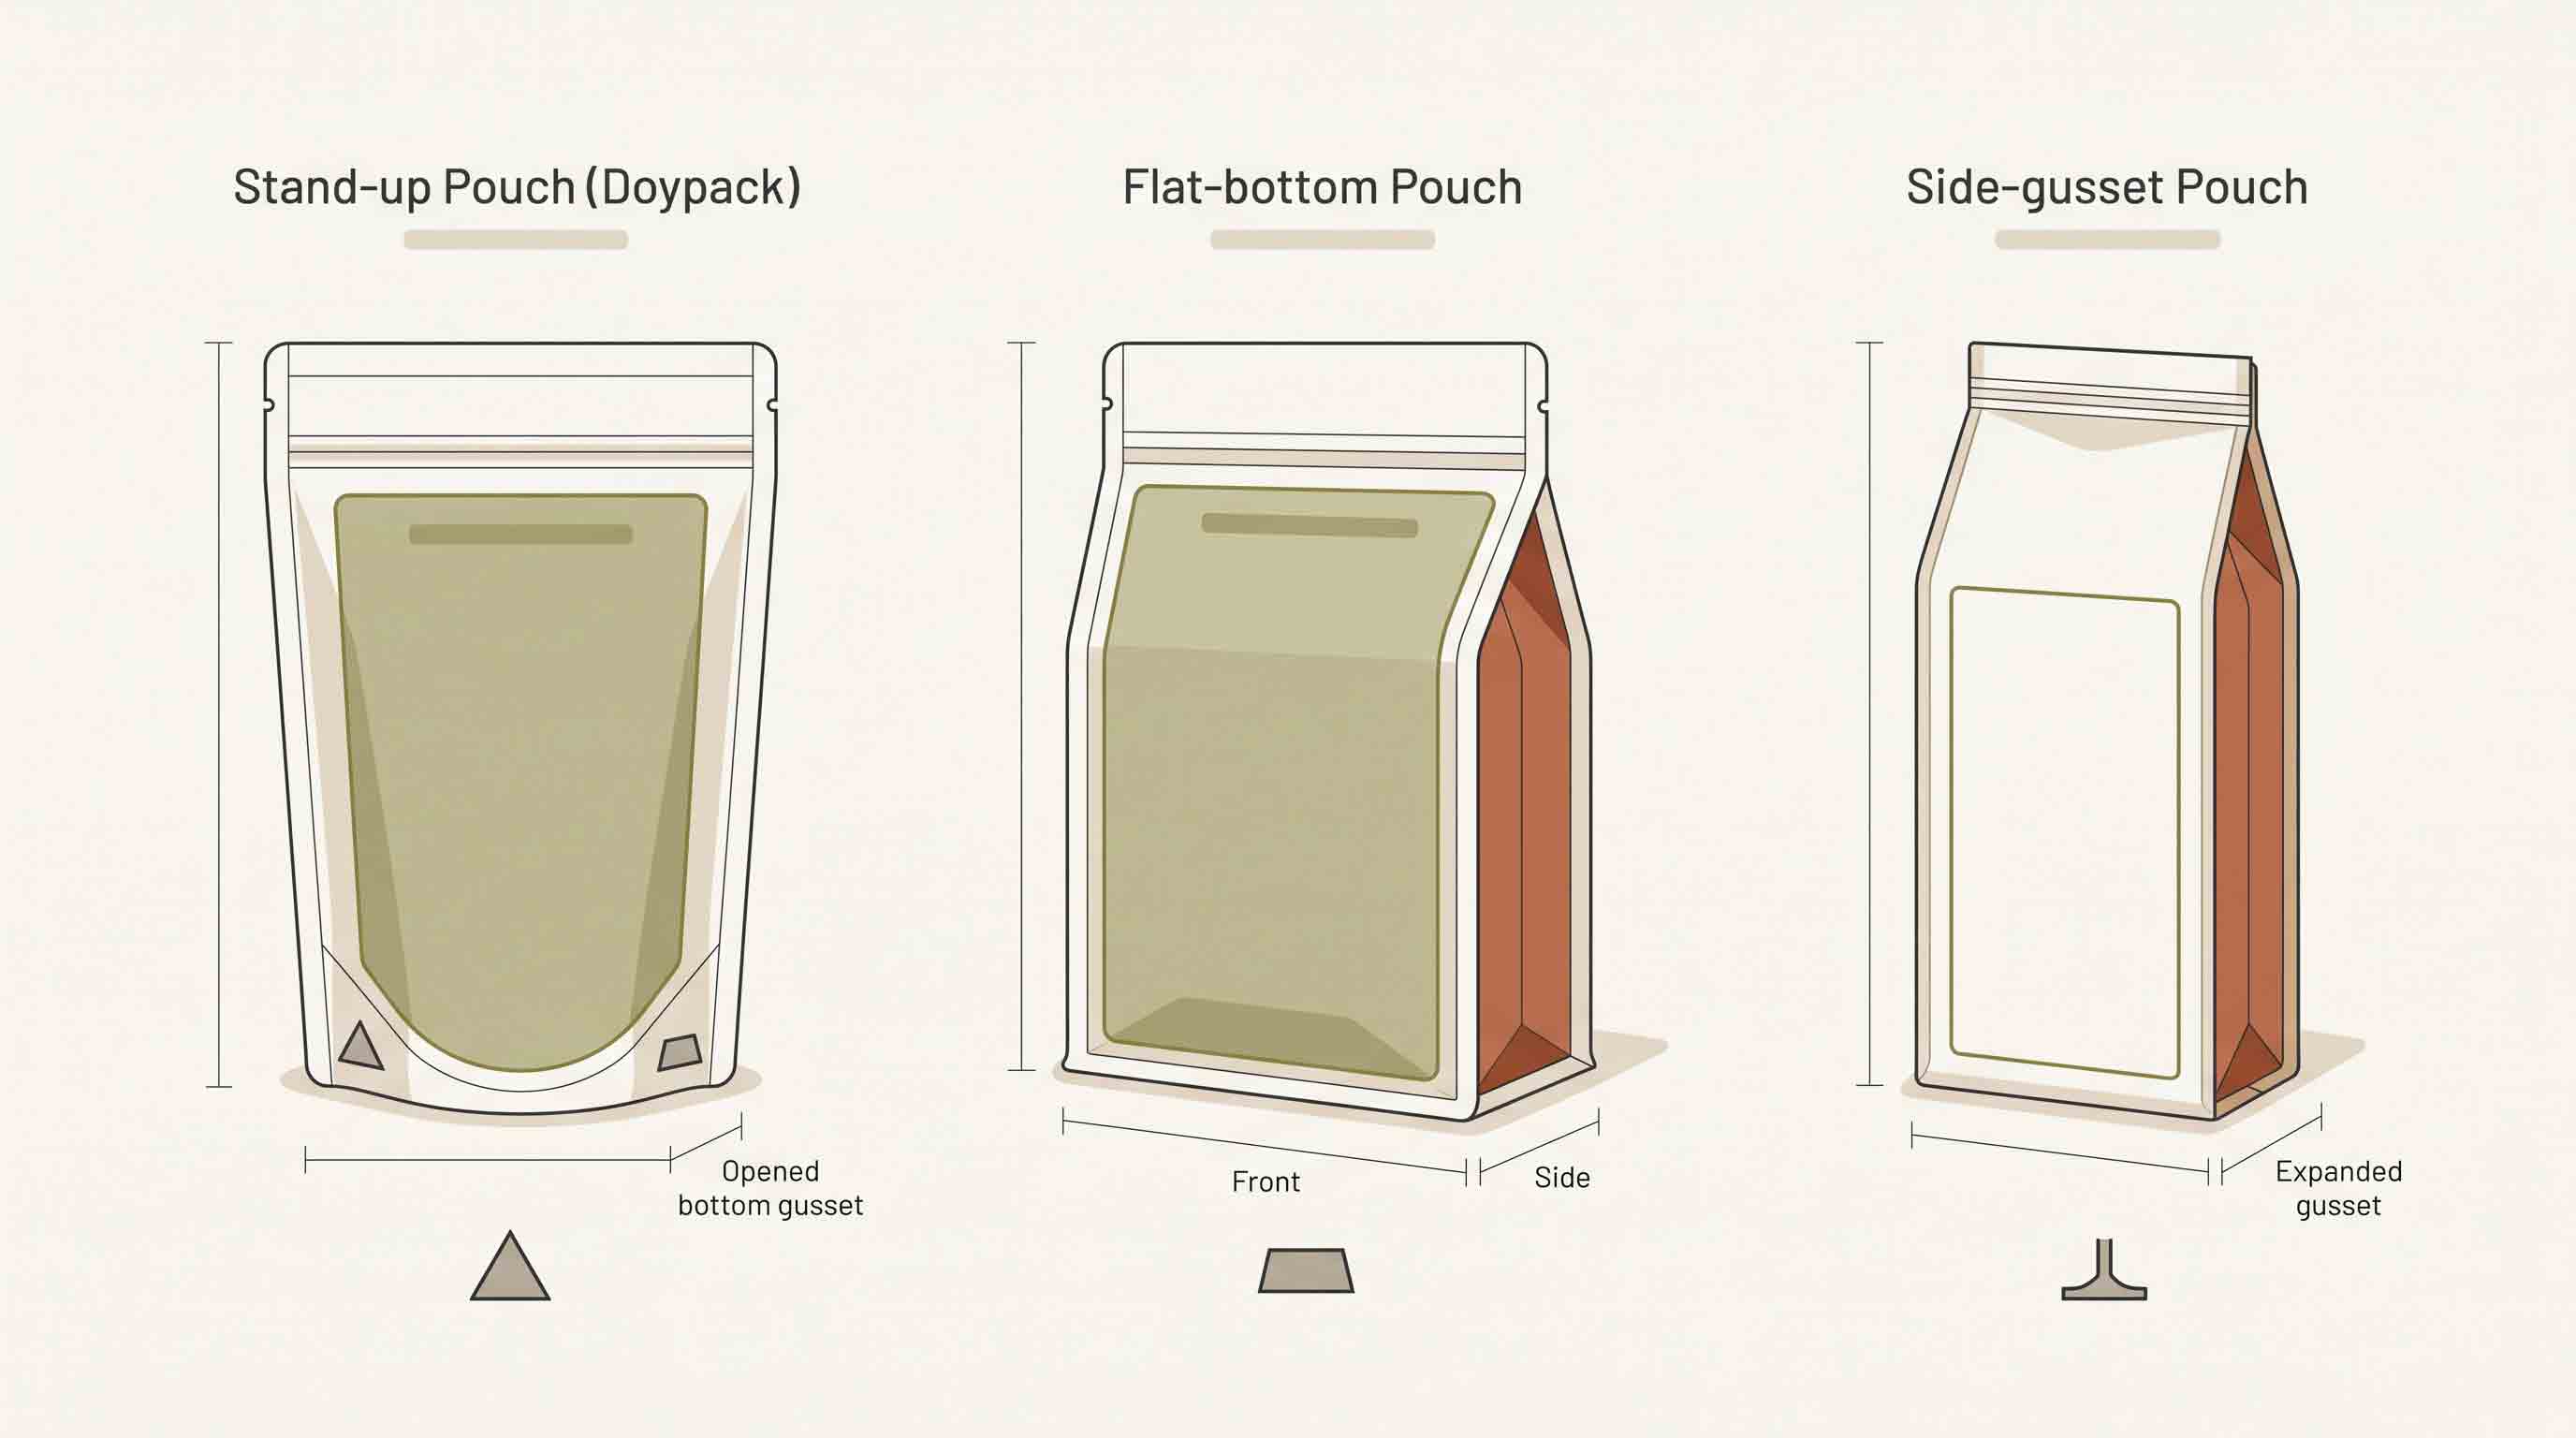
There is no universal best dog food bag. The practical choice depends on fill weight, shelf presentation, and the information that needs to fit on the pack.
Stand-up pouch: a compact format for smaller fills
A stand-up pouch may be a sensible direction for trial packs, smaller retail formats, or products that need a wide front panel. It can be specified with a resealable closure when repeated opening is part of the use case. The right capacity still needs to be sampled with the real kibble: a nominal 8 oz pouch used for dense treats is not a sizing rule for dry food.
Flat-bottom pouch: more panels for a retail pack
For larger dry-food packs, a flat-bottom or box pouch may provide a stable base and multiple printable panels. That can be useful when a pack needs a front story, a feeding panel, ingredient information, a barcode, and opening instructions without crowding one surface. Its dimensions, seal layout, and closure should be agreed from a filled sample rather than from a competitor’s bag.
Side-gusset or quad-seal format: a vertical bulk-pack direction
A side-gusseted pouch may suit a taller format or a project where side panels are useful. It deserves the same checks as any other format: fit, carton configuration, handling, closure access, and the appearance of the pouch after filling. A format is a starting point for specification, not evidence that a particular fill weight will work.
Format decision summary
Brands comparing these directions can review custom dog food and treat packaging options before preparing a product-specific brief.
Materials: specify the requirement, then validate the structure
People often ask whether dog food comes in a “foil bag.” In practice, pet-food packaging can use different layered films, papers, or barrier components depending on the product and the intended performance. The visible surface does not prove the full material structure, its recyclability, or its protection level.
Instead of requesting a generic foil pouch, give the packaging supplier the questions that matter: What has to be protected? What filling and sealing process is used? Is a clear window essential? Which end-of-life claim, if any, is supported in the target market? What testing or documentation does the brand need before launch?
For a project that includes an environmental claim, treat it as a separate design requirement. A material direction may be possible, but it should not be described as recyclable, compostable, or suitable for a specific collection stream until the exact construction, available certification, target market, and collection pathway have been checked.
Allow for labels before artwork starts
Artwork works best when it is built around the packaging format, not forced onto it during prepress. Give the designer a confirmed dieline and keep essential text out of seals, gussets, zipper areas, and any window. Use the final net quantity and declared product information supplied by the brand. Do not invent feeding, storage, nutrition, health, or sustainability claims simply to fill open space.
For a new product, keep a version-controlled artwork file and approve one production-ready PDF. Flavour variants should have a clear system for colour, product name, barcode, and variable information. That makes later additions easier without requiring a redesign of the whole pack family.
Plan panels as working space, not decoration
A useful packaging layout starts by reserving space for information that has to remain legible once the pouch is filled. On a flexible pack, the most attractive panel is not always the most practical panel. Gussets move, seals occupy area, windows interrupt print, and a pack can curve or crease in a customer’s hand. The design team should therefore mark three categories on the dieline before styling begins:
The answer to a crowded design is not to reduce type until it is barely readable. It may be to change the pack format, adjust the fill, reorganise the information hierarchy, or use a secondary carton where appropriate. The brand should not make that decision after plates, proofs, or a large digital run have been approved.
Keep regulatory and marketing copy separate in the review process
The same person should not be asked to make all decisions from a visual proof. A practical review sequence is: the brand confirms its commercial copy; the appropriate regulatory reviewer confirms the required product information for the target market; the packaging team confirms the useable printable area; and the prepress proof confirms that the approved artwork matches the dieline. Each reviewer is looking for something different. Combining the sign-off into a vague “looks good” approval creates avoidable risk.
For multi-market packs, do not assume a U.S. panel can simply be translated and used elsewhere. Requirements and permitted wording can differ. Build a version system early and give each country or language variation its own final artwork record.
Match the pouch to the filling and sealing operation
An empty pouch is only half of a packaging project. The chosen format has to work with the operation that will fill and close it. Before settling on a pouch, document whether filling is manual, semi-automatic, or automated; whether the product is weighed or volumetrically dosed; where the pack is heat sealed; and how the line handles reclose features, tear notches, and headspace.
These questions do not require the brand to become a packaging engineer. They simply prevent the most common disconnect: artwork and a pouch are chosen first, while the filling operation is treated as a detail to solve later.
Headspace deserves a product-specific decision
Headspace is the space between the product and the final closure. Too little may make filling and sealing difficult; too much may make a pouch look underfilled or unstable. There is no universal target because the answer depends on the product, fill method, pouch shape, and what the customer sees when opening it. Evaluate headspace on actual filled samples, then record the agreed condition in the product’s packaging specification.
Define what “resealable” means for this project
Some consumer packs are opened once and used quickly; others are opened repeatedly over weeks. A closure can be an important usability feature, but the customer experience depends on where it sits, how the opening seal is removed, whether product dust or oil reaches it, and whether the customer can close it without forcing the pouch flat. Test the first opening and several ordinary reclose cycles with the product. Describe the result as a project observation, not a permanent performance promise, unless the product and pack have been validated for a defined claim.
From Empty Pouch to Finished Pack
Once the pouch and filling method are confirmed, actual packaging is a sequence of controlled steps. A brand should not assume that buying a bag finishes the job.
- Confirm the approved pouch: Verify that the empty bag matches the approved version, current artwork revision, and intended product.
- Fill the product: Weigh or dose the actual kibble into the pouch using the confirmed method.
- Manage headspace: Keep enough clear space so the bag seals cleanly without product dust compromising the seal area.
- Heat seal: Apply the final seal using a process that has been validated for the specific pouch material and filling line. Generic machine settings are not a guarantee.
- Apply batch coding: Add dates, lot numbers, or required traceability information in a legible format.
- Inspect the result: Check seal appearance, net content, packed shape, text readability, and how the pouches fit inside their shipping carton.
- Retain records: Keep a sample of the filled product and a traceable approval record before authorising a full production run.
Specific machine settings, temperatures, speeds, and inspection criteria must be validated using the actual product, material, and equipment. There are no universal parameters that apply to every dog food bag.
Plan for e-commerce and retail as separate moments
Many pet-food brands sell through more than one channel. A pack that presents well on a shelf can still need a different carton configuration for e-commerce, while an e-commerce-first pack still has to arrive looking intentional if a customer places it on a kitchen shelf. Discuss both journeys.
For retail, look at shelf footprint, facings, readability at ordinary viewing distance, barcode scanning, and how the pack stands after partial use. For e-commerce, look at the outer shipper, movement inside the carton, whether the pack is likely to be compressed, and how a customer experiences the product on first opening. Neither route proves the other is covered.
Packaging note: a published dog-treat project is a reference, not a template
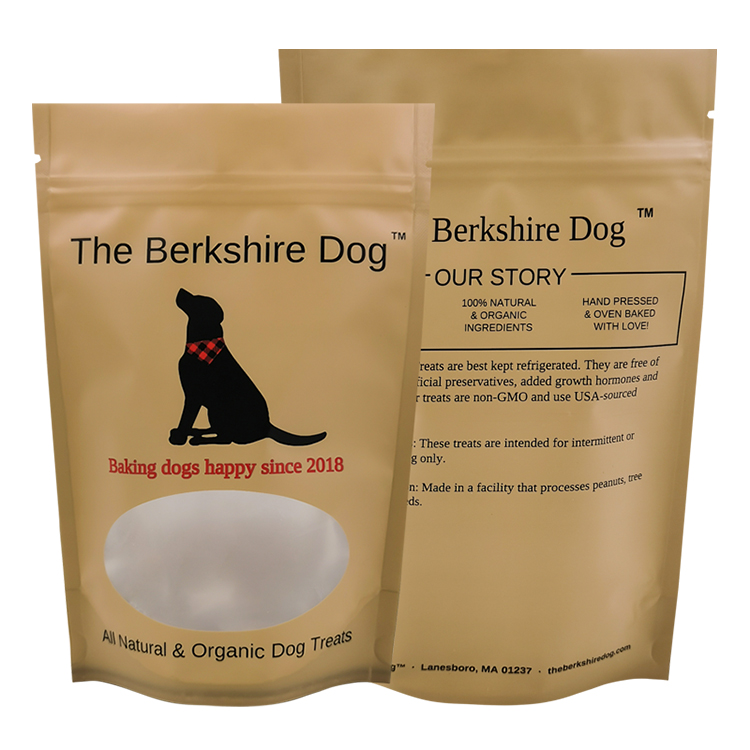
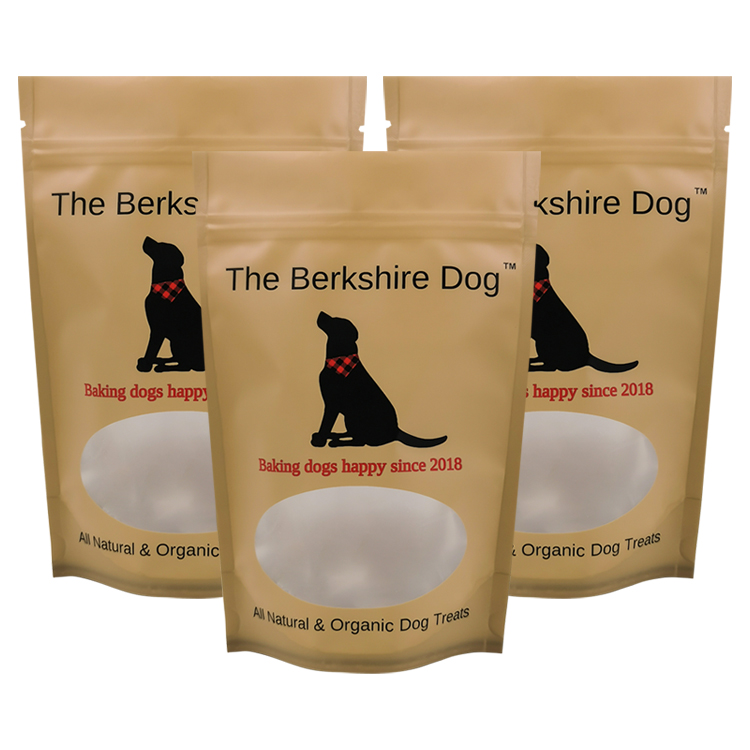
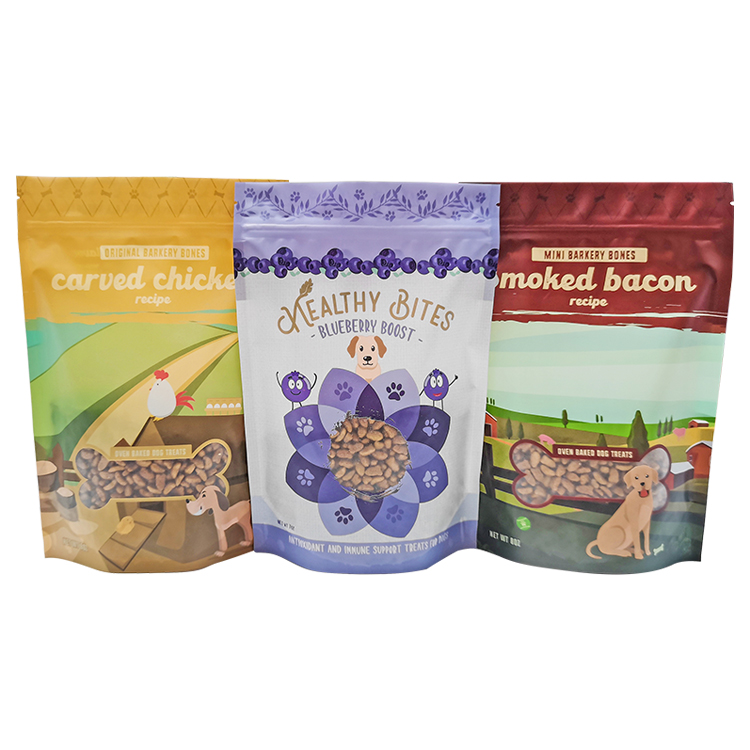
Mylarbag’s Pet Food & Treats collection includes published pouch projects. The recorded examples are useful visual references to observe format choices—such as a printed stand-up pouch, an integrated clear window, or how front and back panels are laid out for artwork. They should not be described as proof that a new dry dog-food project will have the same storage outcome, product fit, or market result. A different kibble, fill size, and route to market can change the final specification substantially.
A staged first-order workflow
The first custom run becomes easier when it is treated as a sequence of practical decisions:
- Define the product and target market.
- Prepare a concise pack brief.
- Review format directions.
- Approve a dieline before final design.
- Sample with real product.
- Start production with a documented handover.
This process is deliberately less dramatic than choosing a bag by a single product photograph. It is also more likely to produce a pack that the brand can reorder, explain to a contract packer, and adapt when it adds a new recipe.
Questions to ask before requesting a custom-pouch quote
An informed inquiry saves time for both sides. The following questions also help a new brand recognise what it does not yet know:
- Is the product dry, shelf-stable kibble, and what is the net fill for each SKU?
- Can the project team provide a representative sample or a confirmed bulk-density measurement?
- Where will the product be sold first, and which markets are planned next?
- Is the pack primarily displayed upright, stacked, hung, or delivered in a shipper?
- Does the customer need repeated reclose use, or is the pack intended for a short consumption period?
- Which information must appear on pack, and who owns final regulatory approval?
- Are any material, environmental, or testing requests already defined in writing?
- Is the artwork ready, in progress, or still at concept stage?
- What date, order volume, and sample process does the brand need to plan around?
Questions without an answer are not a reason to guess. Mark them as open items and close them before a print approval is issued.
Sample the real product before committing to a run
A sensible sample review is not only a print-colour check. Fill the pouch with the actual kibble, close it using the intended process, and inspect it as a customer would. Record the filled dimensions, headspace, seal appearance, opening experience, reclose use, fit in the intended shipper, and any visible stress points. Where a project needs performance validation, agree the appropriate protocol with the relevant packaging and product teams rather than assuming that a stock result applies.
This is also the right time to test the panel layout. Put the actual label copy, barcode, and handling instructions on the sample. A panel that appears large in a flat digital file can become difficult to read once the bag is filled.
Recommended packaging configuration
For a dry dog-food brand preparing its first custom project, start with a filled-product sample and evaluate a stand-up, flat-bottom, or side-gusset format against the intended retail and shipping use. A resealable closure and a material structure can be quoted once the product, fill, target market, and validation needs are known. The dog food and treat packaging page shows the relevant pouch directions and should be the next step for a custom brief.
FAQ
How is dog food packaged for retail sale?
Dry dog food is commonly packed in a format chosen for the real fill, selling channel, label area, and opening use. The production process and pack construction should be confirmed for the specific product; the phrase “dog food packaging” does not identify one universal bag.
Can homemade dog food be sold in a custom pouch?
Packaging is only one part of selling a pet-food product. The food formulation, facility requirements, labeling, and market rules must be assessed for the country or state where it will be sold. A pouch supplier can quote packaging after those requirements and the product format are clear.
What should a dog-food brand ask for first?
Ask for a sample review based on the actual kibble, a confirmed dieline, and a quote that states the format, size, material direction, closure, printing method, and any project-specific validation steps.
How do I choose a dog food bag size?
Base the bag size on a physical test using the real kibble volume, not just the stated net weight. A packaging supplier can help identify appropriate dimensions after testing how much space the specific product needs to allow for a clean, secure seal.
Does dry dog food need a resealable closure?
A resealable closure is often useful for larger packs that take time to consume, but it is not strictly required for all products. The decision should reflect the expected consumption period and whether customers typically store the food in the original bag or transfer it to a rigid container.
What should be checked after a dog food pouch is filled?
After filling, check the seal integrity, printed batch or date codes, overall bag shape, headspace, and how well the finished packs fit inside their intended shipping carton. These steps confirm that the pouch works as a system on the production line.
Final launch review
Before approving a first production order, hold one concise review with the people who own product, artwork, filling, and sales. Put the filled sample beside the approved proof. Confirm that the product in the sample matches the current formula and target fill; that the label content belongs to the target market; that the customer can open and use the pouch as intended; and that the carton and shipping assumptions are current.
For a young brand, this process is also a useful way to decide what not to claim. If a storage period, material outcome, environmental statement, or handling result has not been established for the finished product and pack, leave it out of marketing copy until it can be supported. A clear, accurately scoped package usually creates more confidence than a pouch covered with broad promises.
Ultimately, a brand should rely on verified physical samples, finalized artwork, actual production line conditions, and targeted market requirements as the foundation for mass production.
CTA: Planning a dry dog-food pouch? Share your fill weight, target market, and pack goals with Mylarbag for a project-specific discussion.