
To seal candy bags, first confirm that the bag has surfaces suitable for your sealing method. Keep the intended seal area free of candy, align it in compatible equipment, and use the material and machine suppliers' instructions to establish a tested setting. Allow the required cooling stage before handling. A zipper recloses an opened pouch; it does not replace a specified initial heat seal or restore unopened shelf life.
For a candy business, the useful result is a closure that can be produced consistently, checked, and traced to the correct packaging lot. For someone closing an opened bag at home, the task is simpler: use the existing closure properly and follow the candy manufacturer's storage directions.
This guide covers ordinary candy pouches and clear bags, with US-facing food-contact documentation discussed where relevant. Equipment and material references were checked in September 2026. It does not prescribe a universal temperature, heating time, or pressure, and it does not replace the operating instructions for your machine.
Decide whether you are sealing a new pack or closing an opened one
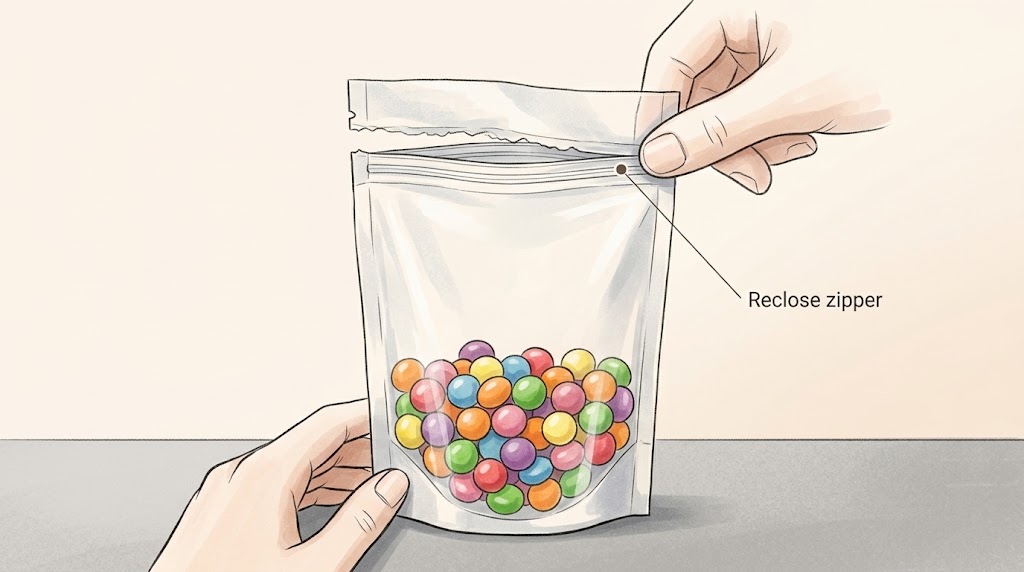
Start with the condition of the bag. An empty pouch supplied for filling may have an open top that needs a final seal. An opened retail pouch may have a reusable zipper below the part that was torn away. A simple wrapper may have neither a zipper nor enough undamaged material for another heat seal.
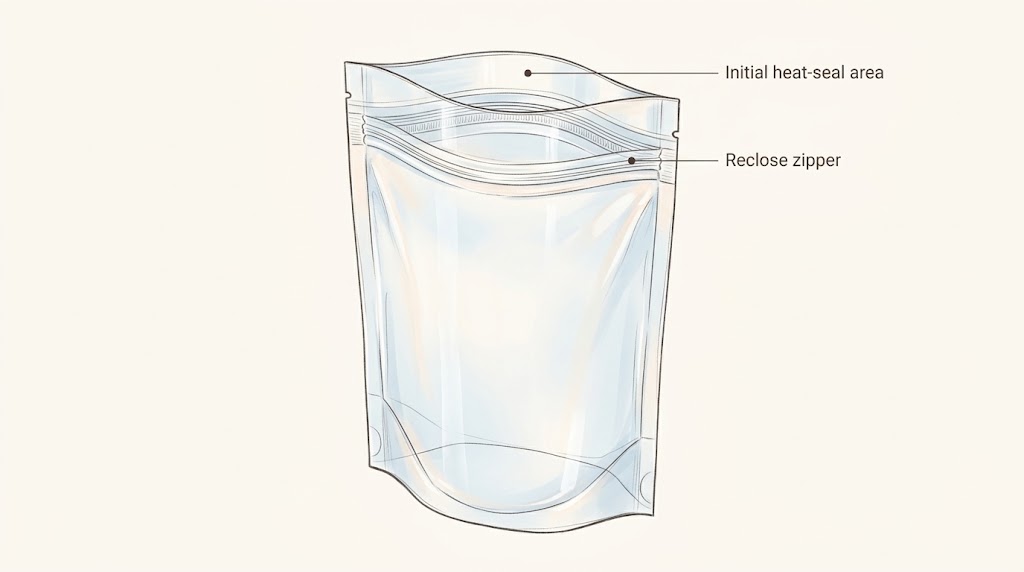
On a typical top-filled zipper pouch, the initial seal and the zipper occupy separate positions. The packer closes the designated sealing strip after filling. The consumer later removes the opening strip and uses the zipper. The exact arrangement belongs on the bag drawing, particularly when tear notches or a display hole share the top area.
A zipper can appear shut while a small section remains disengaged. Conversely, the zipper may work correctly while the required initial top seal is missing. Check these features separately during packaging approval rather than using “resealable” as a description of the entire closure system.
For new orders, discuss candy bags with the closure your packing line needs before approving the dimensions. A bag can fit the portion yet leave too little usable space for the filling and sealing operation.
Identify the sealing surface, not just the appearance
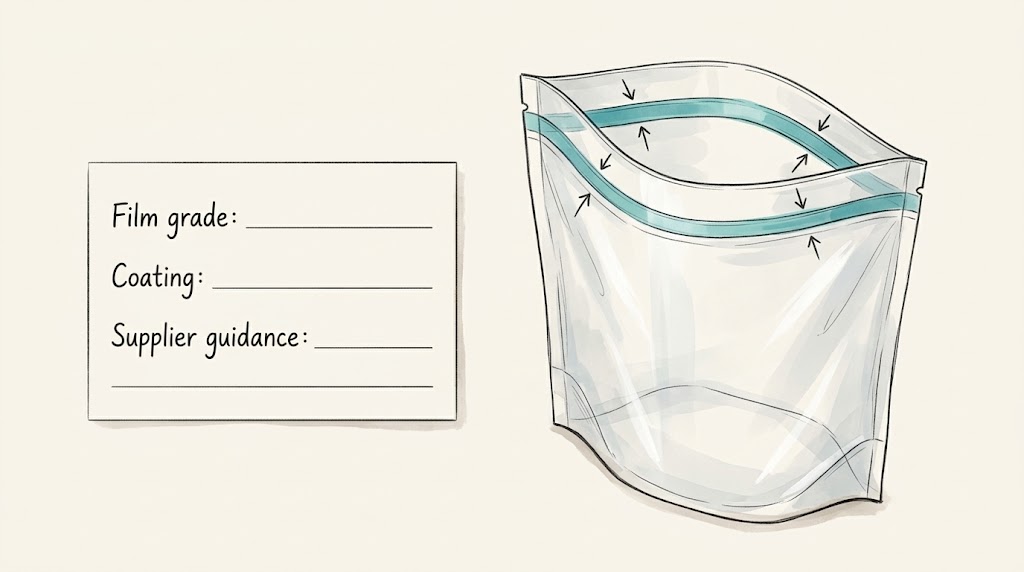
The material against the opposite bag wall at the closure determines what needs to join. An outer paper layer, metallic appearance, or matte finish does not identify that surface. Ask the supplier for the complete construction and the intended sealing interface, together with the relevant handling instructions.
For a laminated pouch, the outer layer may mainly carry printing or support the structure while an inner layer provides the sealing surface. A transparent single-web bag may use a specifically sealable film or coating. Neither the word plastic nor the word clear gives enough information to choose a setting.
Polypropylene films illustrate the problem with broad names. Toray offers packaging films with different sealing characteristics, including heat-sealable and cold-sealable options. Its range is evidence that the specific product matters; it is not evidence that an unidentified candy bag can use either process. Toray packaging-film range.
Keep sealing compatibility separate from suitability for contact with candy. A material may form a visible seam without the documentation needed for its intended food use. FDA guidance ties food-contact status to the substances involved and the applicable conditions. Request documentation for the proposed construction and use, rather than relying on a generic food-grade logo. FDA food-contact material guidance.
When samples arrive, retain their identifying labels. Write the supplier's sample reference beside the trial record, including any change in thickness, inner film, or coating. Two plain sample bags can look identical on a workbench while belonging to different specifications.
How to seal cellophane candy bags
First ask what the seller means by cellophane. Genuine cellophane is regenerated cellulose film, while “cello” is sometimes used informally for other clear packaging. The practical question is whether the exact bag has a heat-sealable surface and which surfaces must meet.
Futamura's Cellophane range includes lacquered films described as heat sealable on both sides. That is a property of identified products, not permission to heat seal every cellulose sheet or transparent gift bag. Obtain the grade information and applicable sealing guidance before choosing equipment. Futamura Cellophane films.
If the seller cannot identify the material or confirm sealability, choose a bag with a documented closure method. A ribbon or tie may suit a decorative presentation, but it should not be treated as equivalent to a validated primary package. Increasing the heat is not a substitute for finding out what you are sealing.
Match the equipment to the actual bag
An impulse sealer applies heat during an operating cycle. Some models use a heating-time dial, while other impulse machines control temperature directly. A constant-heat machine maintains heated sealing components. A continuous band sealer moves the bag opening through its sealing path. These descriptions do not establish compatibility with every film.
Fuji Impulse's P-200 documentation, for example, describes a heating-time adjustment and separate heating and cooling indications. Its OPL series uses temperature control. This difference matters when a colleague says a bag worked at “setting four”: that number needs the machine model and control description before it means anything useful. Fuji P-200, Fuji OPL series.
Check the usable sealing length against the complete mouth of the bag. Also confirm the resulting seal width and whether the equipment can accommodate the material stack at folds or seams. Do not confuse the length of the sealing bar with the width of the bonded strip it creates.
Folded constructions deserve particular attention. Fuji's gusset-pouch equipment description distinguishes multiple overlapping sheets and heating from both sides. The purchasing lesson is to evaluate the thickest region the jaws actually encounter, not merely one wall of the bag. This does not mean every candy pouch requires that machine type. Fuji gusset-pouch sealer.
For continuous band equipment, assess how the filled pouch is supported and presented to the infeed. Horizontal and vertical arrangements handle bags differently. Speed, temperature, and feeding position belong in the setup discussion; a bag should not be pulled through by hand to compensate for poor alignment. Sealer Sales band-sealer documentation.
Ask an equipment supplier to evaluate representative bag samples before purchasing. Include the filling weight and a photograph of the intended sealing area. A demonstration with an unrelated thin film answers less than a trial using your actual pouch construction.
How to heat seal candy bags: a controlled working sequence
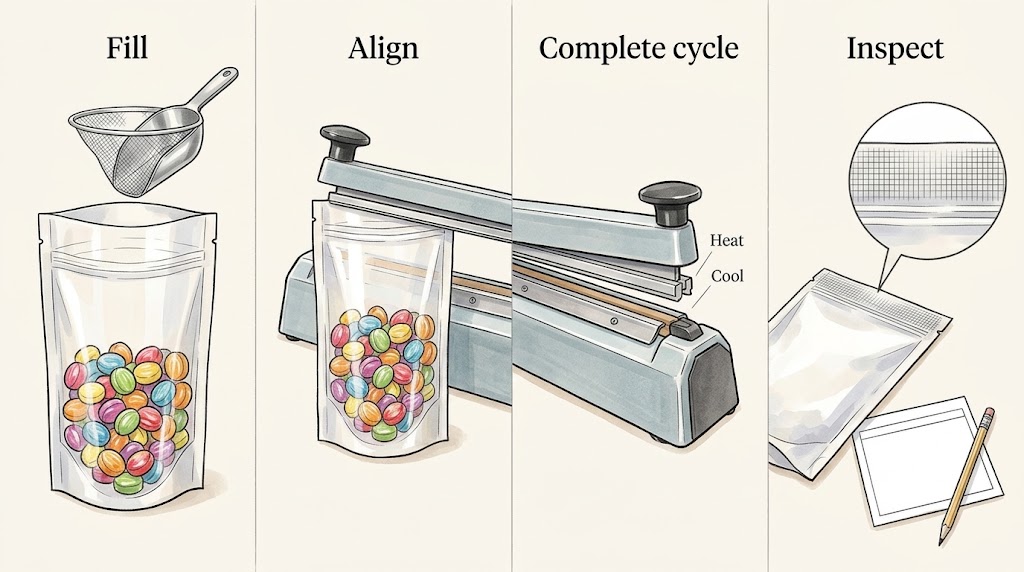
The following sequence is a framework for planning a trial with a compatible bag and machine. Use the equipment's actual operating and safety instructions for activation, adjustment, cleaning, and maintenance. Keep fingers clear of closing jaws and hot surfaces; isolate and cool equipment before servicing it as instructed.
Prepare the bag, candy, and work area
Identify the bag lot and the product being packed. Check empty bags for damage around the intended closure, including torn edges or distorted openings. Set aside questionable bags so they do not become mixed with the samples used to establish the process.
Arrange the filling station so candy reaches the body of the pouch without being dragged across the sealing strip. Sugar dust, oily residues, broken pieces, and inner-wrapper ends are all things to look for. If filling repeatedly soils the top area, change the filling method or bag layout rather than accepting contamination as normal.
The candy should be in the condition specified by your established packing process. Do not improvise by sealing a still-changing product and assuming the package will correct it. For recipes or products requiring special cooling or storage, settle those conditions before evaluating the bag closure.
Fill without consuming the sealing space
Use the intended commercial portion for a filled trial. Leave the designated closure area available and check that the bag walls can come together without forcing product upward. There is no single headspace measurement that works for every bag, candy shape, and machine.
A portion of large wrapped sweets may interfere with the mouth differently from the same weight of small hard candies. Test the presentation that will actually be sold, including any inner wraps. Record difficulty loading or flattening the mouth as a packaging issue, even if the bag technically contains the required weight.
Present a clean, flat sealing area
Check both contacting surfaces where accessible. Follow your packing procedure for a contaminated bag; do not casually add water, solvents, or cleaning agents inside a food pouch to rescue it. A clean replacement is often easier to evaluate than a wiped sample with unknown residue.
Bring the opening into the specified position without folds running through the intended seal. Keep the zipper profile, tear features, and any display hole out of the sealing path unless the approved drawing explicitly accounts for them. Support the filled bag so its weight does not drag the mouth out of alignment.
Run the complete specified cycle
Use the starting conditions agreed with the material and equipment suppliers. On a timer-controlled machine, record the timer setting as such. On a temperature-controlled machine, record the temperature setting and relevant cycle conditions. Avoid translating an arbitrary dial number into degrees.
Respect the cooling stage specified for that model. The end of heating is not necessarily the end of the cycle. Fuji's P-200 description explicitly distinguishes its heating indication from cooling and completion, illustrating why the machine's sequence matters. Do not lift the jaws early merely to increase the number of bags packed.
Inspect and identify the resulting sample
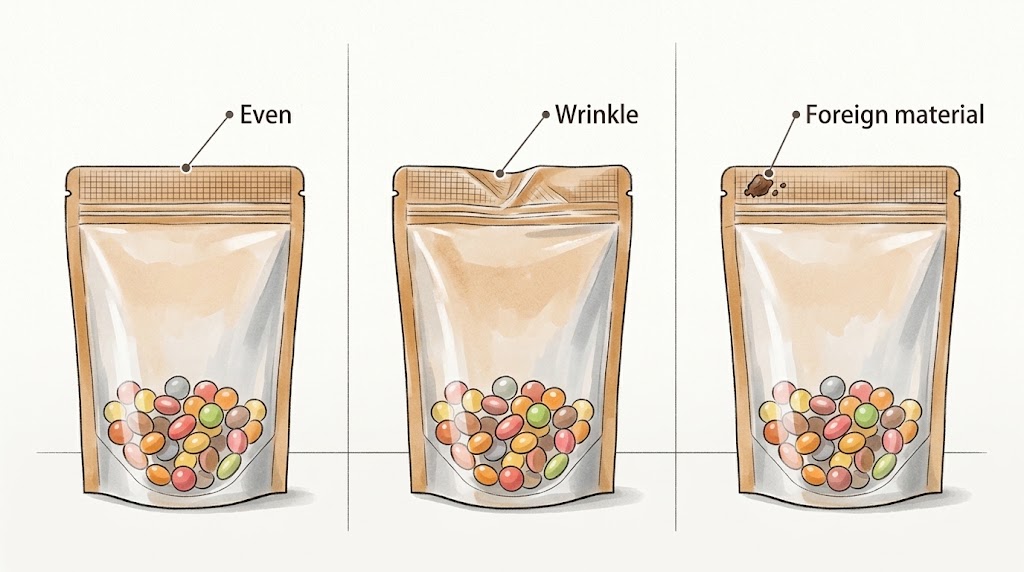
Allow the sample to reach the condition required by your inspection procedure. Look across the full seal, including the ends and any thickness transitions. Note folds, trapped product, unjoined areas, holes, or visible distortion rather than writing only “good” or “bad.”
Label the sample with its trial reference and keep it separate from saleable stock. If you change a setting, start a new record. This makes it possible to connect a physical sample with the conditions that produced it instead of trying to remember which bag came first.
Establish a repeatable setting and keep a useful record
A supplier's starting recommendation is the beginning of a trial, not the finished approval. Your actual equipment, bag construction, product presentation, and operating pace need to work together. Agree what counts as acceptable before choosing the setting that looks best.
Begin with identified empty bags where the suppliers consider that appropriate, then include filled packs under representative conditions. An empty sample helps examine the joining operation without product interference. A filled sample adds the practical effects of loading, support, and handling. Keep those two purposes distinct in the record.
For initial troubleshooting, change one identified factor at a time within the suppliers' permitted range. Keep the remaining conditions steady enough to interpret the comparison. This is a practical way to investigate a problem, not a substitute for a formal process-validation plan where one is needed.
Repeat the agreed checks during a representative run. Consider startup, a normal pause and restart, and the sustained pace expected in production. One successful bag made slowly does not answer whether the same arrangement works when the operator is filling and presenting bags repeatedly.
Separate a displayed setting from a measured process value. If temperature verification is required, use the equipment maker's procedure and suitable measurement method. Do not place improvised probes in moving or closing parts. The record should make clear whether it contains a controller setting, a timer position, or an independently measured value.
Retain an approved reference sample when practical, but also retain the acceptance criteria. A reference bag helps explain appearance; it cannot replace the written material identity or the test results. Revisit the setup after relevant changes, such as a different film specification, sealing element, machine, or bag design.
Troubleshoot the pattern before adding more heat
When a seal fails, pause and identify the affected product. Compare where the defect appears, whether it repeats, and what changed before it started. Treat the following table as an inspection order, not a diagnosis from a photograph.
Sealer Sales identifies worn sealing components, residue, incorrect settings, and insufficient cooling among possible contributors to weak or inconsistent impulse seals. These are maintenance and process checks; they do not justify dismantling an unfamiliar machine during packing. Use the manufacturer's service instructions and approved replacement parts. Impulse-sealer troubleshooting reference.
Preserve a few identified examples of a recurring defect for the supplier or equipment technician. Include a wider photograph showing the whole top of the bag and a closer view of the problem. Add the machine model, bag reference, and recent changes. A cropped image with the message “does not seal” leaves the most useful questions unanswered.
Keep suspect filled packs on hold until your responsible quality person decides their disposition. Adding a second line of heat can consume opening space or leave the original problem unresolved. Rework needs an agreed method and another check, not an assumption that more sealing must be better.
Know what an inspection can actually establish
A visual check can identify obvious folds, trapped candy, damaged edges, or a missed sealing area. It cannot demonstrate a universal leak rate, seal strength, or storage life. A smooth-looking strip is useful evidence of appearance, but it is only part of an acceptance decision.
For commercial packs, discuss appropriate seal-strength and package-integrity testing with the packaging supplier or a qualified laboratory. Ask what the method measures, what sample preparation it requires, and what limitations apply to your material. A strength measurement and a leak check answer different questions; neither should be renamed a shelf-life test.
Specify the relevant acceptance criteria before comparing suppliers or equipment. Results obtained using different sample widths, conditioning, or procedures may not be directly comparable. Keep reports attached to the construction and trial conditions they actually concern.
Do not treat squeezing a bag by hand or tugging at its corners as a standardized test. Such observations may reveal an obvious problem, but an apparently satisfactory result cannot establish all the properties needed for commercial release. Use them only within the limits of your agreed procedure.
How to reseal a bag of candy after opening
If the pouch has a zipper, open it using the intended tear feature without cutting through the zipper itself. After taking out candy, check that the two profiles remain aligned and that loose pieces are not caught between them. Press a press-to-close zipper along its entire length, checking the ends as well as the middle.
For a slider closure, follow the package's directions and check that the slider reaches its intended closing position. Do not assume instructions for a press-to-close profile describe every zipper design. Stop forcing the closure if it is distorted or will not engage normally.
Keep handling clean and avoid introducing moisture while trying to remove debris. If a closure is damaged or cannot be cleared appropriately, use a suitable clean, dry food-storage container where consistent with the product's directions. Retain the original label, including any storage, allergen, and date information you will still need.
For a bag without a zipper, a fold and clip can provide a practical temporary closure, but it is not equivalent to the original package seal. Choose storage according to the candy label and the condition of the package. Do not assign a new unopened shelf life simply because the mouth looks closed again.
Commercially heat sealing an opened bag is a separate decision. It requires known material, sufficient undamaged sealing area, compatible equipment, and an approved rework procedure. It does not reverse the time the candy spent exposed or establish that the contents remain suitable for sale.
A household iron, hair straightener, or flame is not a controlled substitute for a specified packaging sealer. This guide does not recommend using them on unidentified packaging. Where the original closure no longer works, an appropriate container or replacement bag is a clearer option than experimenting with heat.
Related project: a kraft-look pouch with an identified inner film
Mylarbag's published candied-nut pouch project records Puerto Rico, digital printing, a stand-up pouch, and a kraft paper/PET/CPP structure. It lists dimensions as 11.2 × 15 + 2.5 cm. Confirm the supplier's dimension convention when discussing a new order.
The useful connection to sealing is the difference between the kraft appearance and the recorded construction. A buyer should ask about the specific CPP grade and the intended joining surfaces rather than choosing a setting for “paper bags.” The project page does not provide a validated sealing temperature, cycle time, or closure test report.
<!-- FIGURE 6: Verified real candied-nut project front and back photograph. -->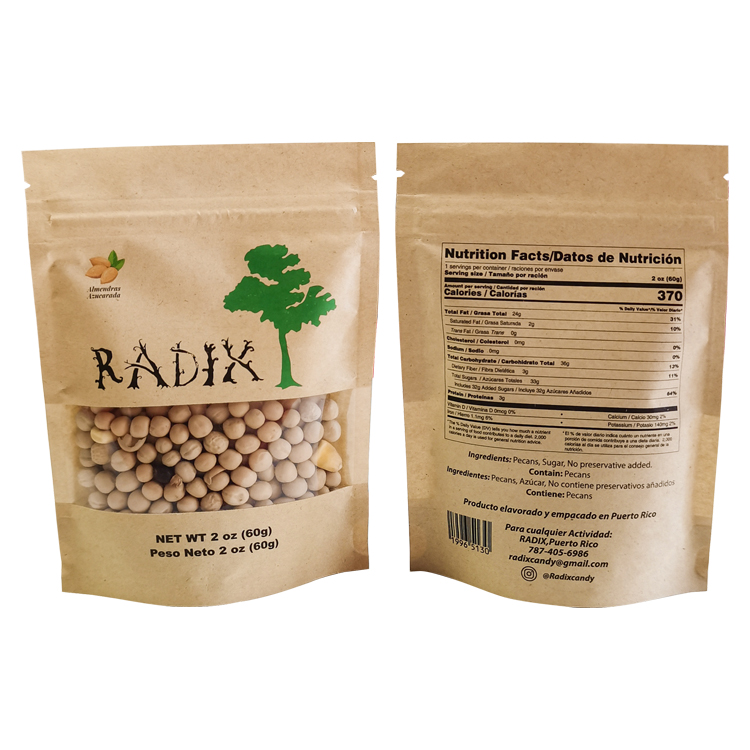
Use a physical sample and drawing to review the top layout, usable filling opening, and required final seal together. This related project illustrates the questions to ask; it is not evidence that another candy, filling weight, or machine will use the same settings. No customer performance or sales result is claimed here.
Recommended packaging configuration
For a candy pack intended to be opened several times, evaluate a documented heat-sealable pouch with an appropriate zipper and a separate, clearly defined initial sealing area. For a single-use portion, assess whether a simpler closure layout meets the product and opening requirements. The portion, machine, and consumer use should drive the choice.
Mylarbag's custom candy packaging and closure options can be used to start that specification. Request samples that match the proposed material and top layout, then run them on the equipment intended for production. Include the required seal area on the approved drawing before finalizing the artwork.
Frequently asked questions
What temperature should I use to seal candy bags?
There is no reliable universal value. Use guidance for the actual construction and equipment, then establish an acceptable process through trials. Some impulse sealers adjust heating time instead of temperature, so an unexplained dial number cannot be transferred to another machine.
Do candy bags with zippers still need heat sealing?
If the packaging design specifies an initial heat seal, the zipper does not replace it. The initial closure and later reclosure have different roles. Confirm the filling opening and sealing position on the drawing rather than assuming every zipper pouch is supplied or used the same way.
Can all cellophane candy bags be heat sealed?
No. The name alone is insufficient. Confirm the actual film, any coating, and the sealable surfaces. Some identified cellulose-film grades are heat sealable; unknown gift wrap or a loosely labelled cello bag needs further information before a heat-sealing process is chosen.
Why does my candy bag look sealed but pull open?
Possible factors include incompatible surfaces, contamination, a fold, unsuitable cycle conditions, or handling before the required cooling stage finishes. Check the material and process records, then examine where the failure occurs. Appearance alone cannot identify the cause or establish acceptable seal strength.
Can I reseal an opened candy bag with heat?
Only consider it when the material, remaining sealing area, and equipment are suitable. For commercial rework, use an approved procedure and check the result. Reheating a bag does not restore the candy's unopened condition; an intact zipper or appropriate storage container may better suit ordinary household use.
Does heat sealing make candy packaging vacuum packed?
No. Heat sealing joins suitable surfaces to close the pack. Removing air requires a separate vacuum operation and compatible packaging and equipment. Do not describe a normally filled, heat-sealed pouch as vacuum packed merely because the opening is closed.
Bring the bag and the sealing process into the same enquiry
When asking for samples or a quotation, provide the candy type, portion, intended market, bag style, and whether consumers need to reclose it. Include the sealer model or explain that equipment has not yet been chosen. A photograph of the proposed filling and sealing arrangement can help clarify the available space.
Ask Mylarbag about a candy pouch for your sealing setup. Request the material specification, top-layout drawing, representative samples, and applicable sealing guidance together. Those items give your packing team a concrete basis for trials and help prevent a last-minute mismatch between an approved bag design and the machine that must close it.