
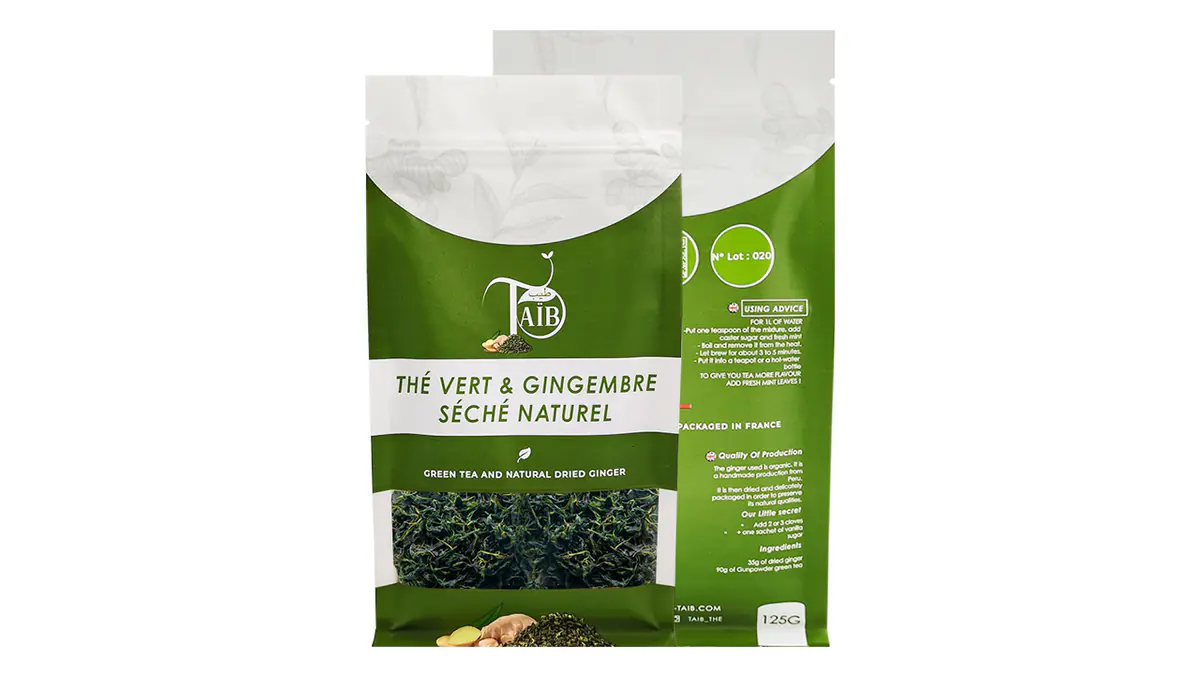
Start with a bottom-gusset stand-up pouch if the product name and flavor fit on the front and the filled pack fits your display tray. Try a flat-bottom bag first if you need a defined base or a separate side panel for instructions. When both bags hold the right net weight, take sealed samples to the shelf and the shipping bench. A bag that fills easily can still hide the flavor behind a tray lip or leave you one pack short of the retailer’s case count.
Look at the open base before comparing dimensions
Pick up the two samples and turn them over. On the conventional stand-up pouch in this comparison, a fold between the front and back panels opens to form the base. On the flat-bottom bag, also called a box-bottom pouch, you can follow the edges of a distinct bottom panel around to the side panels. Both formats can stand upright. A front view of an empty pouch tells you little about which one is in the quote.
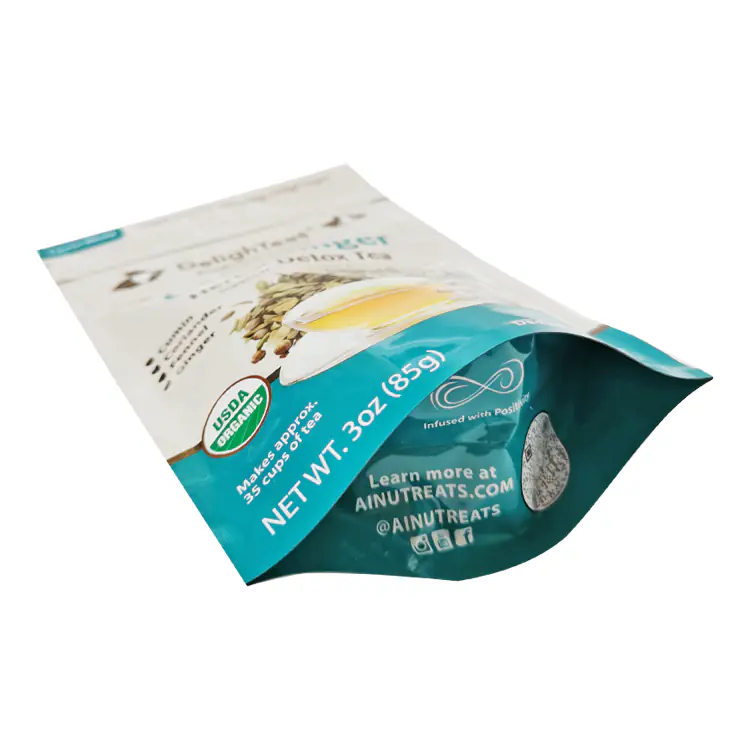
In the tea pouch pictured above, the turquoise base tapers to a point at either end. On the 500 g coconut sugar pouch below, trace the corners of its green rectangular bottom. These are features you can ask a supplier to photograph on your samples. The two projects were designed for different foods and photographed from different angles. Their photos identify the construction. You will need filled samples of your own food to compare how much space each takes up.
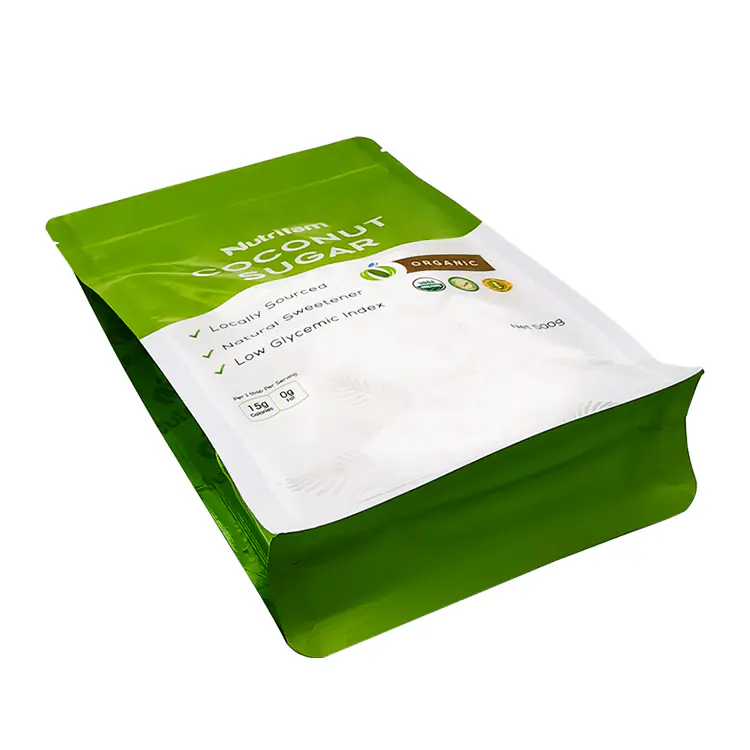
Use the bottom-gusset stand-up pouch guide to identify the base fold before requesting a sample. If a second quote describes a bag as “quad seal,” ask for a bottom view of that exact version. The description draws attention to its seals. Your buyer still needs to know whether the quoted pack has the separate bottom and side panels shown on the proposed artwork. A dimensioned drawing and one photo of the open base usually settle which sample to request.
Give the samples short names, A for the bottom-gusset stand-up pouch and B for the flat-bottom bag. Keep the supplier’s item code and drawing revision with each letter. Copy the dimensions exactly as quoted, including the units, then ask the supplier to point to each measurement on the drawing. A plus sign after the height might refer to a fold measured flat or to a dimension across an open section. Doubling that number on your own can send the designer and the person ordering cartons to work with different depths.
Fill both samples with the product you sell
Suppose you are packing 100 g of loose-leaf tea. This is a sample trial you can run with your own blend. Take both portions from the same batch and use the same scale. Ask each supplier for a size suited to that fill, allowing enough room for the normal filling and sealing operation. Forcing both formats into the same empty width and height answers a different question. The useful comparison is between two packs you could actually order for that 100 g line.
Take the samples to whoever will fill the order. Have that person use the usual scoop, funnel or filling spout and document any extra handling. With a scoop, watch what happens when its widest part reaches the mouth. With a spout, look at the opening while the operator or machine holds the top edges in their normal position. A bag can look wide enough when you open it with both hands yet become too narrow in the grip used for filling. Note where it catches before asking for a larger bag.
Watch the last portion go in. If long leaves bridge at the mouth, record where they stop. If pieces land in the area for the first heat seal, note whether adjusting the drop position keeps that area clear. A wider mouth may solve a snag at the opening. Extra height above the fill may help when the product comes too close to the seal. If making a clean seal means taking tea out, record the weight shortfall. Try the revised size at the full 100 g.
Table 1. Compare filling and sealing for both samples.
| Check | How to compare the samples | Record for each candidate |
|---|---|---|
| Sample identity | Label the bottom-gusset sample A and the flat-bottom sample B. Match each one to its supplier drawing and quote. | Supplier, sample code, drawing revision and quoted dimensions with units. |
| Film, closure and opening | Check the supplied structure and closure. Measure the usable opening while the pouch is held in its normal filling grip. | Film, thickness, closure, opening measurement and how it was taken. |
| Product and fill | Use the same batch, target net weight and filling method for both candidates. Weigh each filled sample. | Product batch, target and actual net weight, and filling tool or line. |
| Handling | Watch the scoop or spout enter and the last portion go in. Note any extra step needed to open or clean the pouch. | Where the tool or product catches and any extra handling required. |
| First heat seal | Use a setup suitable for each sample. Check the seal area for product or other conditions that need attention. | Seal settings, condition of the seal area and any issue for the packer to review. |
| Filled dimensions | After sealing, measure the greatest outside width, depth and height in the normal retail position, including projecting seams. | Maximum width × depth × height, with units. |
| Base contact | Stand the sealed pouch on a level surface and inspect the base and its folds. | Area touching the surface and any fold that remains tucked in. |
Have the packer make the first heat seal using settings appropriate to each sample. If there is a self-sealing strip for the customer, close it as the packer normally would and check the space between the strip, product and first heat seal. A strip that closes easily tells you about reclosure. The packer still needs to check the production seal under the applicable packing procedure. If you tried a stock bag with a different closure from the one quoted, mark that difference beside its sample code.
Stand the sealed pouch on a level surface in its normal retail position. Facing the front, record the greatest side-to-side width, front-to-back depth and overall height. Include projecting seams in the outer dimensions. Then look lower down and separately record the part of the base touching the bench. The fullest part of a bag can extend beyond its base and rub the front or side of a tray. The measurement convention for standing pouches and flat-bottom bags is set out in sections 4.5.3 and 4.5.7 of the GS1 Package and Product Measurement Standard. The base-contact note is for your shelf trial.
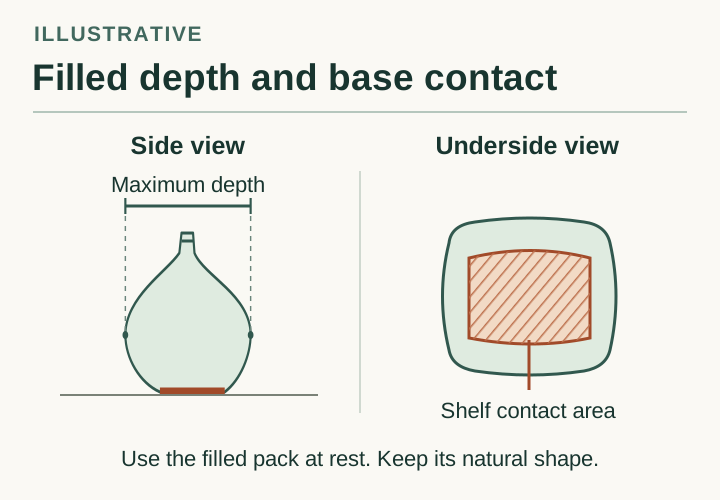
A single pouch can reveal that the filling spout catches. To decide whether an operator routinely has to stop and straighten the base, repeat the fill with fresh samples and record how many needed help out of the number tried. If the material or thickness also differs, include that in each sample record. You can choose between the two quoted packs on that evidence, but you cannot attribute every difference you observed to the bottom shape.
Put the filled pouches in the actual shelf tray
Take the tray the retailer intends to use, with its front lip and any dividers in place. Measure its usable inside width and depth, the height of the front lip, and the clear space up to the shelf above. Put a filled sample at the front edge, facing the shopper. Check whether the product name and flavor can be read from the aisle. Then put a second pack behind it and try lifting that one out. The measurements alone may miss a header that catches the shelf above when the shopper tilts the bag forward.
Build a row with one candidate format at a time. Give each version the same shelf space and the same normal stocking conditions. Count how many complete fronts fit across and how many packs fit behind each front. If the last bag has to be squeezed in, mark that position and try taking it out without disturbing its neighbor. A row that staff cannot replenish without bending the pouches is a poor basis for promising the buyer that many facings.
Table 2. Check shelf visibility and access for both samples.
| Check | How to compare the samples | Record for each candidate |
|---|---|---|
| Tray and clearance | Use the same intended tray, including its front lip and any dividers. Check the space to the shelf above. | Inside width and depth, lip height and overhead clearance, with units. |
| Facing and access | Arrange one format at a time without squeezing. Count the pouches across and behind, then try lifting one out. | Number across and positions deep; where a pouch catches or is hard to remove. |
| Name and flavor | Place the filled pouch facing the aisle in the intended tray. Check the words the shopper needs to choose a product. | Which words remain visible and any obstruction from the tray or a fold. |
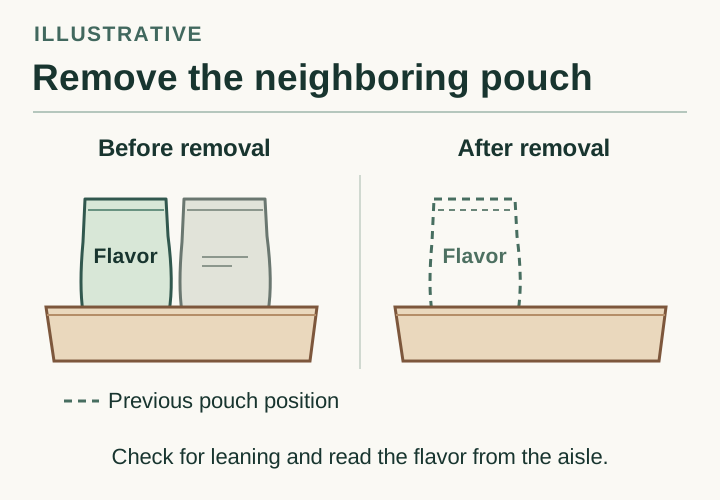
| After a neighbor is removed | Keep the observed pouch untouched and remove the one beside it. Compare the same position before and after. | Change in lean, orientation and visible wording; keep photos of both positions. |
| Partly used pouch | For a multi-serve product, use a separate opened sample of each format at the same agreed remaining weight. Try access and reclosure; skip for a single-use pack. | Remaining net weight and any difficulty scooping or closing the self-sealing strip. |
Now remove the bag beside the one you are watching. Leave the observed bag untouched. Does it keep facing forward, turn so the flavor moves out of sight, or lean against the tray wall? Photograph the same position before and after. A brand sold in several similar flavors may care more about that one word staying visible than about a slight lean. A store that displays a single pack on an open shelf may require it to stand on its own. Write down which condition your buyer requires.
A partly used bag calls for a separate check. Use a fresh sample of each version, fill and seal as before, then open each as a customer would. Remove tea until both are at the same agreed remaining net weight. Try getting a scoop in and bringing the self-sealing strip together without holding the pouch in an awkward grip. If your pack is emptied in one use, skip this step. A multi-serve tea pouch could pass the full-shelf check and still be difficult to use near the end.
If a candidate is too tall or wide, the next sample can have different proportions within the same format. Our sister site shows three pouch layouts for a 250 g coffee fill, including two flat-bottom bags with different proportions. Those projects give you a way to describe the next sample to the supplier, such as a shorter face with more depth. Its fit in your tea tray still has to be checked with your tea.
Which panels will the shopper actually see?
Two tea projects illustrate why a designer needs the drawing for each bag. The 3 oz loose-leaf tea pouch lists 12 × 18.5 + 3 cm. The 125 g flat-bottom tea bag lists 12 × 22 + 6 cm. Both specifications start with 12 cm. That number alone cannot tell a designer how much of the flavor name the shelf lip will cover, or tell a buyer how deep a row of filled packs will be. Each project has its own artwork, size and declared fill.
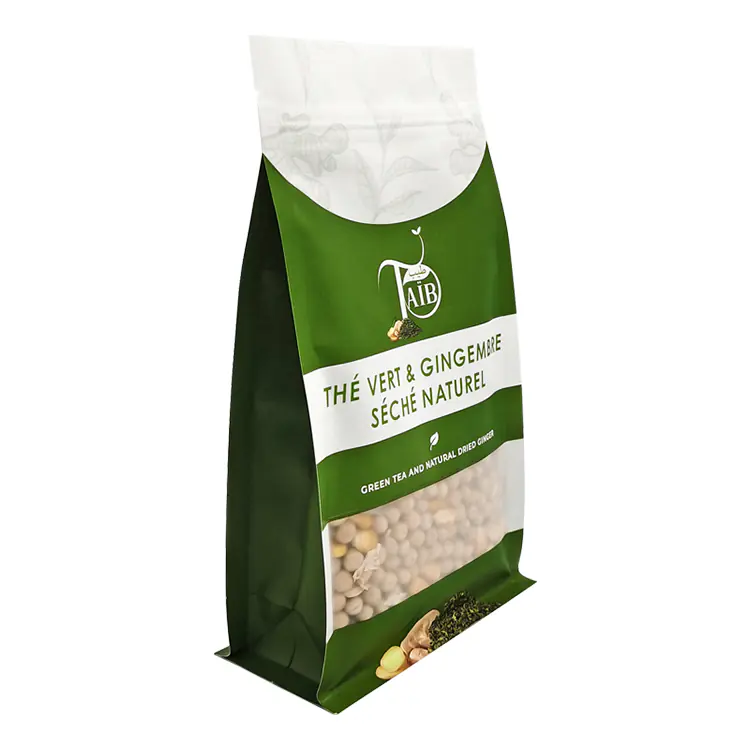
Look at the dark green side panel in the photo. On a design like this, a side panel could carry brewing instructions that the buyer reads after picking up the pack. It is a less useful place for the only flavor name if identical-looking fronts sit shoulder to shoulder. Try the proposed design at actual size. Place the flavor name in the area that stays smooth on the filled sample. Set the pack in the tray and ask someone to identify the flavor from the aisle without picking it up. If they need to turn the pack, you have located an artwork problem before ordering a new format.
Mark three areas on each production drawing. First, mark what the shopper must see to choose a pack. Next, mark information they can turn the pack to read. Finally, mark the functional areas the designer must allow for, including seals, folds, a window and the opening feature, where present. Ask the supplier for the safe print areas for that specific drawing. A fold line that runs between two words on screen may run through a letter after the artwork is moved to a smaller size. Check the smallest SKU separately when sizes share a design.
A printable surface can also face the shelf. Totani’s standing-pouch equipment specification describes a configuration that lets the printer line up a bottom-gusset design with the front and back artwork. A printed base might reward someone who turns the bag over, but it cannot carry the only flavor cue you need shoppers to see at first glance. If a separate side panel is essential, review the flat-bottom pouch options and request the drawing for your size. If moving one line higher on the front solves the problem, ask the designer for that revision before paying for a different bag.
Count finished pouches in the shipping case
Start with the buyer’s receiving instructions. Does “12 per case” mean exactly twelve of one flavor, or will the buyer accept a mixed case? Is the shipping carton also the display tray once the lid is removed? If it is, the pouch at the front needs to face the customer when the store opens the case. A tight arrangement that calls for staff to turn every second pouch around can add work the buyer never agreed to.
Get the actual carton, liner and dividers specified for the shipment. Use the inside dimensions to set up the trial. Pack one candidate format at a time, using completely filled and sealed samples. Stand them upright, lay them flat or alternate their direction only where the buyer allows that arrangement. Pay attention to the final pouch in each row. Record if its upper seam folds against the wall, if the last row bows the side outward, or if a divider shifts out of its slot. Take a photo before closing the flaps so someone else can repeat the layout.
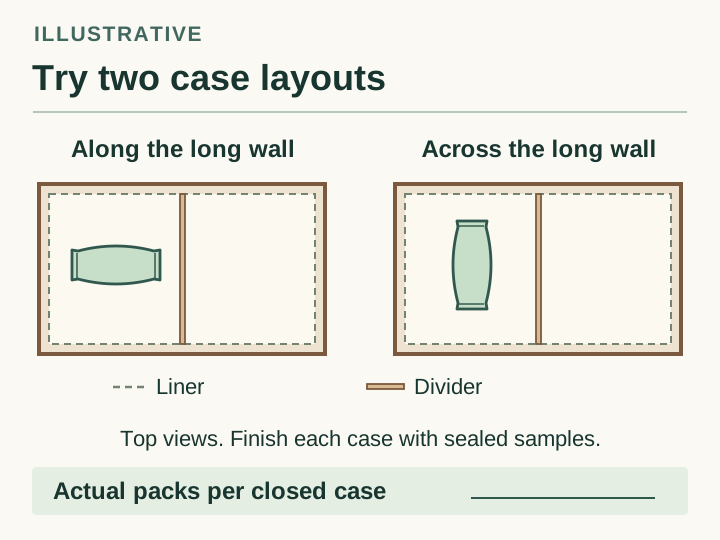
Count the sealed packs and weigh the complete, closed case. For uniform rows you can multiply packs per row by rows per layer by layers. In a staggered layout, count each layer directly and add the counts. Mark the outside shipping dimensions, including any bulge, on the same record as the gross weight. The warehouse needs that outside measurement for a freight quote. The person designing a new layout needs the usable space inside. Labeling both sets of dimensions saves a call back to the packing bench.
Table 3. Compare case fit and the cost of the same delivered order.
| Check | How to compare the samples | Record for each candidate |
|---|---|---|
| Case setup | Use the specified carton, liner and dividers. Try only orientations the buyer permits. | Inside case dimensions, packing materials and permitted orientation. |
| Packs per closed case | Pack filled, sealed pouches and close the case normally. Check contact, folded seams and any bulge. | Saleable pouches per case and any interference or distortion to review. |
| Shipping dimensions and weight | Measure the outside of the packed case, including any bulge, and weigh the complete closed case. | Outside width × depth × height, gross weight and units. |
| Order and last case | Apply the same order quantity and buyer's case-count rules to each accepted layout. | Total packs, full cases and the agreed quantity in any last case. |
| Pouch and packing costs | Use comparable quantities and itemize separately billed pouch, setup, carton, liner and packing charges. Avoid counting an included charge twice. | Each quoted cost, currency and items already included. |
| Freight and delivery terms | Compare quotes for the same destination and service. Identify other agreed charges and items excluded from each quote. | Freight, delivery terms, other quoted charges and exclusions. |
| Comparable delivered cost | Add the applicable charges once and divide the delivered total by the number of saleable retail packs. Mark estimates as estimates. | Delivered total, currency and cost per saleable pack. |
Consider an illustrative order for 120 retail packs. If two layouts that the buyer accepts hold 12 and 10 packs per case respectively, the first takes 10 cases and the second takes 12. Neither count belongs to either pouch format until you run the trial. If the retailer requires exactly 12 per case, the 10-pack layout needs to be changed or approved as an exception before its price belongs on the comparison. If partial cases are allowed, divide the order quantity by the actual packs per case and round up. Identify what goes in the last box and whether the buyer accepts its label and packing method.
When the flaps close naturally, check the case against the buyer’s count, outside dimensions and gross-weight limit. Ask the buyer or packer what transport testing the route requires and which sample configuration to submit. Record the packing pattern and materials they evaluate. If the liner changes to make an extra pouch fit, that is a different configuration. Keep its count and any later transit results on a separate line so receiving staff can tell which pack-out the order calls for.
Compare the cost of delivering the same order
Review the filling, shelf and case checks in order before comparing prices. Cross out any candidate that misses a fixed requirement, and write the reason beside it. A stand-up pouch that fills cleanly, shows the flavor above the tray lip and delivers the required case count is a sensible choice when the front provides all the space the brand needs. A flat-bottom bag earns its place if the separate panel does useful work or the particular filled bag meets a display requirement the other sample misses. A stock bag that needs one small artwork change can go back for a revised proof without restarting the entire comparison.
Ask for prices at the same order quantity, artwork mix, currency and delivery point. State whether the supplier is quoting empty custom pouches delivered to a packing site or cases of filled product delivered to a retailer. An empty-pouch supplier can quote the first leg. Your packer and carrier can fill in the remaining costs for the second. Putting an empty-pouch quote alongside an all-in retail delivery total makes even a large apparent saving hard to interpret.
For each passing sample, add the quoted pouch cost, separately billed setup, case materials, packing and the agreed freight and other charges. Count each charge once. If the packer provides the cartons in its packing fee, leave the separate carton charge blank and mark it “included.” Divide the comparable delivered total by the number of saleable retail packs in the order. Keep any estimate visible as an estimate. If one price assumes a faster filling rate, ask the packer to time the actual sample on the intended equipment before using the saving to award an order.
If both options pass and the quote difference is small, revisit the open item most likely to change the purchase. That could be an unpriced divider, a second artwork proof or a retailer’s answer about mixed cases. Name the person who will resolve it and the sample revision they should use. When you issue the purchase order, attach the selected drawing, the approved artwork and a photo of the accepted case layout. A substitute described simply as “another 100 g tea bag” could fit the tea while undoing the shelf and case decisions you just made.
You can adapt this request for your first pair of samples.
Please quote two alternatives for [quantity] empty pouches delivered to [packing site]. Price the bottom-gusset stand-up pouch and the flat-bottom pouch separately. Each will hold [net weight] of the same tea blend, filled using [tool or line]. Our tray measures [inside dimensions] with a [height] front lip, and our retailer requires [count] finished packs per shipping case. Please send each drawing with the matching sample code, filling opening, printable areas and any setup charge. We need enough samples of each for a complete case plus a separate filling trial.
Frequently asked questions
If both bags stand upright, how can I tell which format I was quoted?
Ask for a view underneath the open sample and a side view with the folds expanded. On the bottom-gusset design, follow the fold between the main panels. On a flat-bottom design, trace the distinct bottom and its junctions with the side panels. Put the supplier’s drawing number and the exact construction on the quote so a similar front photograph cannot be mistaken for approval of another bag.
Do I need the same empty dimensions for a fair comparison?
Use the same food, net weight, filling method and retail requirements. Let each candidate have the dimensions needed for that job. If you already own a fixed carton or have booked a particular shelf space, give both suppliers those constraints. Record any difference in film, closure or size so the purchasing decision can be traced to the two specific samples tested.
Which pouch will stand better after part of the food is used?
Try both at the remaining weight that matters to your customer. On each one, check whether the product collects at one end and whether the base reopens when you set it down after scooping. Make a note if it stands only after you redistribute the contents by hand. For a tea used daily, see whether the customer can set it back down after scooping and close it with their usual grip.
Does a flat-bottom bag give me more usable artwork space?
A separate side panel gives the designer another place to put information. Its value depends on what must be read and when. If the side rubs against the next pack, reserve it for information a shopper can read after picking the pouch up. Check the actual drawing and a filled proof for folds and seals before moving a flavor name or brewing directions there.
Can both pouch types run on my current filling setup?
Give your packer the samples and their drawings. Ask them to check pickup, how far the mouth opens in the grippers, clearance around the filling spout and the position of the top seal. A hand fill can expose an opening that is too small. Get a run on the intended machine before promising a production rate or budgeting labor around that rate.
Does a flat-bottom pouch reduce my shipping cost?
Use the measured external dimensions and gross weight of each packed case, the number of cases for the order, and quotes for the same destination and service. Even when both cases hold twelve packs, different outside dimensions or gross weights can produce different quotes. When one layout needs fewer cartons, include the last partial case in the quote if the order requires one.
Request pouch samples for a side-by-side fill trial with your product, target net weight, tray dimensions and required case count.